6 Crucial Tips to Enhance Your Smile Simulations
Natural-looking smiles are everything we aim to achieve when we follow the Principles of Smile Design and facially-driven concepts used in SmileFy's Digital Planning Workflow. It all starts by conducting a facial analysis of your patients to prepare to create an initial smile design of the patient's future smile.
But what happens if the smile design does not look natural? Of course we want the first impression to be moving, whether your treatment plan includes restorative changes to 2 teeth or 8, we want to show a notable difference in the aesthetics of the new smile that complement the patient's facial features.
Defining the "perfect smile" for each patient might look different from dentist to dentist. If you're not fully satisfied with the AI-generated smile design at first, we recommend considering a few small changes to make it look more "natural" before presenting it to the patient.
Workflow Summary
Fix Dark Photos
Tap photo > Edit Picture > Adjustments. Drag Brightness or Exposure slider right until face and teeth are evenly illuminated. Tap Done before running the AI simulation.
Correct Lip Mask
Tap Mark Lip icon to reactivate the lip border editor. Drag each white circular handle to the inner lip border, working from midline outward. Confirm bilateral symmetry.
Adjust Teeth Size
Frame > Height: reduce in 5% increments until central incisor height-to-width ratio is approximately 75–85%. Stop when incisal edges sit naturally within the lower lip curvature.
Set Teeth Count
Frame > No. Teeth: select the count matching the patient's clinically observed smile zone (typically 8–10 teeth). Verify no simulated teeth extend beyond the commissures.
Refine Buccal Corridor
Frame > Buccal Corridor: adjust until a slight proportionate shadow appears at the commissures. Always adjust after setting No. Teeth.
Natural Tooth Shade
Colors > Shade first, then Warmth, Brightness (60–70%), and Saturation. Change one control at a time for best results.
A natural-looking, facially harmonised smile simulation ready to present to the patient — no guesswork, no rework, every adjustment clinically grounded.
Tip 1: Is the Picture Too Dark Before Starting the Smile Design?
A dark or underexposed source photo causes SmileFy's AI to detect facial landmarks — particularly the lip line and the tooth-gingival margin — imprecisely. Correcting the exposure before running the AI simulation ensures that all subsequent Frame and Colors adjustments are based on accurate landmark data.
Import or capture — the patient's photo in SmileFy. If the image appears dark, do not proceed to the AI simulation yet.
Tap on the photograph — to trigger the Edit Picture pop-up. Tap Adjustments.
Drag Brightness or Exposure — slider right until the face is evenly illuminated on both sides and the teeth are clearly visible without overexposure.
Crop or Rotate — as needed to remove distracting background elements and straighten any head tilt.
Tap Done — to confirm all edits, then proceed with the AI Smile Simulation. Do not attempt to compensate for a dark source image by adjusting Colors controls after the simulation is generated.
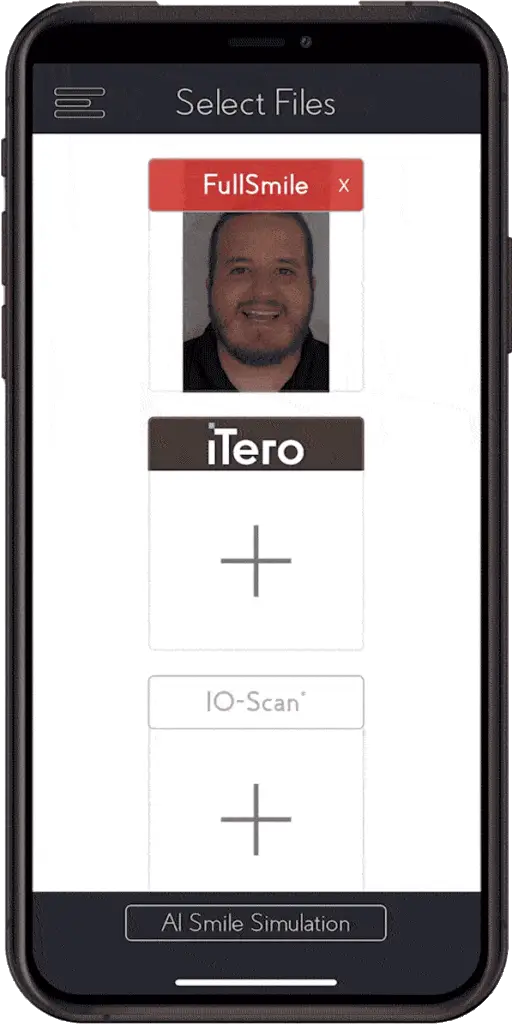
Why it works: SmileFy's AI uses tonal contrast to identify facial landmarks — lip border, tooth edges, facial midline. Underexposure compresses tonal contrast and reduces detection accuracy, causing the Frame to misalign with the patient's actual anatomy. Correcting exposure pre-simulation prevents compounding errors across every subsequent adjustment step.
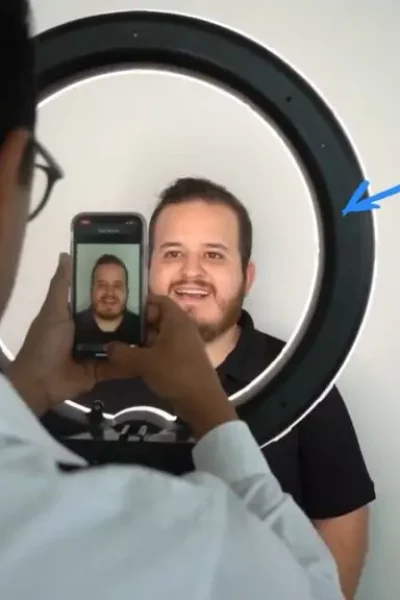
Pro Tip: To prevent your picture from being too dark, we highly encourage you to use a ring light. This will ensure proper lighting and minimal adjustments when importing your picture. A DSLR camera is the best option as it reduces distortions. You don't need a fancy camera — just the proper lighting, backdrop, and proper patient position.
Tip 2: Is the Lip Not Covered Properly?
SmileFy's AI automatically detects and marks the patient's upper lip border to generate a realistic simulation. In photographs with sub-optimal lighting, oblique angles, or strong lipstick, the automatic detection may misplace the lip line — producing a simulation where the tooth-to-lip relationship is clinically inaccurate.
Examine the lip line overlay — after the AI simulation is generated. Confirm it sits precisely at the inner border (vermillion margin) of the upper lip.
Tap Mark Lip icon — if the lip mask appears too high, too low, or asymmetric to activate the lip line editor.
Drag each white circular control point — along the lip border to reposition it accurately. Work from the midline outward to each commissure.
Zoom into both commissures — to confirm the line reaches the corners of the mouth symmetrically.
Return to simulation view — to verify that the updated lip mask produces a natural, proportionate tooth display.
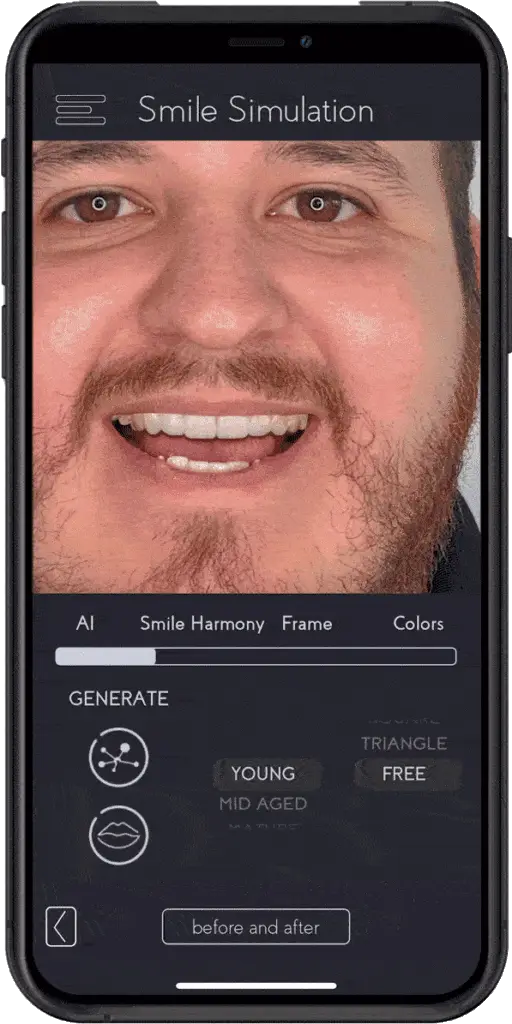
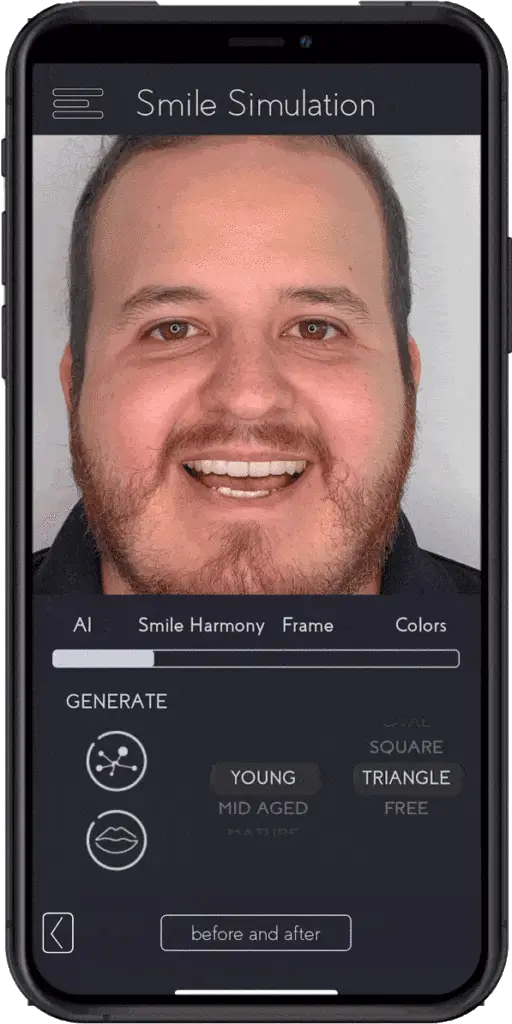
Why it works: The relationship between the upper lip position and visible incisal display is a primary determinant of perceived smile attractiveness. An imprecisely placed lip mask generates a simulation with an incorrect apparent tooth-to-lip ratio — making the smile look gummy (mask too low) or the centrals appear disproportionately short (mask too high).
Tip 3: Are the Teeth Too Large?
The Frame > Height control adjusts the vertical dimension (crown length) of the simulated teeth. Oversized teeth are one of the most common causes of an unnatural-looking AI-generated simulation. Recommended starting range: Frame > Height at 80–100%.
Assess the central incisors — the clinically accepted ideal height-to-width ratio for maxillary central incisors is approximately 75–85%.
Navigate to Frame > Height — and move the slider left (decrease) in increments of approximately 5% per step.
Visual checkpoint — teeth look proportionate when slightly taller than wide — not square, not markedly elongated. Incisal edges should follow the lower lip curvature.
Continue reducing — until the incisal edges sit naturally within — not below — the lower lip curvature. If the incisal edges disappear behind the lower lip, you have reduced Height too far.
Check lateral incisors and canines — they should step down progressively in height from the centrals.
Why it works: Crown proportion is a primary determinant of smile naturalness. The 75–85% height-to-width ratio for maxillary central incisors is the range consistently identified as most natural and attractive in aesthetic dentistry (Magne & Belser, 2002). Simulations exceeding this range trigger an immediate perception of artificiality.
Tip 4: How Do I Change the Number of Teeth Shown in My Design?
The Frame > No. Teeth control sets how many teeth are displayed in the simulation — from 4 to 12. Selecting the correct count is essential for accurate representation of the patient's planned smile zone.
Clinically observe — the patient's natural smile at maximum lip elevation and count the number of teeth visible. This is your target.
Navigate to Frame > No. Teeth — available options: 4, 6, 8, 10, or 12 teeth.
Select the count — matching the clinical observation. Typical: 8–10 teeth for standard full-smile designs.
Verify in simulation view — that the posterior extent aligns with the patient's natural commissure width — no simulated teeth should extend beyond the corners of the lips.
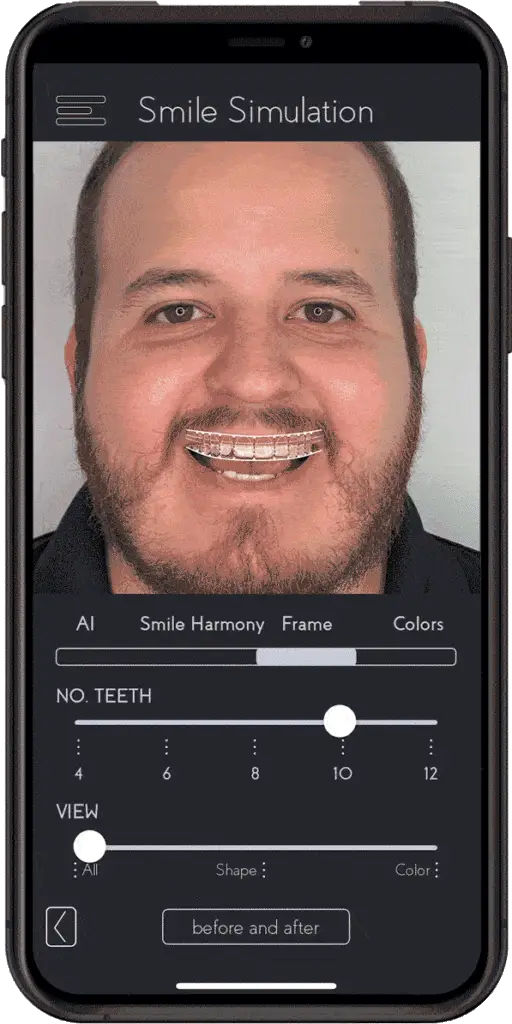
Why it works: The visible smile zone is patient-specific — defined by lip mobility and facial morphology, not by a standardised template. Presenting a simulation with more or fewer teeth than the patient actually shows undermines clinical credibility and sets inaccurate treatment expectations.
Tip 5: How to Adjust the Posterior Teeth to Define a Proper Buccal Corridor?
The buccal corridor is the natural dark space visible between the posterior teeth and the inner surface of the lip commissures during a full smile. Under the Frame section, the Buccal Corridor slider sets the premolars and molars' position to give a narrower or wider smile.
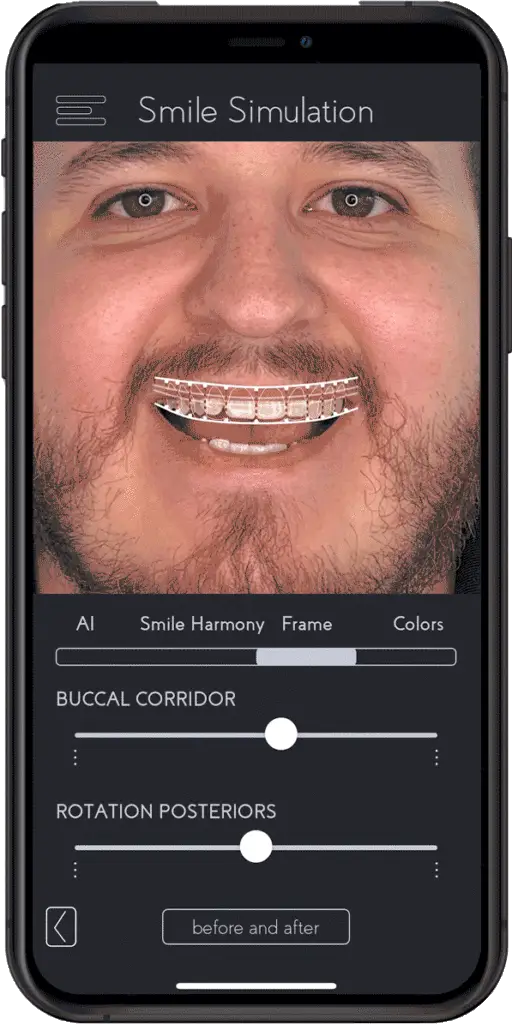
Assess the posterior smile zone — after setting No. Teeth and Height. Is the dark space proportionate, a dominant shadow, or completely absent?
To reduce a dominant dark corridor — move the slider toward the fuller/wider end in small increments. Stop when the dark space is visible but proportionate.
To restore an eliminated corridor — move the slider toward the narrower end until a slight natural shadow reappears at the commissures.
Important — always set Frame > No. Teeth first, then adjust Buccal Corridor. Never adjust Buccal Corridor before No. Teeth is correct.
Why it works: A slight-to-moderate buccal corridor contributes to the three-dimensional perception of naturalness. Total elimination of the buccal corridor is associated with the denture smile appearance — because real dentitions never fill the full commissure-to-commissure width (Fradeani, 2004).
Tip 6: Are the Teeth Too White or an Unnatural Shade?
Under the Colors section there are four interdependent controls for simulating tooth colour, each corresponding to a distinct dimension of tooth appearance. Adjust them in order:
Colors > Shade — sets the base colour category. Adjust this first — all other controls refine the selected base.
Colors > Warmth — adjusts the yellow-orange vs. blue-grey axis. Most natural dentitions have measurable warmth. Warmth at zero almost always produces an artificially cold appearance.
Colors > Brightness — controls overall lightness. The most common error is Brightness set too high, producing a cold, luminous, bleached appearance. Recommended: 60–70% of maximum.
Colors > Saturation — controls chroma intensity. Too low: chalky and flat. Too high: vivid and cartoonish. Natural teeth have moderate saturation.
Why it works: Tooth shade perception is heavily influenced by surrounding context. Increasing Brightness without compensating Warmth produces the most common error: a cold, artificial "Hollywood white" that no clinical treatment can deliver. Perceived shade naturalness depends on the balance of hue (Shade), value (Brightness), and chroma (Saturation) — each mapping directly to a SmileFy Colors control.
Practice makes perfect. Small modifications can make a monumental difference in your smile design — but like any other piece of technology, the more you do, the better you get, and the more patients you WOW.
How this post will look when shared
smilefy.com
6 Crucial Tips to Enhance Your Smile Simulations
Not fully satisfied with the AI-generated smile design? These 6 practical tips — from photo exposure to tooth…