The Intraoral Mock-up: Your Obvious Secret Weapon

It's accessible, it's cost-efficient, and you can do it in-office.
Workflow Summary
Capture Records
Full-face smile photo + intraoral scans (STL). Ensure midline is visible and scans are artefact-free.
2D Smile Simulation
Generate an AI Smile Simulation chairside to open the aesthetic conversation and confirm patient preferences.
3D Design in SmileFy
Superimpose photo + STL, set proportions via Smile Frame, select tooth templates, and refine from all angles.
3D Print the Guide
Export STL, print in-office, and fabricate a silicone index or use the shell directly as the composite guide.
Prep & Separating Agent
Clean teeth, apply glycerin for a reversible mock-up or etch & bond for a retained restoration.
Seat & Cure
Load guide with composite or bisacrylic, seat firmly, light-cure, and trim flash at cervical margins.
Evaluate & Document
Assess occlusion, phonetics, aesthetics, and patient response. Photograph all views.
A predictable, patient-approved treatment plan — validated in vivo before any irreversible procedure begins.
Focus on Aesthetics and Function
A Smile Simulation is a great way to bring awareness to your patient as to what's possible in regards to making changes to their smile. It opens the door to a wide array of questions that allow you to assess your patients' needs and wants.
An intraoral mock-up, on the other hand, is an effective method of showing the patient what esthetic changes may come from a smile makeover. It's an efficient communication tool not just for you and the patient but even for technicians on the receiving end of an order.
A mock-up enables all those involved in the case to control the function of the end result without even beginning the procedure and using it as a blueprint or prototype of the final restorations.
Bottom Line: Patients Want Predictable Outcomes
The intraoral mock-up, the "Smile Test" produced from composite, is a technique all too rarely performed by dentists, but which can alleviate the back and forthness between patient, dentist, and technicians and prove to be exceptionally practical in a wide variety of situations in routine clinical practice. Imagine spending countless hours in the development of a complex treatment plan only for it to be rejected by the patient because it did not meet the patient's expectations. We can help change that.
Different Types of 3D Digital Mock-ups
Below we want to highlight some cases in which a 3D digital mock-up was created to aid in the different stages of the dental treatment plans. These were then placed onto the respective patient's mouth to perform a "Smile Test." Using SmileFy's 3D Smile Design, you can create these in-office and regain control of your patients desired esthetic outcomes.
1. Motivational Mock-up
IN-OFFICE PRE-ORTHO 3D DESIGN
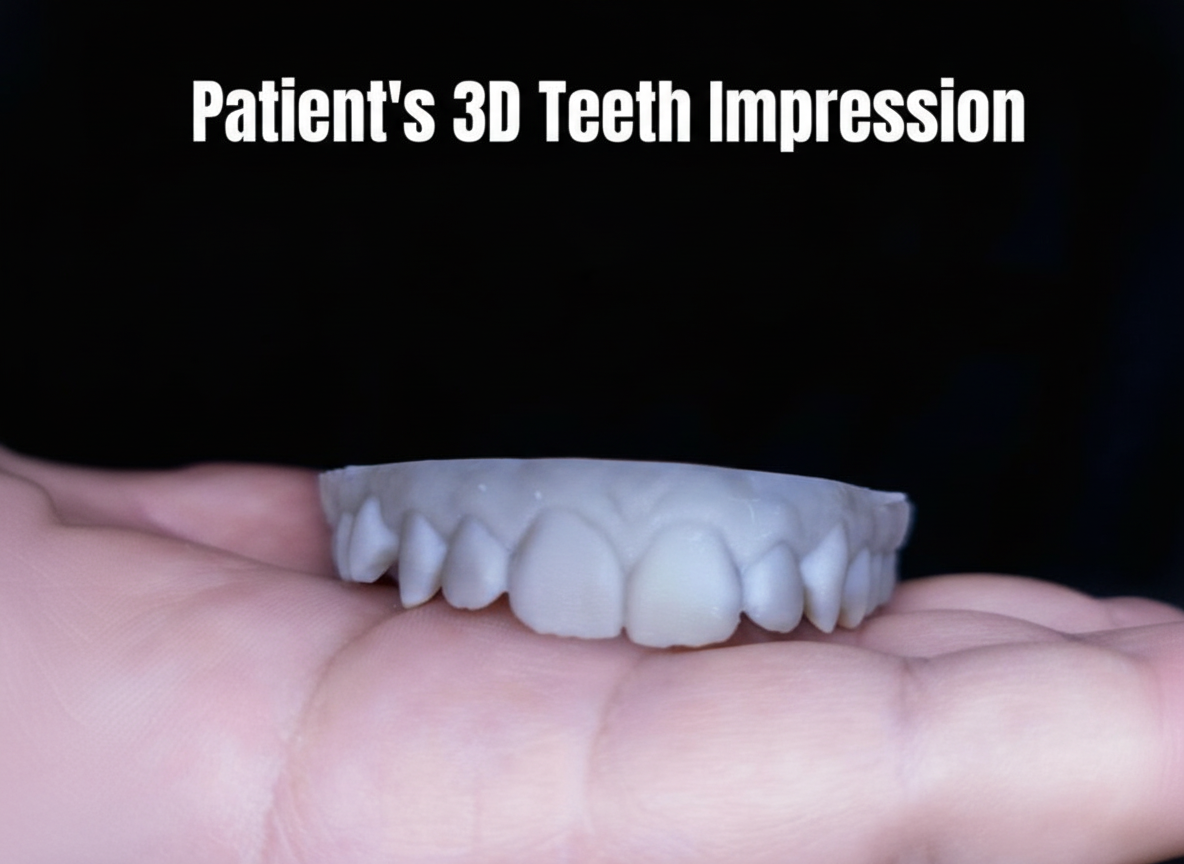
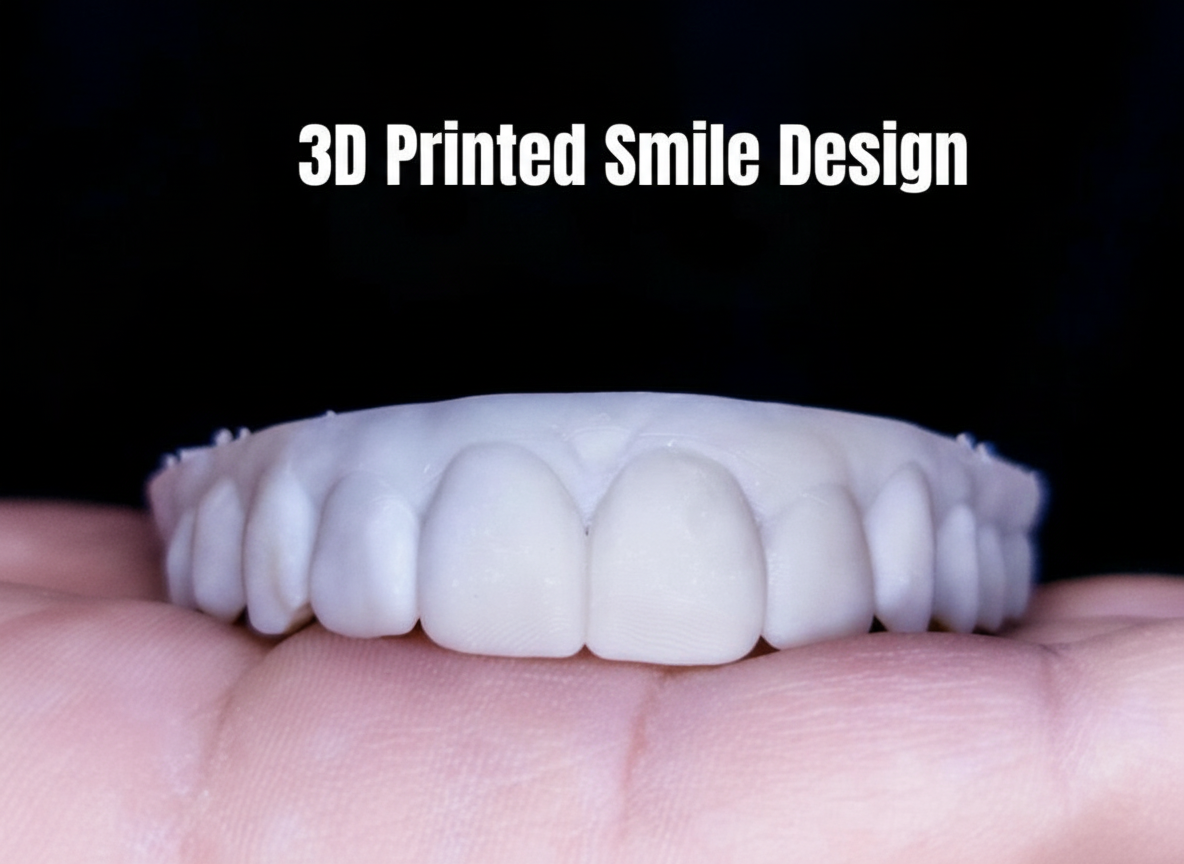
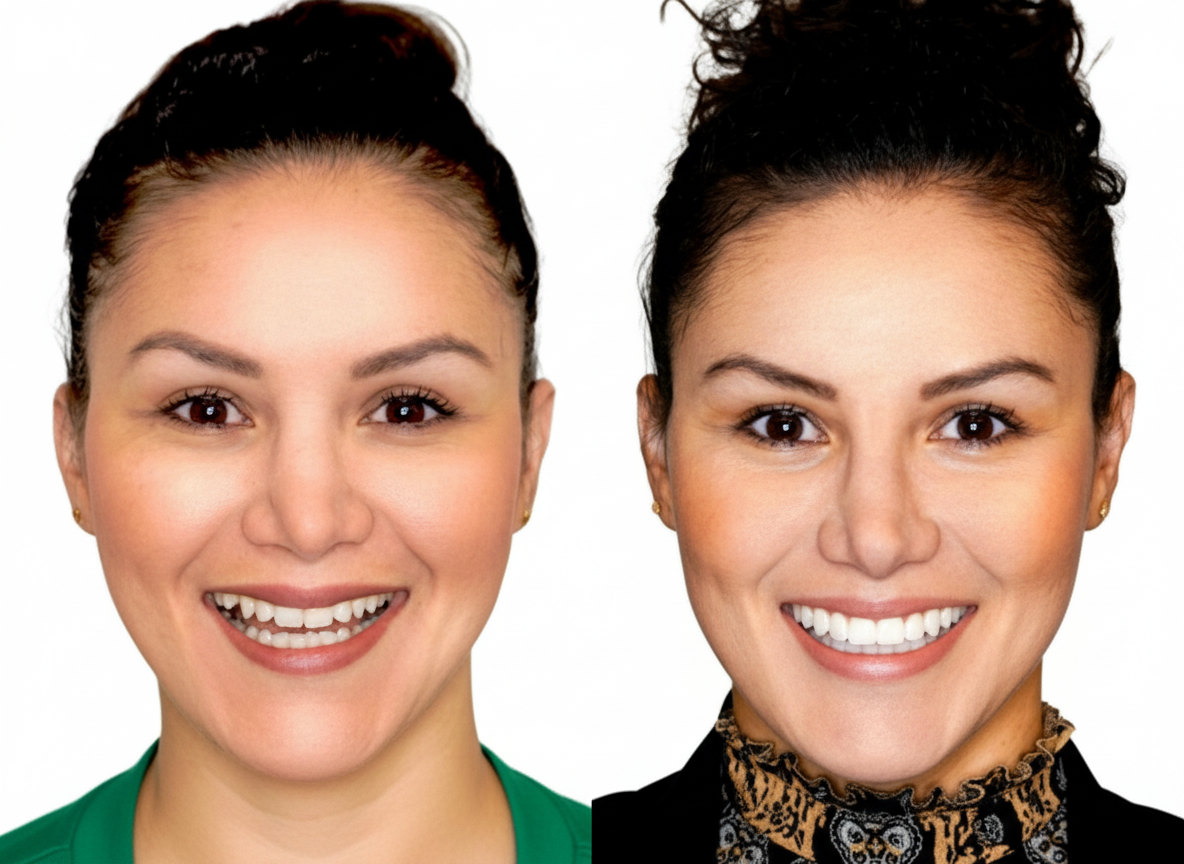
Motivational mock-ups are a great way to show your patient what their final outcome could look like before initiating the treatment plan. It helps the dentist and patient evaluate proposed changes of tooth contour and shape.
This case shows a patient with misaligned teeth and misshapen incisal edges. The facially-guided mock up simulates a wider upper arch with balanced incisal edge shapes and contour.
The 3D design goes over the patient's existing teeth
Patient's feedback is instant
Esthetic evaluations can be performed after mockup placement
2. Mock-up for Composite Restoration
IN-OFFICE INJECTABLE COMPOSITE 3D DESIGN GUIDE
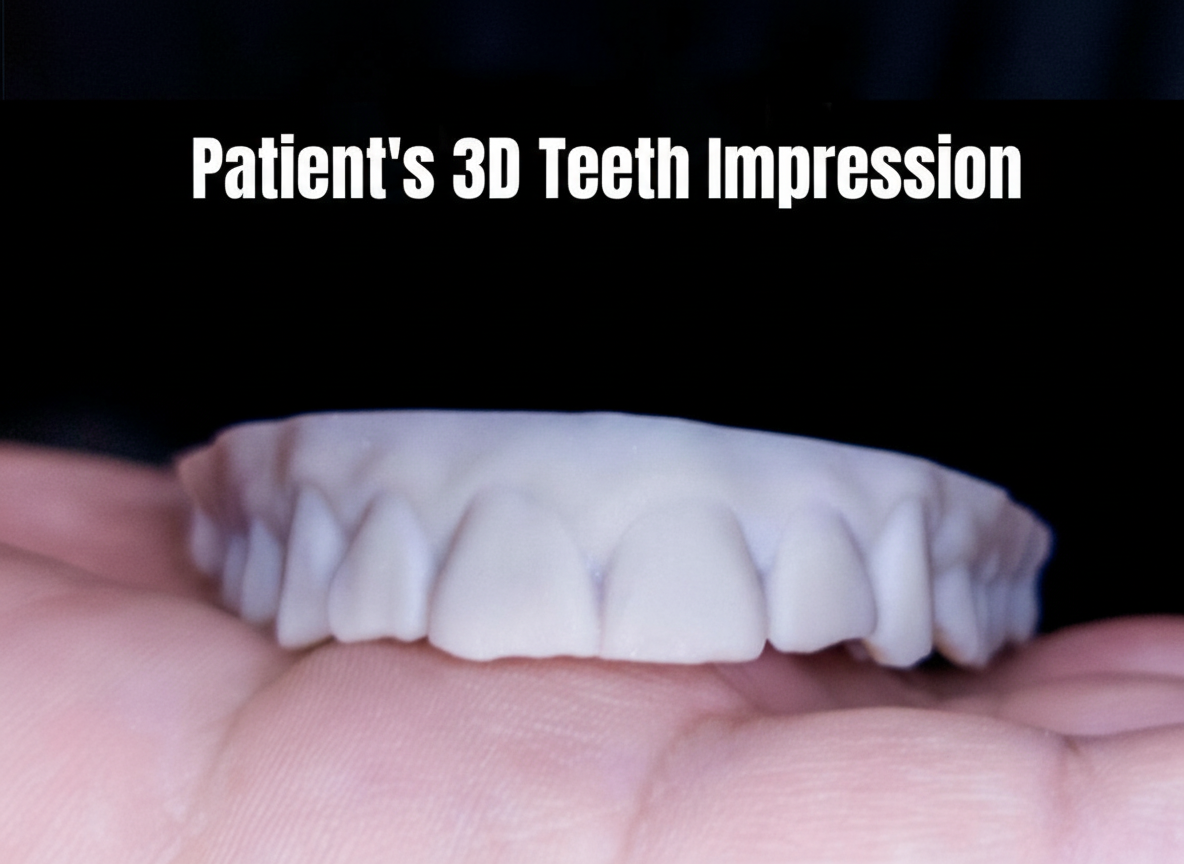
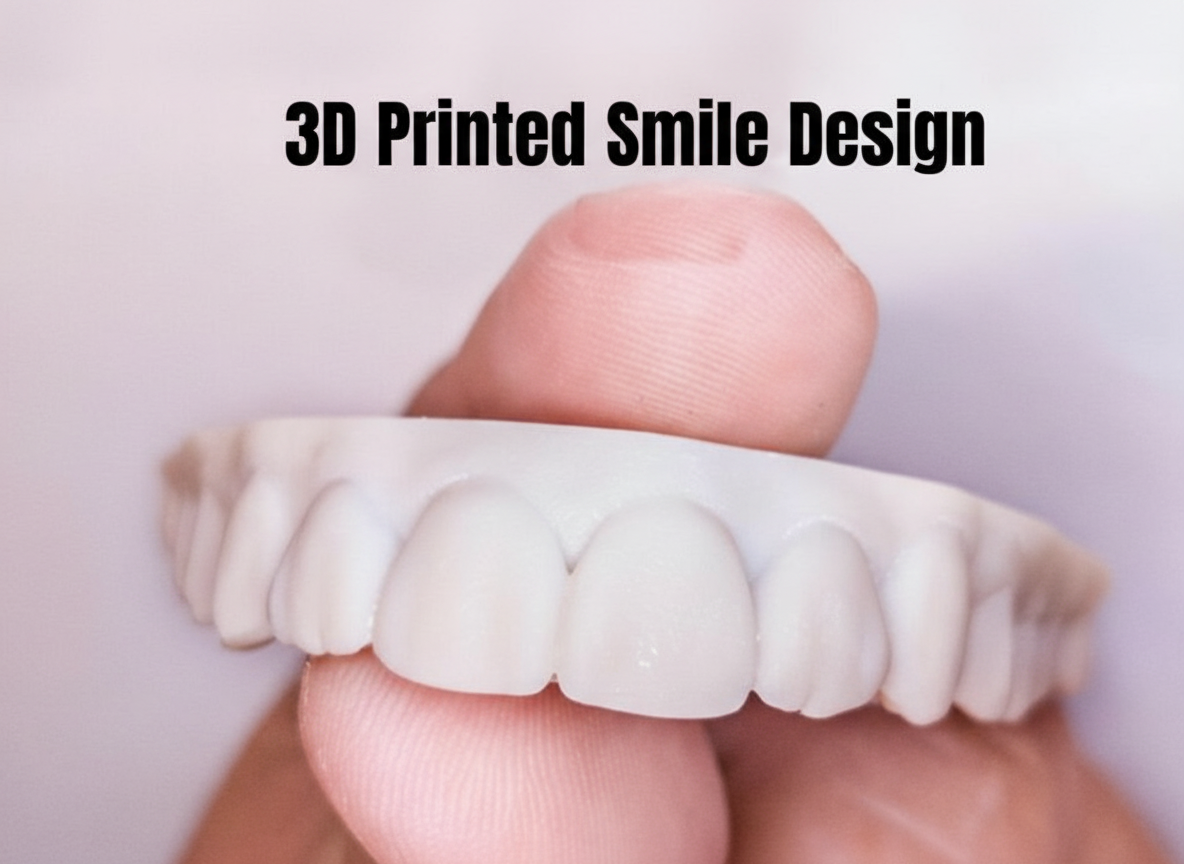
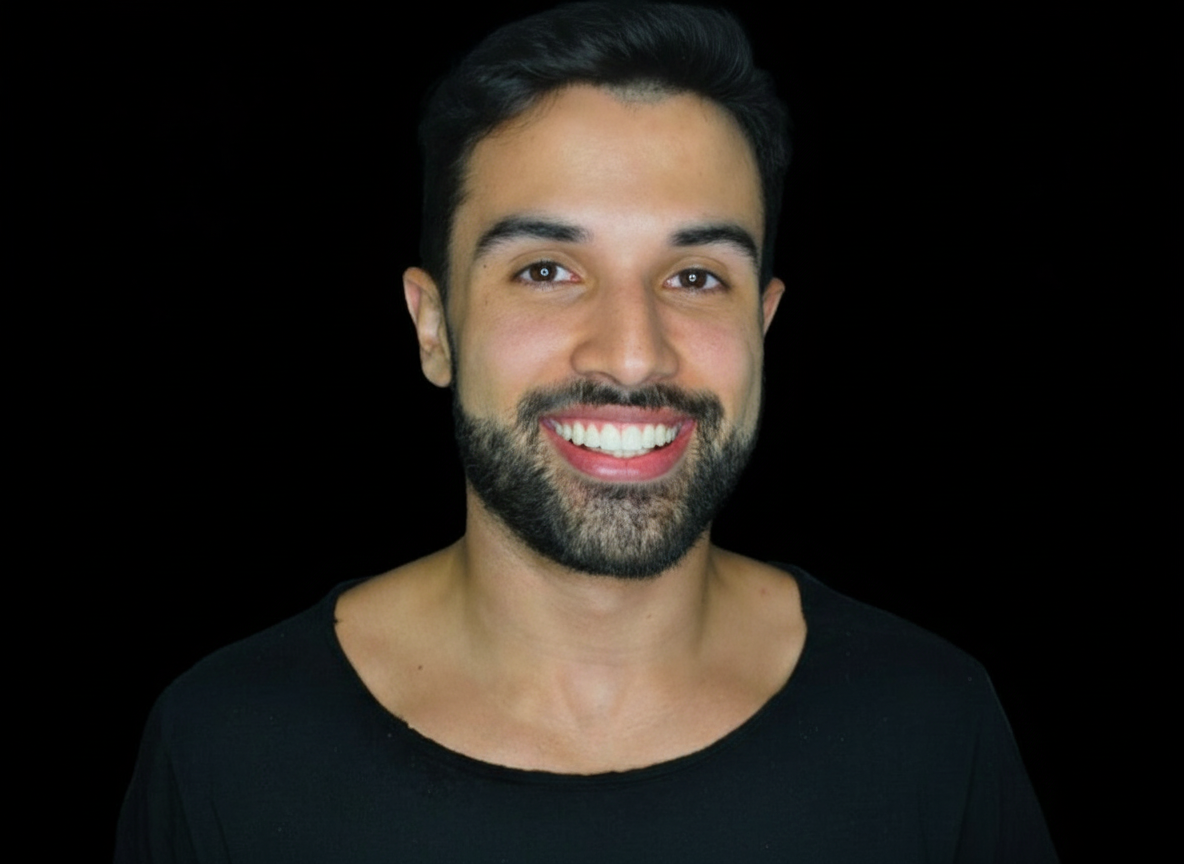
Design and perform anterior composite restoration guides. This case shows 10 upper composite veneers restorations using a flowable composite technique.
We used natural teeth templates from SmileFy's 3D teeth library
Designed a facially-guided 3D mock-up guide
Print the models
*Case by Dr. Diogo Alves*
3. Mock-up for Additive Case
IN-OFFICE MOCK UP FOR CLINICAL AND ESTHETIC EVALUATION
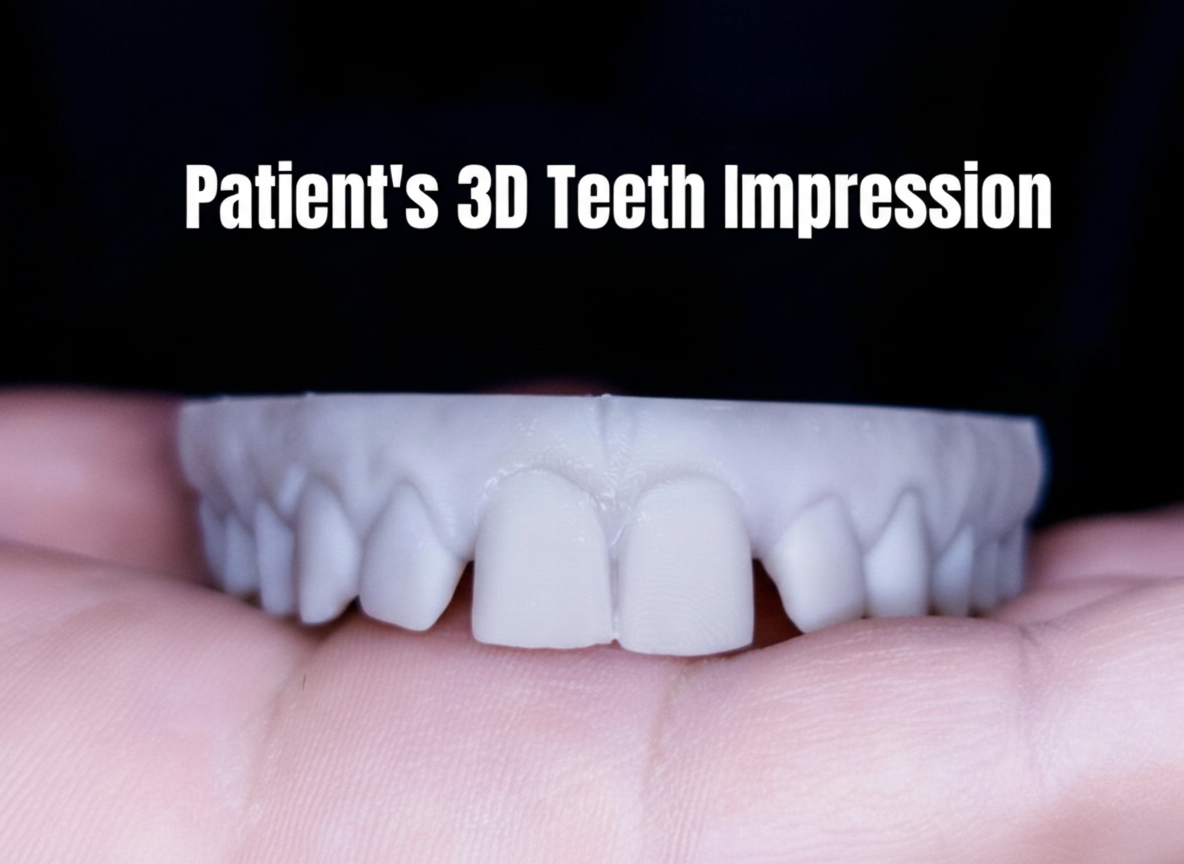
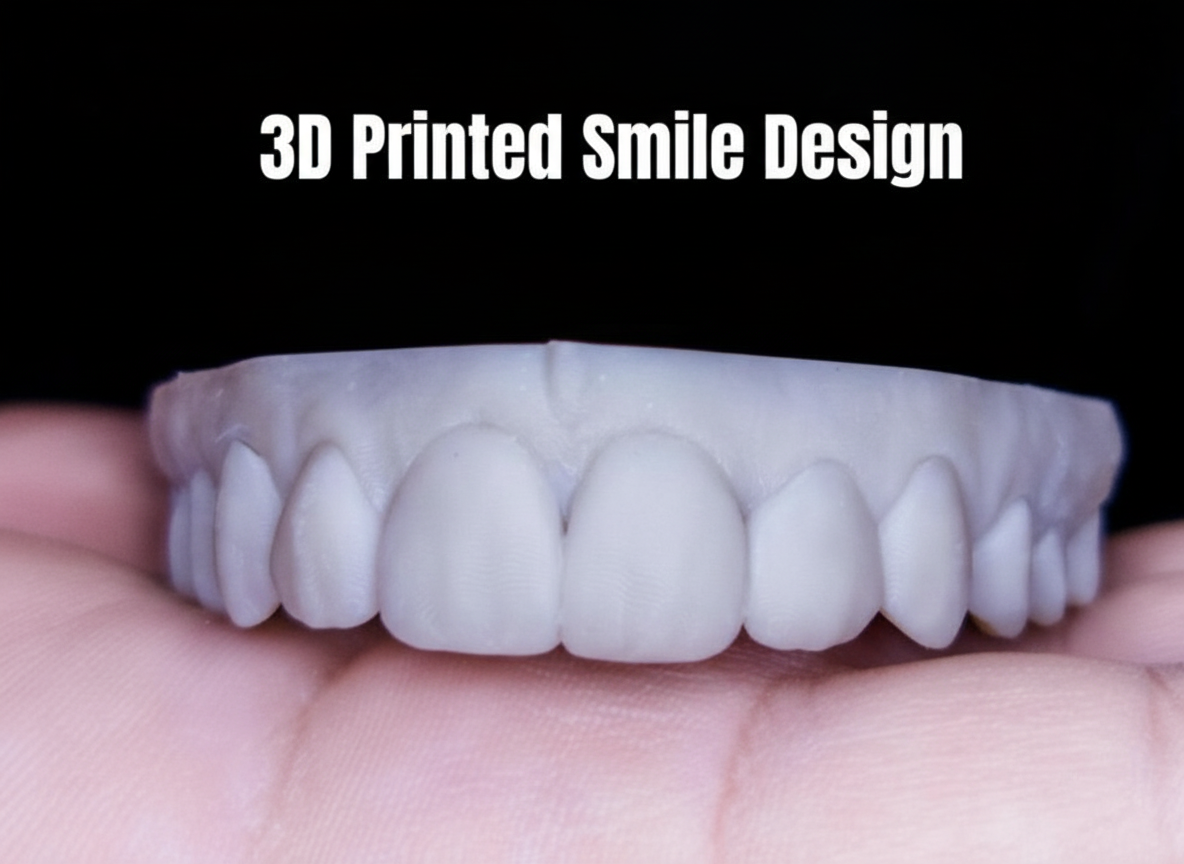
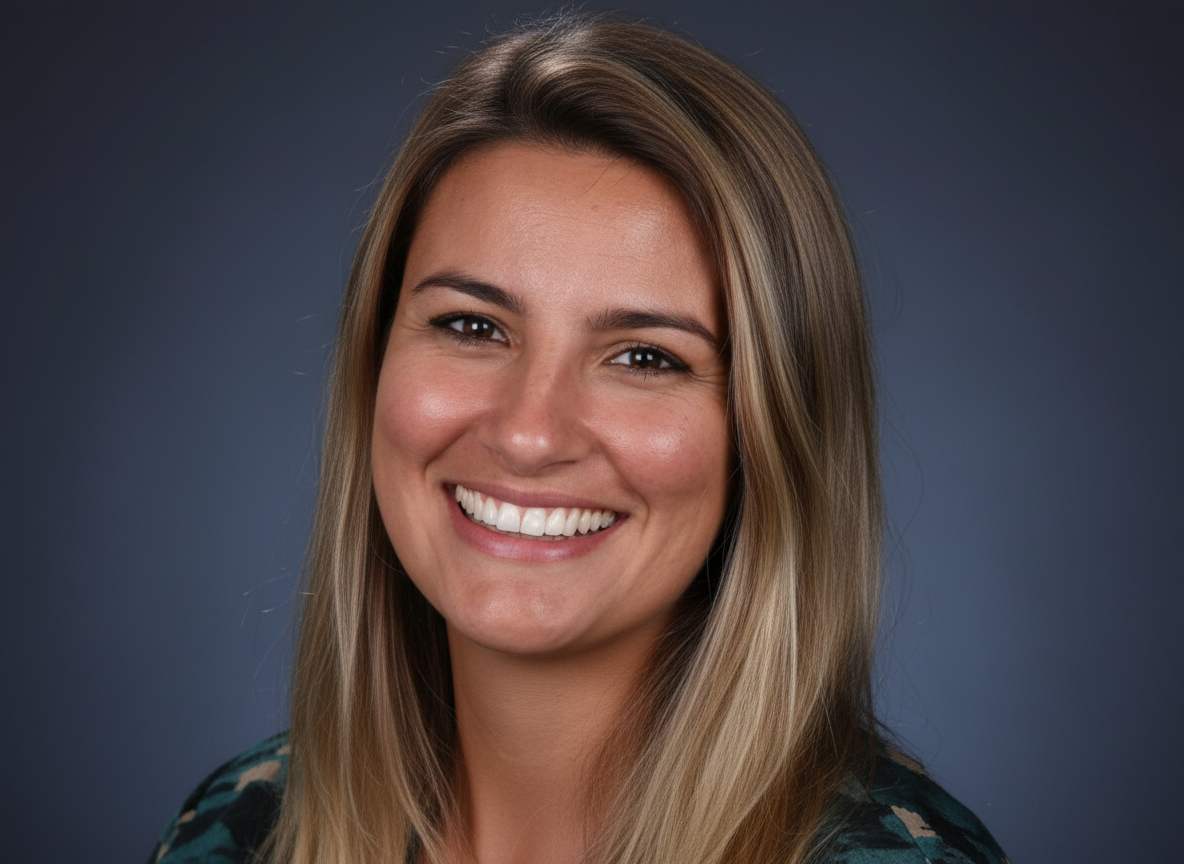
Create in-office dental mock ups as a starting point for your procedures. This case shows a patient with a gap and teeth shapes that are disproportionate to her face. After the in-office mock up, the patient and doctor can instantly check on any improvements that can be made before the final restorations.
Expect results with higher accuracy
Gain control of the treatment outcome
Deliver on patient expectations
4. Porcelain Veneers Guide Mock-up
IN-OFFICE PRE-OP MOCK-UP FOR PORCELAIN VENEERS
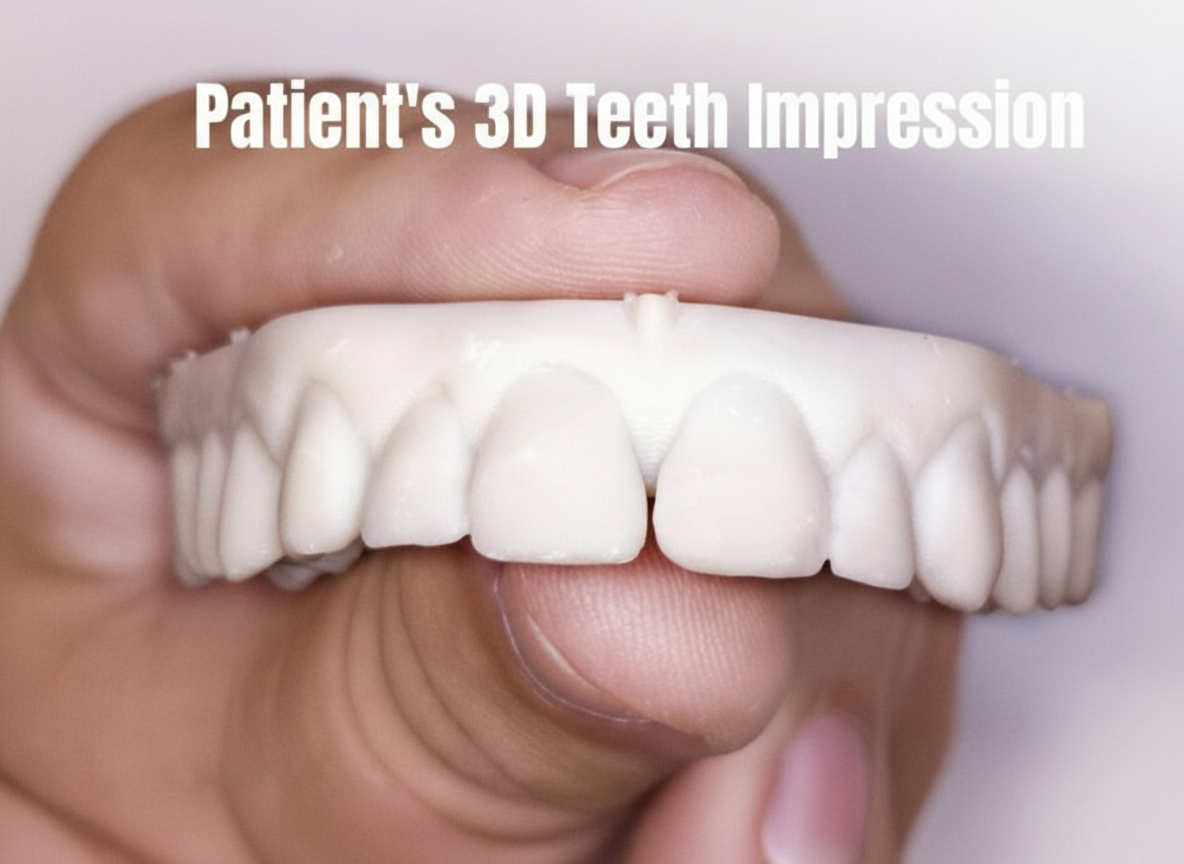
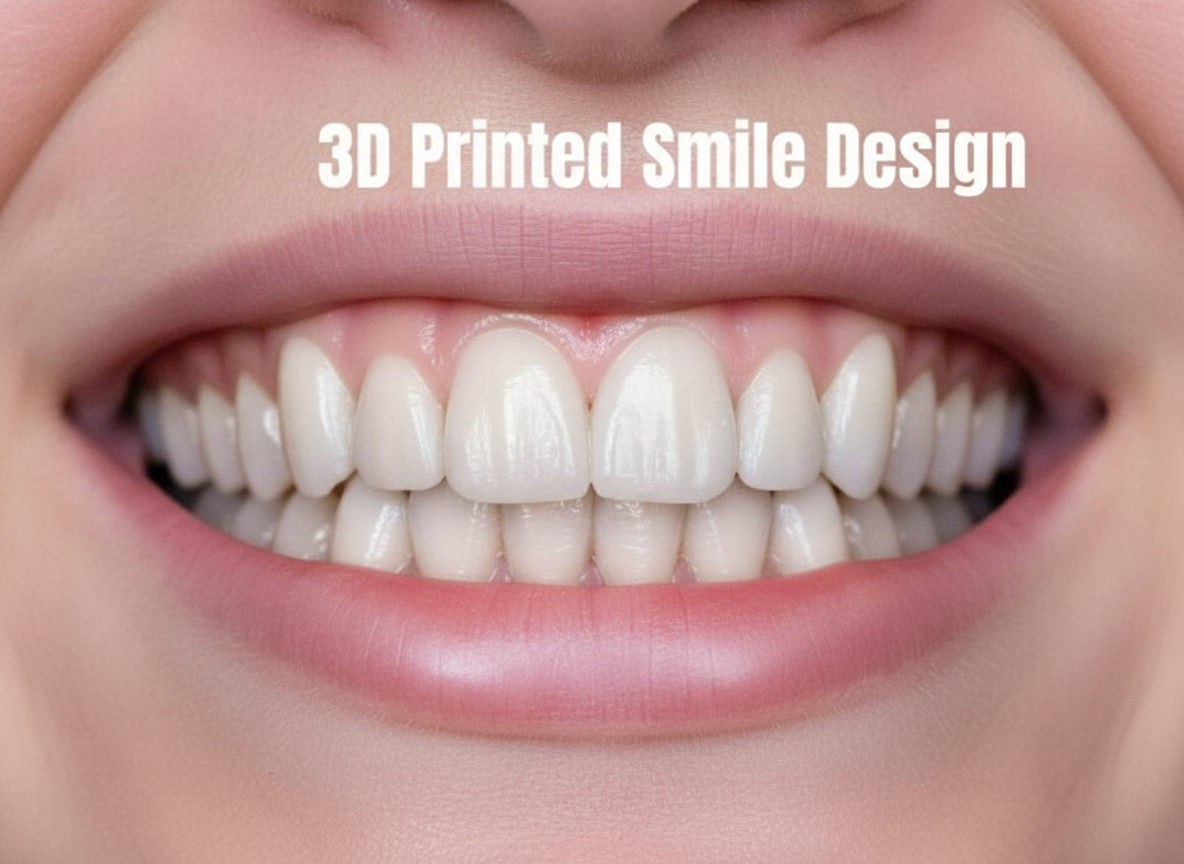
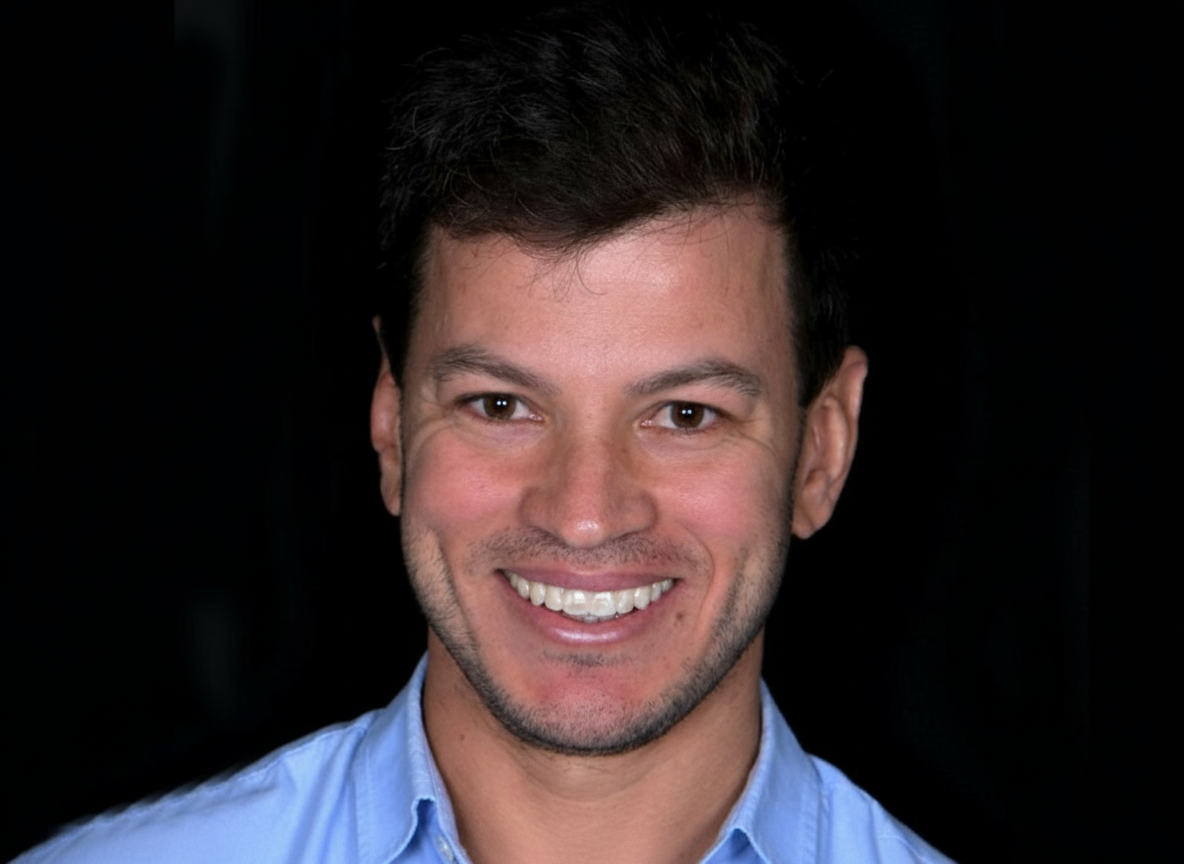
Be in control of your treatment plans and create in-office facially-guided dental mock ups to initiate cases such as porcelain veneers. This case shows a patient with a flat smile curvature, dark shaped teeth and gaps between the centrals. The facially-guided mock up shows the increased crown lengthening and balanced incisal edges. After functional adjustments of the mock up in the patient's mouth, it was also used as a preparation guide for minimally invasive final restorations.
Deliver final restorations that your patient is looking for
Create mock up guides for minimally invasive tooth preparation
*Case by Dr. Diogo Alves*
How to Perform an Intraoral Mock-up Using SmileFy — Step-by-Step
The following procedure describes the complete in-office digital workflow for a 3D-printed guide mock-up. Steps 1–3 are completed before or between appointments; Steps 4–8 are chairside.
Step 1 — Capture Patient Records (~10 min)
Inputs — Full-face smile photograph (natural light; lips at rest and in full smile); close-up retracted intraoral photograph; upper and lower arch intraoral scans in STL format saved in maximum intercuspation.
Action — Photograph with a DSLR or directly via the SmileFy iPhone/iPad app. Save arch scans in occlusion — do not include bite registration geometry files in the upload.
Check — Facial midline clearly visible and vertical. Both arches fully captured with no scan voids or artefacts. Photograph is sharp, well-lit, and unblurred — simulation and design accuracy depend on photograph quality.
Risks / Notes — Poor photograph quality is the most common cause of a suboptimal digital design. Retake if the image is blurred, overexposed, or the midline is not visible. For motivational mock-ups, a facial photo is the minimum required dataset.
Step 2 — Generate 2D Smile Simulation (~5 min, Optional)
Inputs — Full-face smile photograph.
Action — Upload the photograph into SmileFy and generate a 2D AI Smile Simulation chairside. Present to the patient to open the aesthetic conversation and confirm design preferences before committing to the 3D design phase.
Check — Patient confirms the simulated changes align with their expectations. Document any specific preferences (tooth length, shape, midline shift) for incorporation into the 3D design.
Risks / Notes — The Smile Simulation is a 2D photograph overlay — it is not the mock-up. Do not present it as the final outcome. It cannot evaluate occlusion, phonetics, or three-dimensional tooth volume. Use it solely as a motivational and preference-gathering tool before progressing to 3D design.
Step 3 — Create the Facially-Guided 3D Design in SmileFy (~15–25 min)
Inputs — Full-face photograph and upper/lower arch STL files superimposed (calibrated) in SmileFy.
Action — Use the 3D Smile Frame to set tooth proportions, width, height, and midline relative to the facial photograph. Select the tooth unit(s) in Dental Chart and auto-place from the SmileFy 3D tooth template library. Adjust proportion, form, and position reviewing from buccal, incisal, and proximal views. For additive and composite cases, confirm the design is fully additive with no reduction to the existing STL.
Check — Midline aligned with facial midline. Incisal edge position consistent with lower lip curvature. Buccal volume appropriate relative to adjacent teeth. Contact points visible and correctly positioned in the incisal third. Design approved from all viewing angles.
Risks / Notes — For composite injection guide cases (Case 2), the design forms the definitive restoration template — accuracy is critical. For veneer prep guide cases (Case 4), verify the buccal volume does not over-prescribe the required preparation depth before printing.
Step 4 — 3D Print the Mock-up Model (~35–95 min)
Inputs — Approved SmileFy 3D design exported as STL.
Action — Export the STL and send to the in-office 3D printer or dental laboratory. Print the model at the appropriate resin and resolution settings. Fabricate a silicone putty index over the printed model, or use the printed shell directly as the composite injection guide.
Check — Printed model accurately replicates the digital design — no layer artefacts, distortion, or missing geometry. Guide seats passively and fully over the printed model before chairside use.
Risks / Notes — Calibrate the printer regularly to maintain dimensional fidelity. If printing in-house, complete this step the day before or the morning of the appointment — do not attempt same-session printing and seating without confirmed printer readiness.
Step 5 — Chairside: Clean Teeth and Apply Separating Agent (~5 min)
Inputs — Patient; 3D-printed guide; glycerin gel or petroleum jelly (separating agent) for reversible mock-up; etch and bond if the composite will be retained.
Action — Professionally clean and dry tooth surfaces. For a diagnostic (removable) mock-up: apply a thin, even layer of glycerin or petroleum jelly to all tooth surfaces to be covered. For a composite that will be retained as a temporary or definitive restoration: apply etch and bond per manufacturer protocol instead.
Check — Tooth surfaces are plaque-free and fully dry before the separating agent is applied. Gingival health adequate — no active bleeding that would contaminate the composite.
Risks / Notes — This is the primary reversibility step. Never skip the separating agent on a diagnostic mock-up. If composite partially bonds without a separating agent, removal requires a composite bur and risks enamel damage.
Step 6 — Inject Composite and Seat the Guide (~5–10 min)
Inputs — 3D-printed guide or silicone index loaded with flowable/injectable composite or bisacrylic resin.
Action — Load the guide with the chosen material and seat firmly over the teeth, applying even pressure across all units. Light-cure through the guide where accessible, or remove the guide and light-cure directly after seating. Remove the guide and trim any flash at the cervical margins with a scaler or composite finishing instrument.
Check — Guide seats fully with no rocking or marginal gaps. Composite fills all internal guide voids. No excess material displaced into the gingival sulcus. Incisal and cervical margins are clean.
Risks / Notes — Bisacrylic resin is self-curing and requires no light access — preferred for full-arch guides or areas with limited light penetration. Flowable composite requires light-curing and provides a more durable temporary. Gingival flash left in the sulcus can cause transient irritation — trim immediately after seating.
Step 7 — Functional and Aesthetic Evaluation (~10–15 min)
Inputs — Patient with mock-up in situ; articulating paper; dental mirror and retractors; photographic documentation setup.
Action — Evaluate across four parameters in sequence: (1) Occlusion — check for premature contacts and lateral interferences with articulating paper; adjust with a composite bur as needed. (2) Phonetics — ask the patient to pronounce /s/, /f/, and /th/ sounds; assess sibilant clarity and patient comfort. (3) Aesthetics — review from full-face, retracted frontal, and lateral 45° views; assess tooth length, shape, midline, and smile arc. (4) Patient response — record verbal and emotional feedback. Photograph all views.
Check — No occlusal interferences in centric occlusion or lateral excursions. Phonetics comfortable after brief acclimatisation. Midline centred. Smile arc follows the lower lip curvature. Patient confirms aesthetic satisfaction.
Risks / Notes — Initial phonetic discomfort in the first minute of wear does not indicate a design error — allow the patient to adapt before concluding there is a phonetic problem. Document all four evaluation parameters formally.
Step 8 — Remove Mock-up and Confirm Enamel Integrity (~5 min)
Inputs — Composite remover instrument or periodontal scaler; polishing cup and prophy paste; explorer.
Action — Remove the mock-up by gently leveraging with a composite remover or scaler, starting at the proximal margins. Polish all tooth surfaces to remove any residual composite or separating agent residue. Confirm enamel integrity with an explorer under adequate lighting or magnification.
Check — All composite fully removed — confirm with explorer. No enamel abrasion, scratching, or inadvertent preparation. Tooth surfaces polished to pre-procedure condition.
Clinician FAQ
Q: When is an intraoral mock-up indicated?
A: An intraoral mock-up is indicated whenever you need to validate aesthetic or functional outcomes in three dimensions before committing to any irreversible procedure. Specific indications include: (1) motivating a patient to initiate treatment by showing a tangible in-vivo preview; (2) planning and executing direct composite restorations, where the mock-up guide doubles as the injection template; (3) evaluating additive cases — diastema closure, incisal lengthening, or proportion correction; and (4) all porcelain veneer cases, where the functionally adjusted mock-up serves as the minimally invasive preparation depth guide.
Q: How does an intraoral mock-up differ from a Smile Simulation?
A: A Smile Simulation is a 2D digital photo overlay — generated in seconds using AI — that gives the patient a visual impression of possible changes. It cannot reproduce three-dimensional tooth volume, phonetics, or occlusal relationships, and it is never placed in the mouth. An intraoral mock-up is a physical, in-vivo prototype seated directly on the patient's unprepared teeth. It allows real-time evaluation of aesthetics, speech, and occlusion, and produces documented patient approval before any clinical procedure begins. Use the Smile Simulation to open the conversation; use the mock-up to close the plan.
Q: How does an intraoral mock-up differ from a lab wax-up?
A: A conventional lab wax-up is fabricated by a technician on a plaster model and is never seated in the patient's mouth — it cannot evaluate phonetics, patient response, or occlusal function in vivo, and it requires laboratory turnaround time. A 3D-printed mock-up guide, designed in SmileFy and printed in-office, replaces the lab wax-up for most anterior aesthetic cases. It is seated directly in the patient's mouth at the same appointment as the design, delivering the same dimensional accuracy as a lab prototype but with immediate chairside feedback and no laboratory delay or cost.
Q: What materials are used for an intraoral mock-up?
A: Two primary options: (1) Flowable/injectable composite — delivered via the 3D-printed guide or silicone index. Applied without bonding for a fully reversible diagnostic mock-up, or with etch and bond when the composite will be retained. (2) Bisacrylic resin — self-curing, syringe-delivered into the guide or index. Does not require light access, making it practical for full-arch cases. Both materials are fully compatible with the SmileFy 3D-printed guide workflow.
Q: What is the typical appointment flow?
A: Appointment 1 — Design: patient records captured (full-face photo + intraoral scan); 2D Smile Simulation shown chairside if desired; 3D design created in SmileFy and approved (~30–40 minutes total). STL sent to printer between appointments. Appointment 2 — Mock-up: guide seated, composite delivered, mock-up evaluated for occlusion/phonetics/aesthetics, photographs taken, patient feedback documented, mock-up removed (~20–30 minutes). In practices with an in-office printer, both steps can be consolidated into one extended appointment.
Q: Can the 3D-printed guide be reused or sterilised?
A: 3D-printed resin guides used intraorally are single-patient use. Standard dental 3D printing resins are not rated for steam autoclave sterilisation. Cold chemical disinfection can be used between re-seatings on the same patient within the same appointment. For any new patient, a new guide must be printed from their specific digital design.
Q: What documentation should I capture?
A: Minimum documentation: (1) Pre-mock-up retracted intraoral photographs. (2) Mock-up in situ: full-face, retracted frontal, and lateral 45° views. (3) Articulating paper mark photographs. (4) Written patient feedback or signed consent confirming aesthetic approval. (5) Post-removal intraoral photographs confirming intact tooth surfaces. This documentation forms the clinical justification for the treatment plan and the medico-legal record of informed consent.
How this post will look when shared
smilefy.com
The Intraoral Mock-up: Your Obvious Secret Weapon
It's accessible, it's cost-efficient, and you can do it in-office. Learn how 3D digital mock-ups transform tr…