How to Use Your iPhone Camera to Take Incredible Facial Photos for Your Smile Simulations
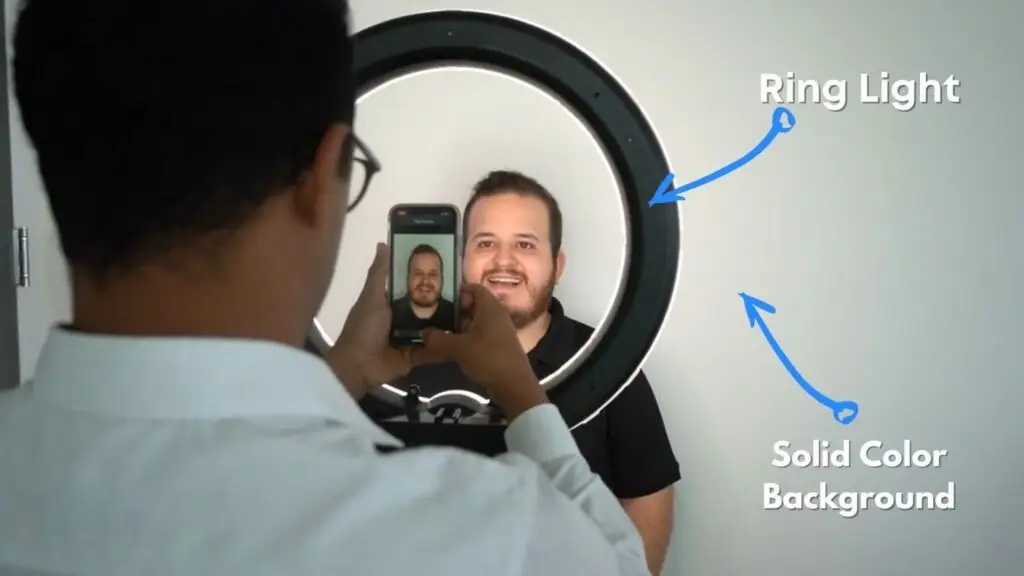
It is no secret that smile designs add value to your treatment planning as they provide additional perspective when evaluating a patient's oral and facial structures for cosmetic dental procedures. However, in order to yield the best possible outcomes in your smile designs, photographs of your patients need to be clear and taken from the right angles.
If this is the first impression your patient will see of their possible esthetic outcome, we want to nail that shot! Typical errors have a lot to do with the quality in the frontal picture. To name a few:
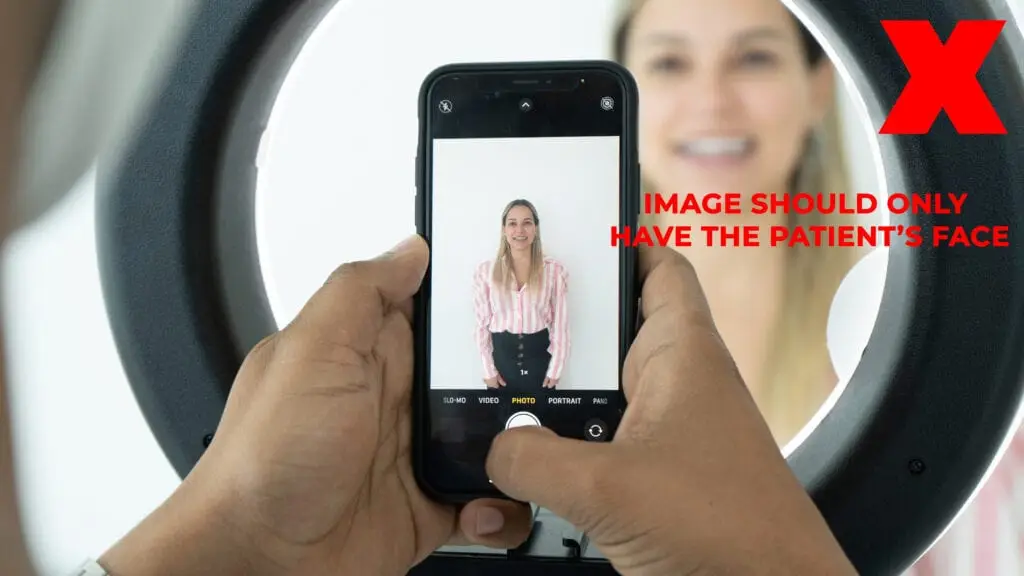
The picture is zoomed in too close
The picture is too dark
The picture has a shadow reflected in the patient's mouth
The picture is not focused
The picture does not show the teeth completely
Luckily, we've outlined tips and how-to's you can use from your iPhone's camera and room setup that will help you take the best photo for your documentation. Let's take a look at what these are:
Workflow Summary
Room Setup
Solid-colour background + dimmable ring light or softbox. Correct the environment once — not per patient.
Patient Preparation
Explain the process, use verbal encouragement, and position the patient upright with hair behind ears.
Lighting
Even frontal illumination. Ring reflection visible in both eyes = brightness is sufficient. Flash OFF — always.
Camera Settings
2x telephoto lens (tap "2x" — never pinch-zoom), 4:3 ratio, Grid + Level ON, HDR Auto, +0.3–0.7 EV exposure.
Framing & Distance
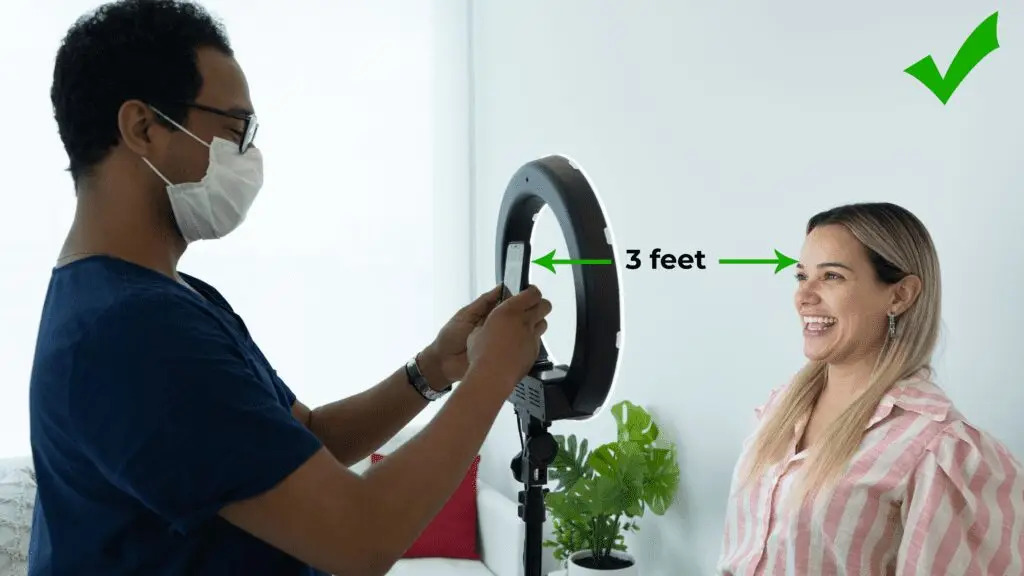
~3 ft (1 m) from patient. Lens at eye level. Shoulders cropped out. Full face in frame.
Capture & Review
Wide smile, mouth slightly open. Use 3-sec timer or Bluetooth shutter. Review at full zoom before patient leaves.
Lens Compatibility
Confirm your iPhone model's 2x lens type (true optical, sensor crop, or fallback protocol).
Upload to SmileFy
Select the sharpest, most natural maximum-elevation smile photo and upload directly.
A distortion-free, evenly lit, upload-ready facial photo captured in under 60 seconds — every time, with every patient.
Step 1 — Room Setup
Whether you have a designated room or a small space to take photographs of the patient, below is an example of the ideal space setup. A solid colour background and dimmable softbox can immediately improve the quality of the photos and adds a level of sophistication and care to the patient's experience.
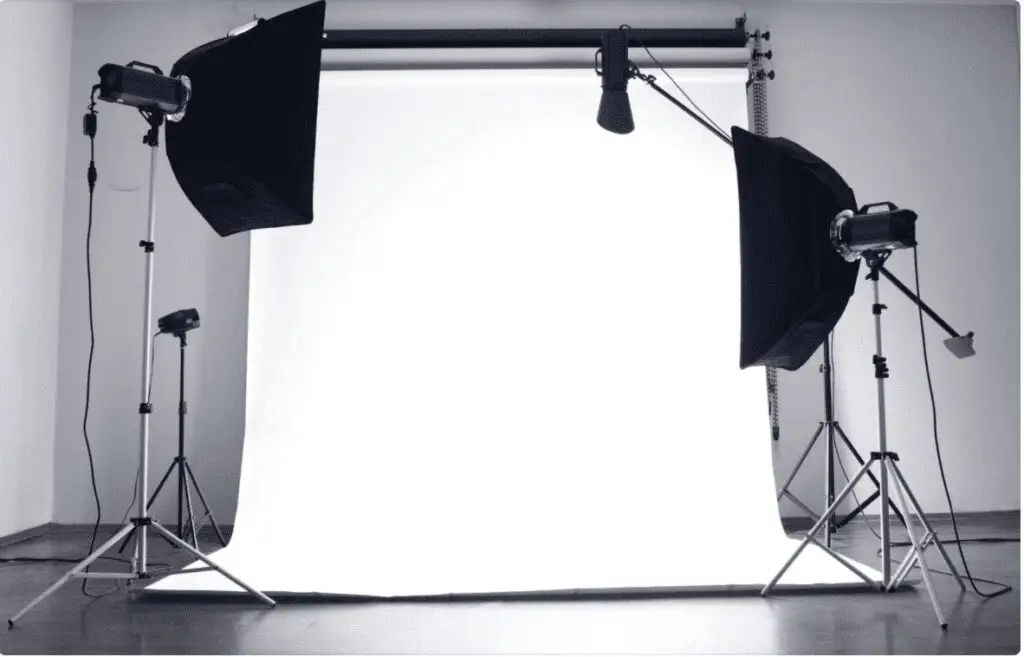
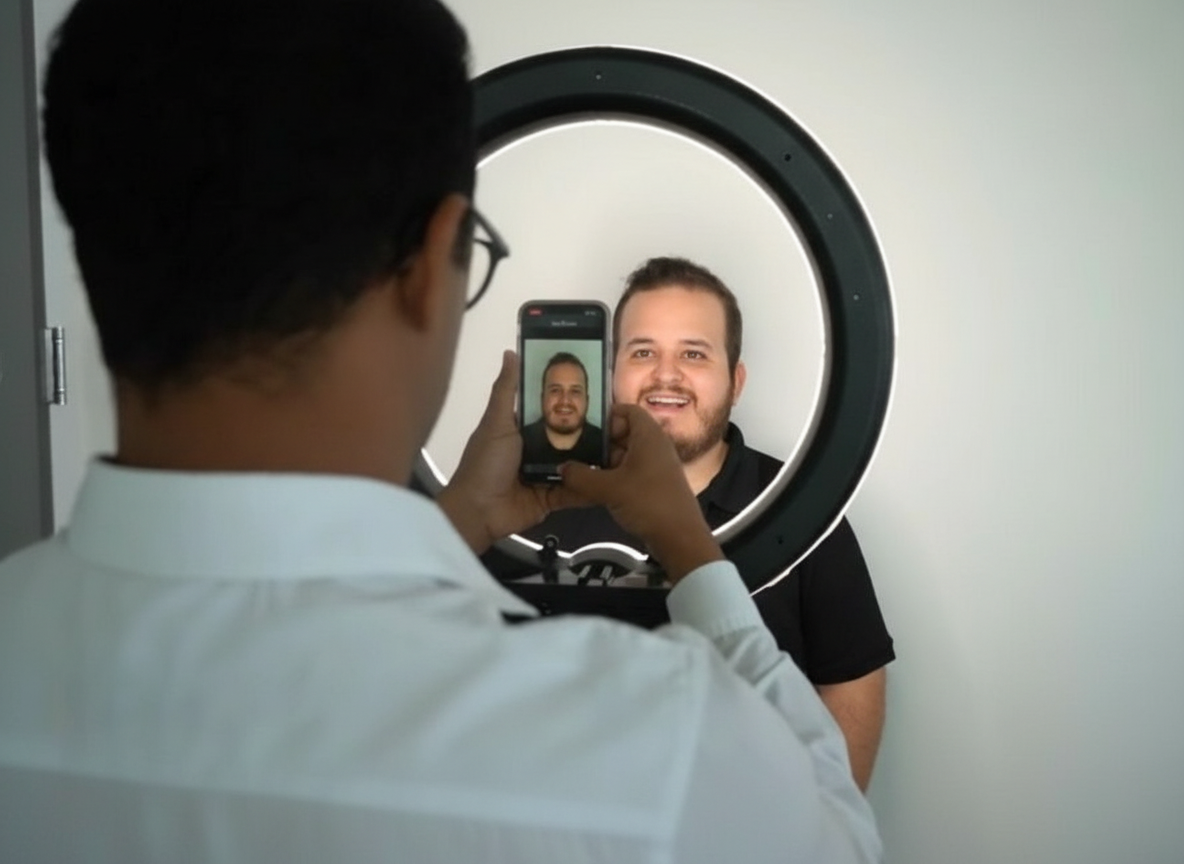
What you need — A solid-colour background (plain wall or backdrop stand with a neutral-coloured paper roll) and a dimmable light source — either a ring light or a softbox. The background eliminates visual clutter that would distract from facial landmark assessment in the design phase.
Ideal setup — Dedicated photography corner or small alcove with the backdrop centred behind where the patient will stand. Place the ring light or softbox directly in front of and facing the patient, approximately at face height.
Background — Plain, solid colour — white, light grey, or dark grey. Avoid patterned walls, curtains, or backgrounds with equipment visible. The background should provide sufficient contrast to the patient's face for SmileFy's facial landmark detection to function accurately.
Light position — Ring light: centred directly in front of the patient, lens of the camera through the centre of the ring. Softbox: positioned at 45° if using two softboxes, or directly frontal if using one.
Step 2 — Patient Preparation and Comfort
Rule number one in dental photography: make your patient feel comfortable. Although the facial pictures do not take long, if the patient is uncomfortable, they will turn down this step — leaving you with a missed opportunity at exciting them with a smile simulation of their possible esthetic outcome.
Explain the process — Before taking pictures, explain your process. Example script: "These photos will give me additional insight into your current smile so that I can develop a natural-looking smile that suits you best." This framing positions the photograph as a tool that benefits the patient, not as clinical documentation.
Encouragement — Use positive verbal cues throughout: "Really nice!", "Give me a big smile!", "Great job!" Small words of encouragement go a long way and make the patient more comfortable in front of the camera.
Patient positioning — Ask the patient to stand upright, back straight, feet shoulder-width apart. Remove glasses, hats, and heavy jewellery. Hair should be tucked behind both ears to expose bilateral facial contours.
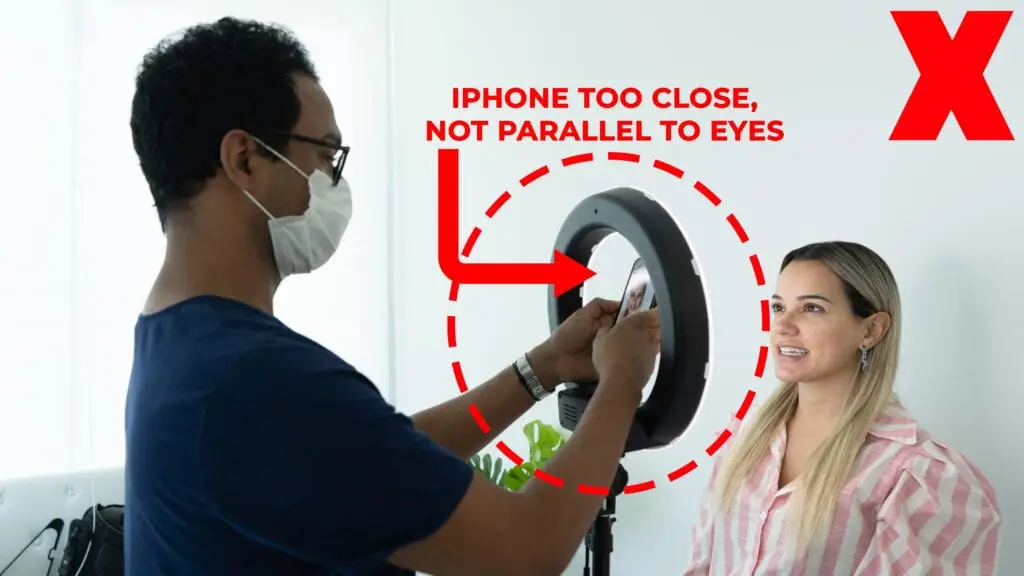
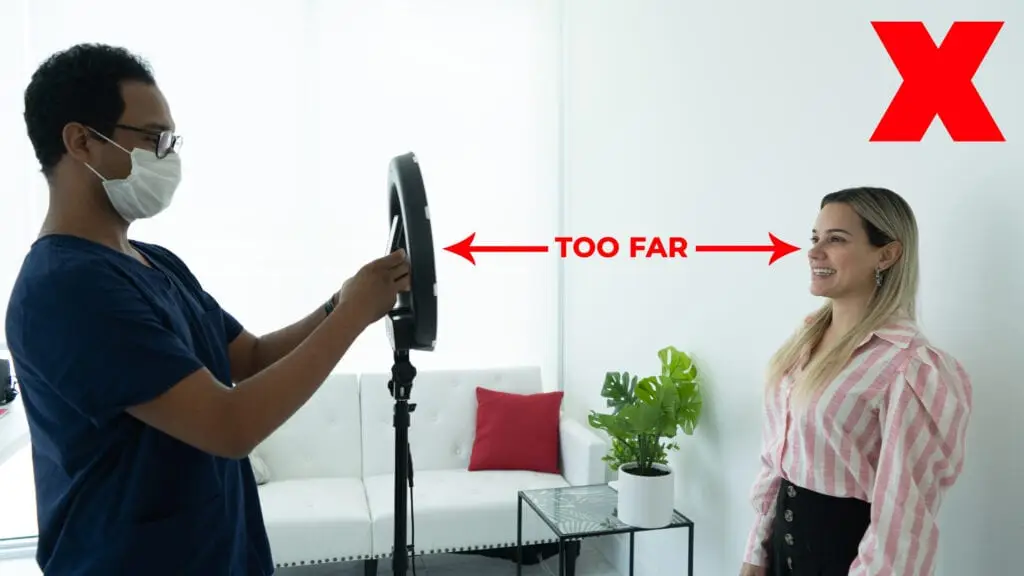
Distance — Stand approximately 3 feet (1 metre) away from the patient. This distance is comfortable for the patient (personal space is maintained), prevents the close-range barrel distortion associated with wide-angle lenses, and is the correct working distance for the 2x telephoto lens.
Pro Tip: Stay about 3 feet away from your patient when taking the picture. Don't stand too far back as this will create distortion in the picture.
Step 3 — Lighting
Lighting is very important to the quality of your photo. Make sure you evenly light the patient using a ring light. Try to keep the intensity of the light comfortable for the patient — a good rule of thumb is that if you can see the ring from the light reflected in your patient's eyes it should be bright enough for the picture. It doesn't have to be very bright but just enough to be noticeable.
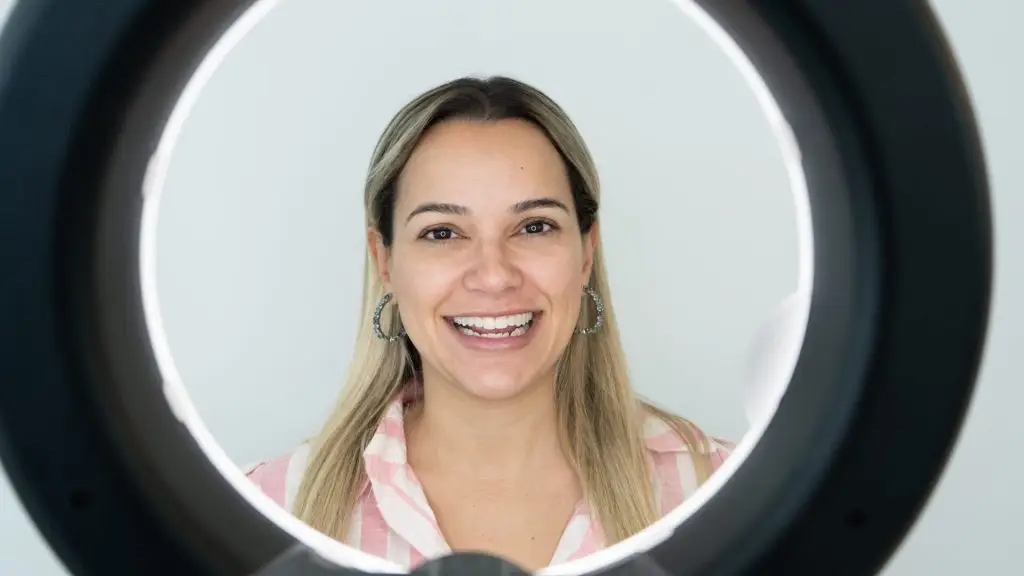
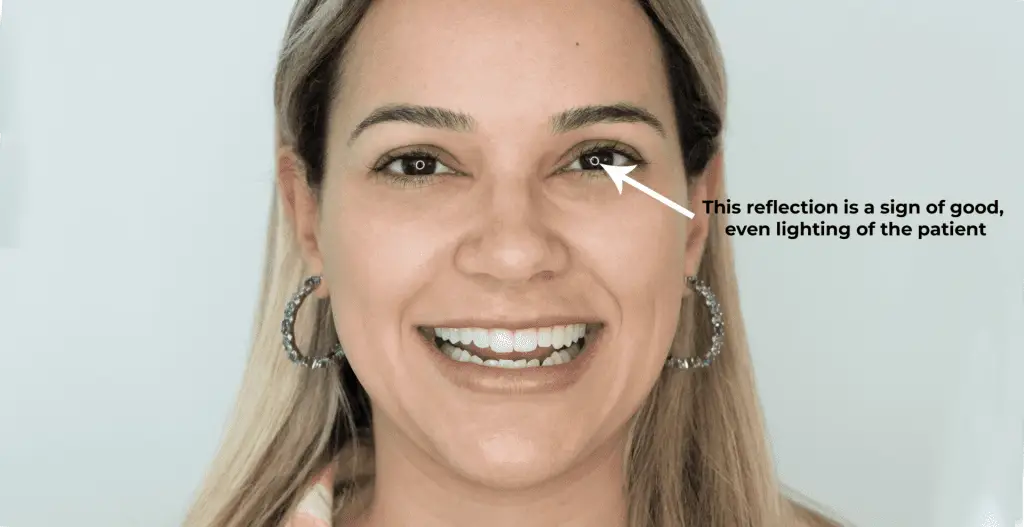
Ring light — The most practical option for most dental practices. Position it so the camera lens shoots through the centre of the ring. The ring should be at face height, directly in front of the patient.
Softbox — A single dimmable softbox positioned directly in front of the patient at face height is a close alternative. Two softboxes at 45° angles bilaterally provides optimal, shadow-free illumination.
What to avoid — Do not photograph with: a window behind the patient (backlighting silhouettes the face); natural light from one side only (creates unilateral shadowing); the iPhone flash (produces harsh shadows inside the mouth); overhead room lighting as the only source (produces downward shadows).
Flash — Flash off — always. The iPhone's built-in flash creates shadows at the corners of the mouth and inside the oral cavity. Use the ring light or softbox as your sole light source.
Step 4 — Camera Settings (iPhone)
Open Camera — Use the native iPhone Camera app. Do not use third-party camera apps for SmileFy uploads — the native app preserves the full resolution and EXIF data that SmileFy uses for image processing.
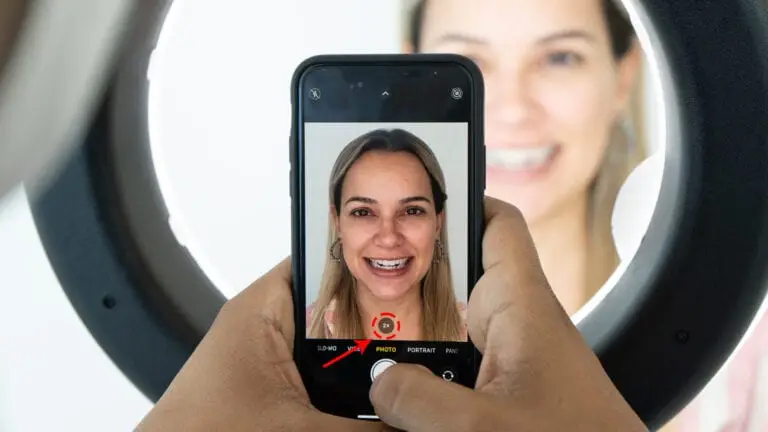
Select 2x lens — Tap the "2" or "2x" button on the lens selector. This activates the native 2x telephoto lens. Do not use the pinch motion to zoom — this engages digital zoom, which degrades resolution.
Aspect ratio — Confirm the camera is set to 4:3 aspect ratio (the default). Avoid 16:9 (crops the top and bottom of the face) and Square (crops the sides).
Grid + Level — Enable the grid overlay: Settings > Camera > Grid (toggle ON). The Level feature activates automatically — a yellow line appears when the camera is not perfectly level, turning white when level.
HDR — Leave HDR on Auto or enable it manually. HDR blends multiple exposures to preserve detail in both the bright highlights of the teeth and the darker areas of the oral cavity.
Exposure — After tapping to focus on the patient's face, drag the exposure slider (the sun icon) up slightly: +0.3 to +0.7 EV. This brightens the face without overexposing the teeth.
Timer / stability — Use the 3-second self-timer or a Bluetooth remote shutter to eliminate camera shake.
Pre-capture checklist — confirm before every session: 2x lens active, flash off, grid on, 4:3 ratio, and a small positive exposure applied — these five settings eliminate the most common image quality errors.
Step 5 — Zoom With The 2x Telephoto Lens
SmileFy is compatible with iPhone 7 Plus or newer versions. These provide two types of lenses you can use for your pictures. The "1x" you see on your iPhone's screen when you open your camera is called the "wide angle" lens — if you take a frontal picture of your patient with the 1x wide-angle lens, you can produce a "barrel distortion" commonly portrayed when photos are taken with the "fisheye" lens. The closer you are to the patient's face, the more apparent this distortion will be and less accurate your design will become.
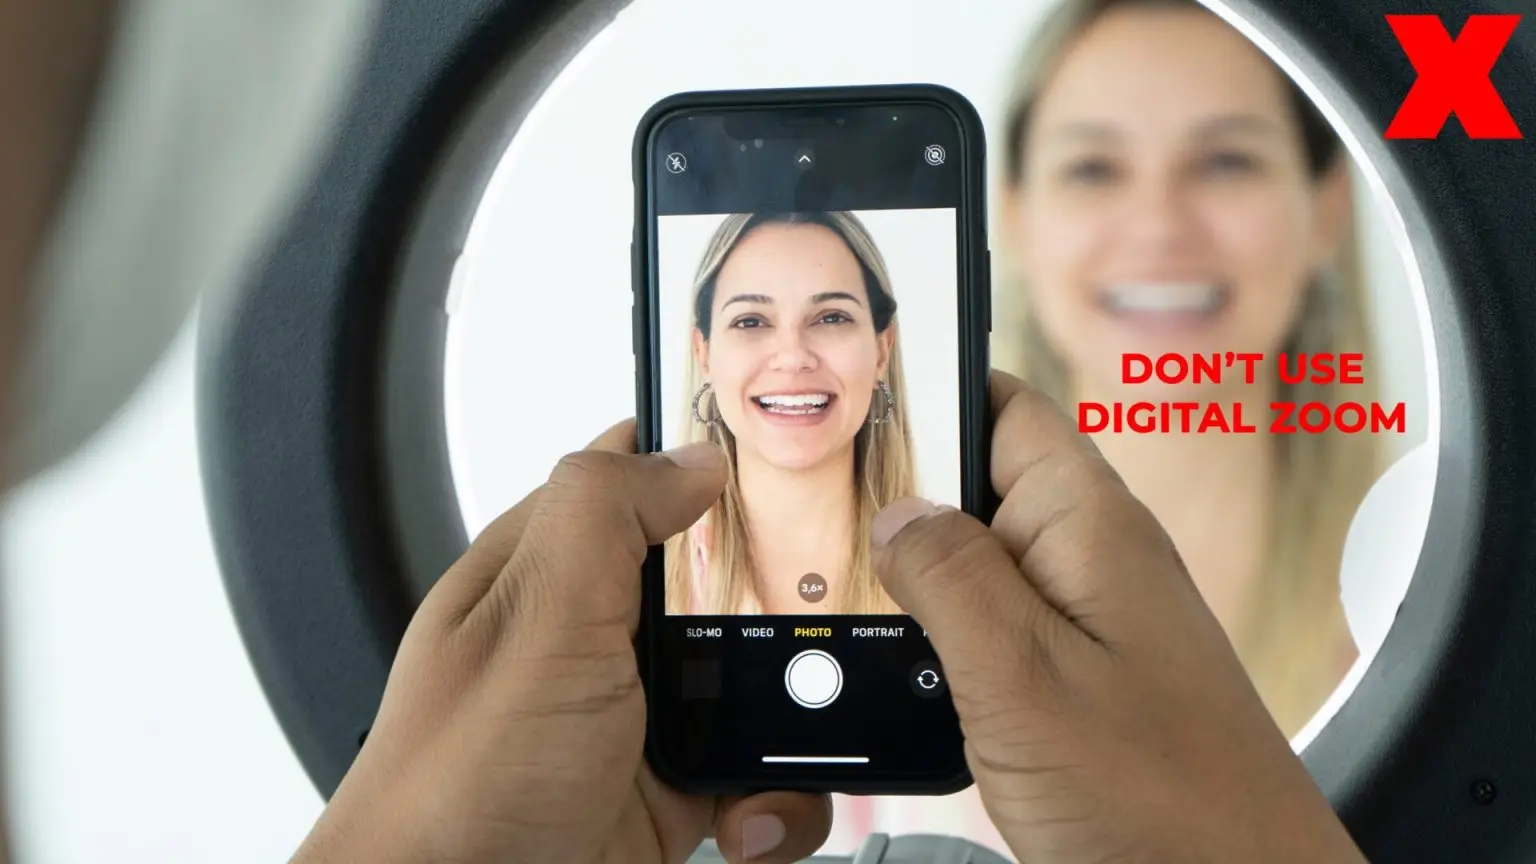
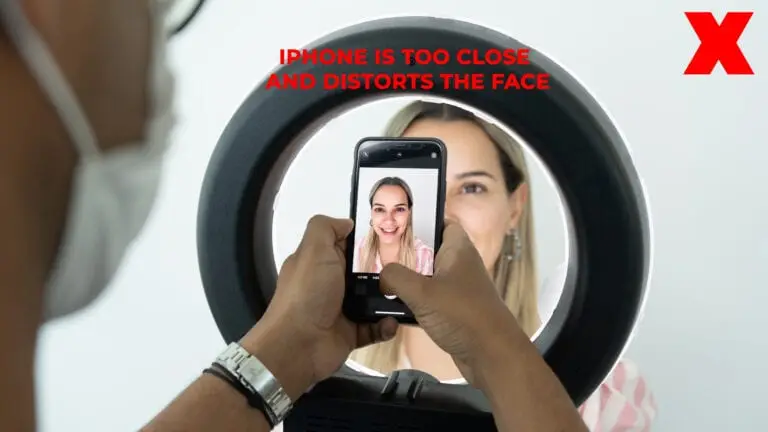
Switching to the iPhone's "2x" telephoto lens will eliminate the barrel distortion so your portrait photos will have more accuracy to the real measures. Do not use the pinch motion to zoom as it will degrade the quality of the image.
Position your patient standing up straight, with no hats or glasses, and hair tucked behind the ears. In a room with great lighting, frame the patient's face inside the screen of your iPhone eliminating shoulders. To prevent distortions on the smile curve, level the lens of the camera to the eyes of your patient and make sure that your iPhone is straight.
Step 6 — Capture and Review
Smile cue — Ask the patient to look directly at the camera lens and give a wide, natural smile with the mouth slightly open. The goal is to capture the maximum elevation of the upper lip with the teeth clearly visible. Take 3–5 shots in quick succession and select the best.
Capture method — Use the 3-second timer or a Bluetooth remote shutter. If holding the phone, press the volume button with a light, deliberate press — do not jab the button as this introduces motion blur.
Immediate review — After capture, review the photograph at full resolution on the phone screen. Check for: blur or motion artefact; shadow inside the mouth; lens at eye level; teeth fully visible; shoulders absent from the frame.
Retake criteria — Retake immediately if: the image is blurred; one side of the face is in shadow; the camera was above or below eye level; the patient's eyes are partially closed; the smile is forced or the mouth is fully closed; the teeth are not completely visible; shoulders appear in the frame.
Best of session — Select the photograph with the most natural, maximum-elevation smile, level horizontal reference, and the sharpest focus on the anterior teeth. This is the file to upload to SmileFy.
Do this: After every session, review the selected photo at full zoom on the phone before the patient leaves — it takes 15 seconds and eliminates the need for a re-appointment due to an unusable image.
iPhone Model Guide — Which 2x Lens to Use
SmileFy is compatible with iPhone 7 Plus or newer. Not all iPhone models have a dedicated 2x telephoto hardware lens. The guide below identifies which models provide true optical 2x, which provide an acceptable sensor-crop 2x, and what to do on 1x-only models.
iPhone 7 Plus, 8 Plus — True 2x optical telephoto lens. Full compatibility. Tap "2x" to activate the dedicated telephoto lens.
iPhone X, XS, XS Max — True 2x optical telephoto lens. Full compatibility. Same dual-camera system as 7 Plus / 8 Plus.
iPhone 11 Pro, 11 Pro Max — True 2x optical telephoto lens. Full compatibility. Triple-camera system. Tap "2x" on the lens selector.
iPhone 12 Pro, 12 Pro Max — True 2x optical (12 Pro) / 2.5x (12 Pro Max). Full compatibility. Both produce a distortion-free portrait at 3 ft working distance.
iPhone 13 Pro, 13 Pro Max — True 3x optical telephoto. Use the 2x crop setting. The "2x" option appears as a 48 MP sensor crop in later iOS versions and is acceptable for SmileFy.
iPhone 14 Pro, 14 Pro Max — 48 MP main + 3x telephoto; 2x is sensor crop. Tapping "2x" uses a cropped region of the 48 MP main sensor — acceptable quality for SmileFy at 3 ft.
iPhone 15 Pro, 15 Pro Max — 48 MP main + 5x telephoto (Pro Max) / 3x (Pro); 2x sensor crop. Same as iPhone 14 Pro — tapping "2x" activates a 48 MP sensor crop.
iPhone SE (all), iPhone 11, 12, 13, 14 (non-Pro) — No telephoto — 1x wide-angle only. Use fallback distance protocol: do not use pinch-zoom, step back to ~5 ft to reduce barrel distortion.
Practice makes perfect. Small modifications can make a monumental difference in your smile design but like any other piece of technology, the more you do, the better you get, and the more patients you WOW.
How this post will look when shared
smilefy.com
How to Use Your iPhone Camera to Take Incredible Facial Photos for Your Smile Simulatio…
A step-by-step clinical guide to capturing distortion-free, upload-ready facial photographs using your iPhone…