")
")
Case Report Information
- Case Report by Dr. Sergi Miralles | Australia
- Information
In this article, talented Dr. Sergi Miralles - Australia, provides valuable insights on developing and implementing a complete Digital Workflow for ten anterior porcelain veneers. The process covers various stages, including the initial consultation, patient's digital file, Smile Design, Mockup Trial, communication with the laboratory, and installation of the final porcelain veneers. The 3D teeth templates and mockup files exported from the SmileFy App's 3D smile design served as the basis for the final porcelain veneers and can help you achieve the same results.
Introduction:
The 3D smile analysis process is essential for diagnosing, planning, treating, and proposing any dental treatment with aesthetic goals to the patient. Moreover, it facilitates communication between dentists and ceramists by improving their daily workflow, it reduces the number of patient appointments, and improves the final fitting and aesthetics of the final restorations. This work aims to show how SmileFy Smile Design Software can assist doctors in delivering more predictable oral-facial outcomes by creating more balanced smiles in harmony with patients’ facial features.
The Case:
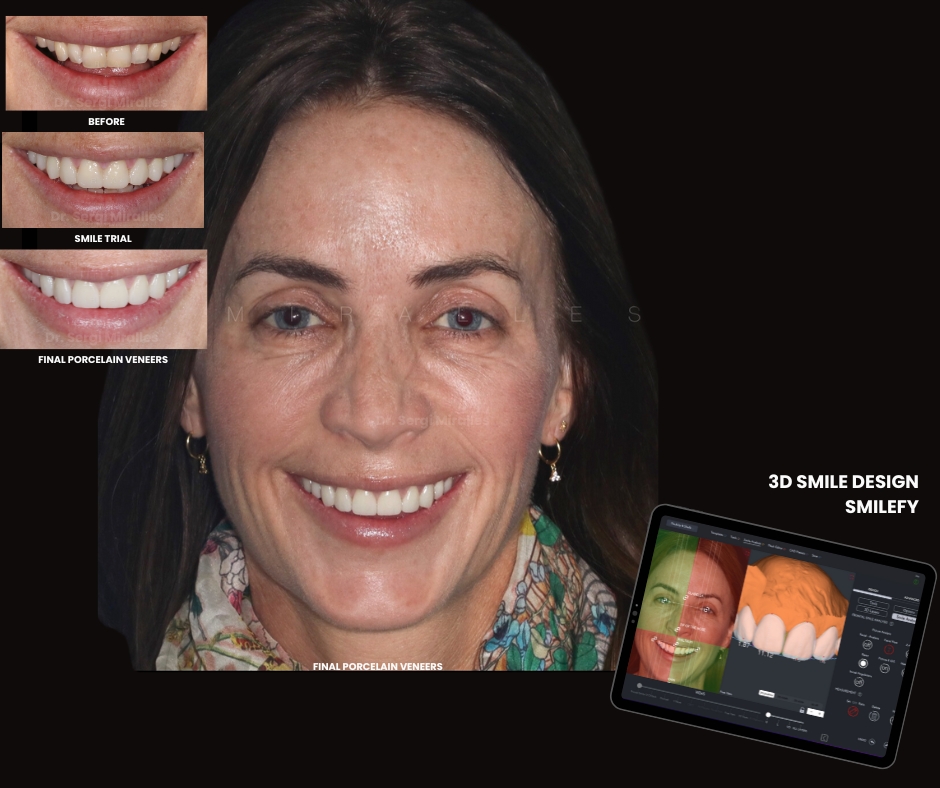
A middle-aged woman in good general health condition was referred to Dr. Sergi Miralles at the Perio Specialists & Dental Implants Practice (Gold Coast, Australia) for oral aesthetic rehabilitation (Fig.1). She was dissatisfied with her smile, essentially with the existing gaps on both sides and overall shade. Also, she was keen to improve her upper anterior teeth, which were slightly crooked, and uneven smile line. She had no bite or any other functional issues.
The first consultation protocol:
A complete examination was performed, which included pre-operative teeth measurements, x-rays, clinical videos, photographic documentation, and digital impressions.
• The First Appointment Communication:
The reason why we offer a real-time 2D SmileFy Smile Simulation during appointments is to enhance communication between dentists and patients. This simulation uses natural teeth templates available in the software and overlays them onto a photo of the patient's face. This allows us to present the patient with a proposed new smile and discuss possible treatment options, goals, number of appointments, and timing. The Smile Simulation can be performed on either the iPhone, iPad, or MacBook. We choose the iPhone for being a fast pocket-size solution.

SmileFy uses artificial intelligence to build the smile simulation, facilitating and delivering the simulation process within seconds. Although the Smile Simulation cannot be used for the final treatment plan due to its two-dimensional limitations, it helps the dentist and the patient deliver a first draft of the future smile and start drawing the details of the outcome to achieve.
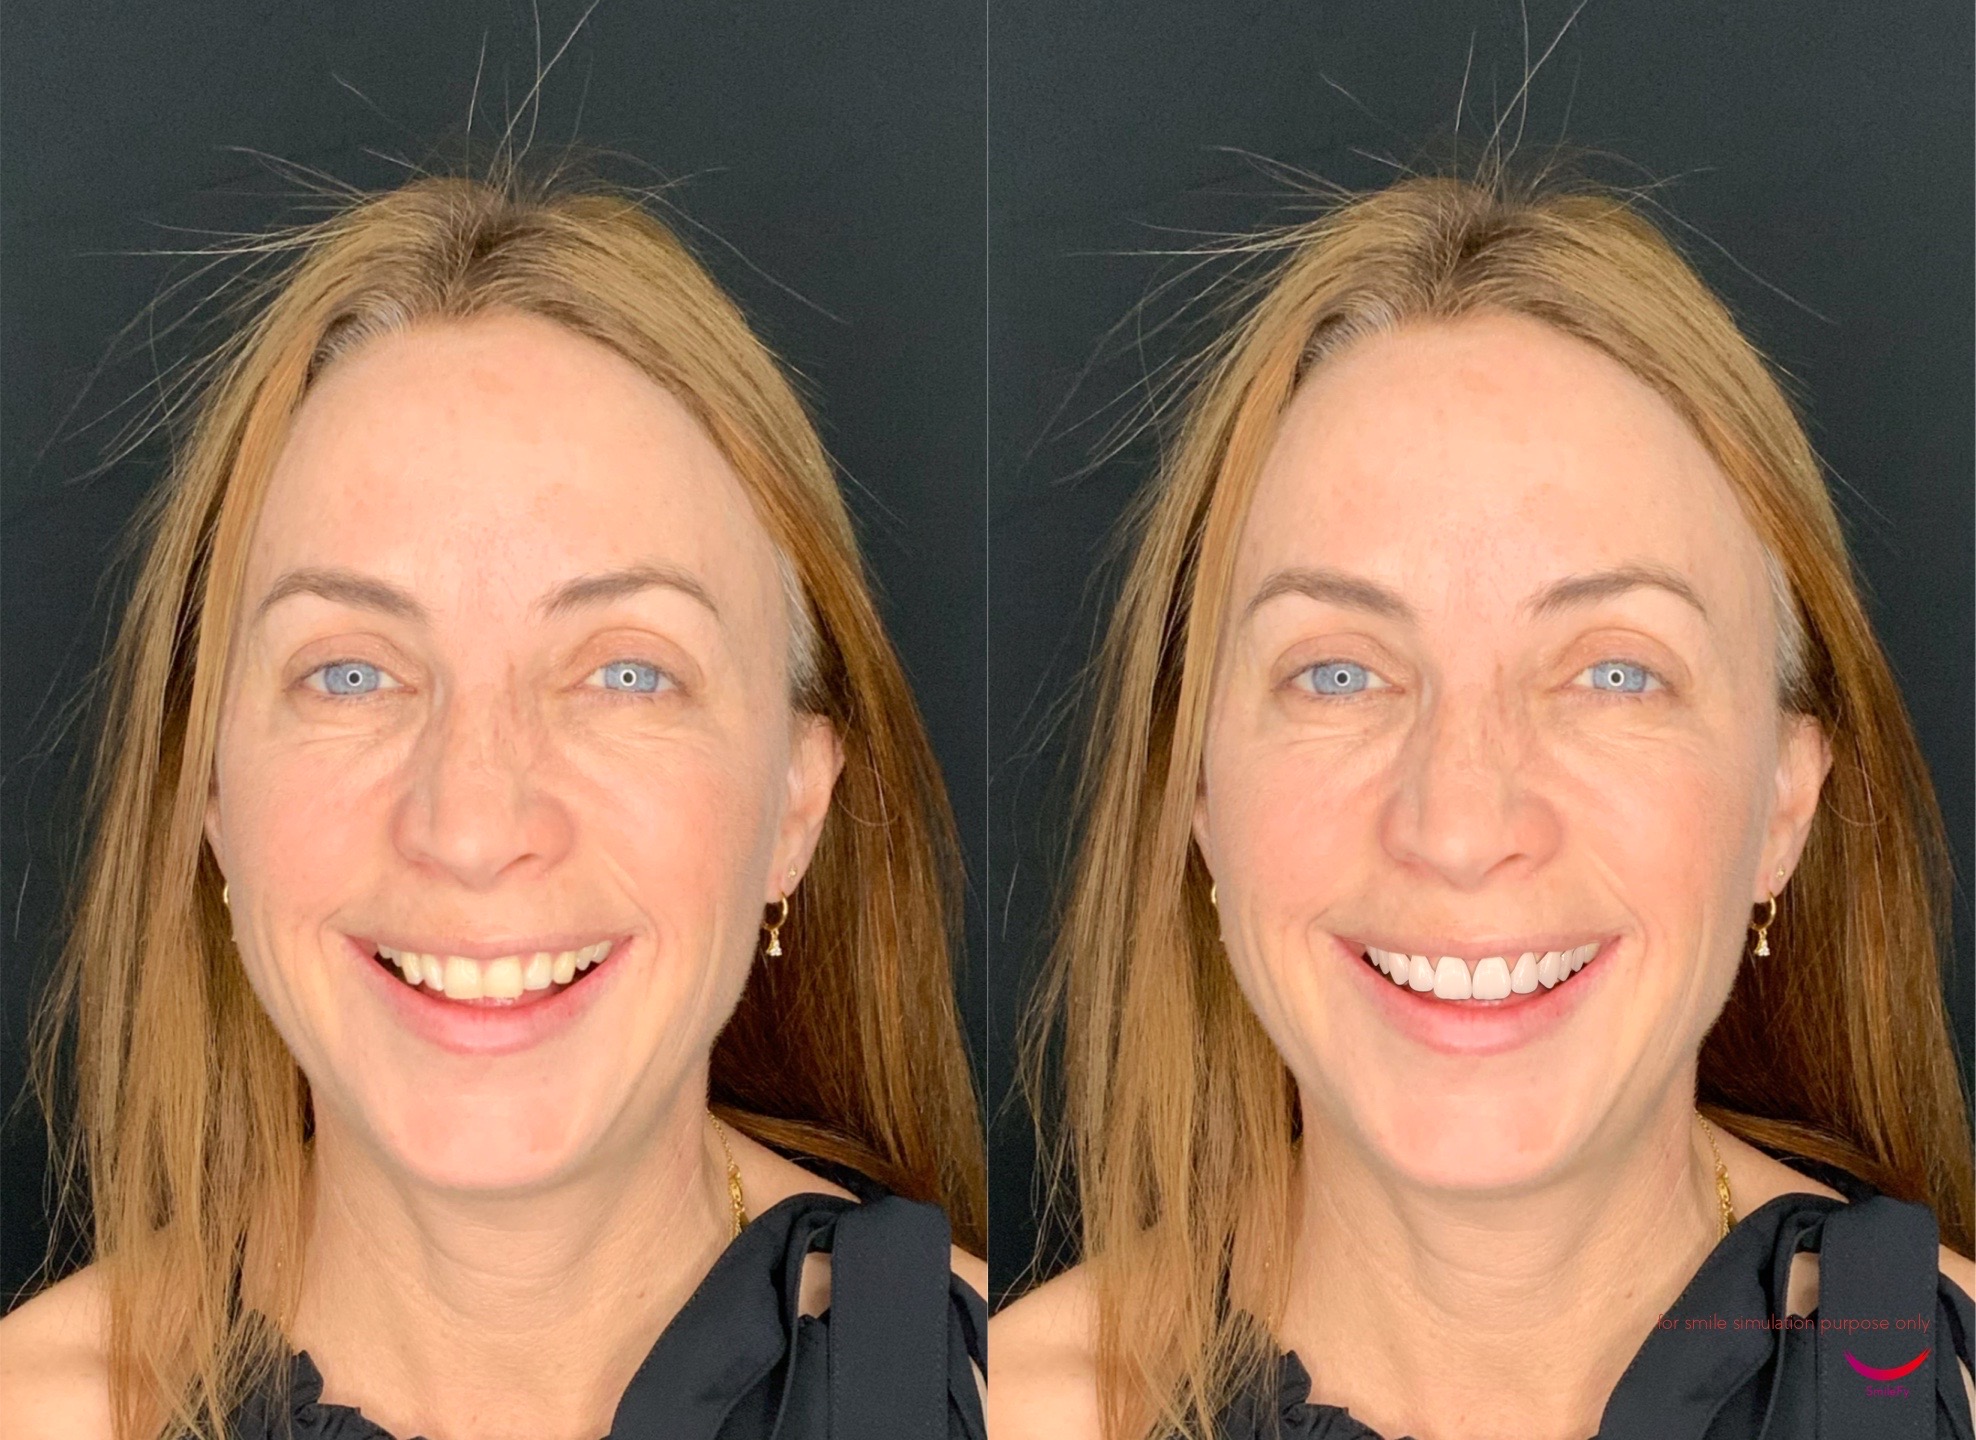
• SmileFy's Smile Simulation: The Patient's Reaction and its Impact on case acceptance.
The Patient needed to see a smile simulation to understand better all the improvements that should be done to achieve a much more balanced, whiter, and harmonious smile, which helped her visualize all the necessary work that would be done. Thus, 10 upper porcelain veneers were accepted immediately after proposing the treatment plan.
3D Analysis & Mockup Design:
After a comprehensive evaluation of the periodontal tissues and gingival health, the patient was scanned intraorally, and new photographs were made. The patient was dismissed, and the 3D wax-up process began.
The goal of the 3D Smile Design process was to create a smile prototype that would translate the treatment :
- The original right central incisor length was used as a reference.
- teeth gaps had to be closed
- The teeth proportions and smile, in general, needed to be broadened
- And the smile line had to be leveled-up
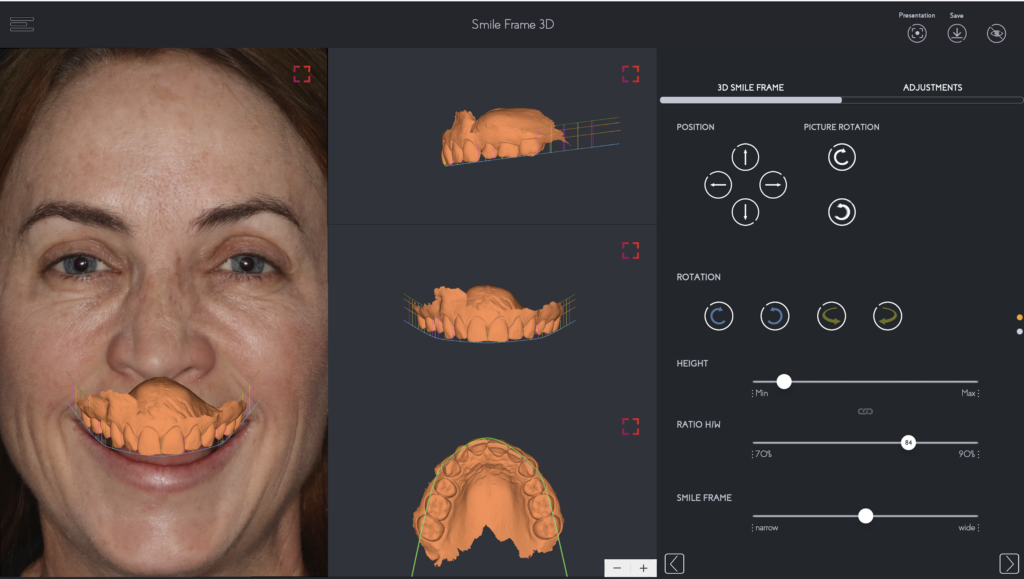
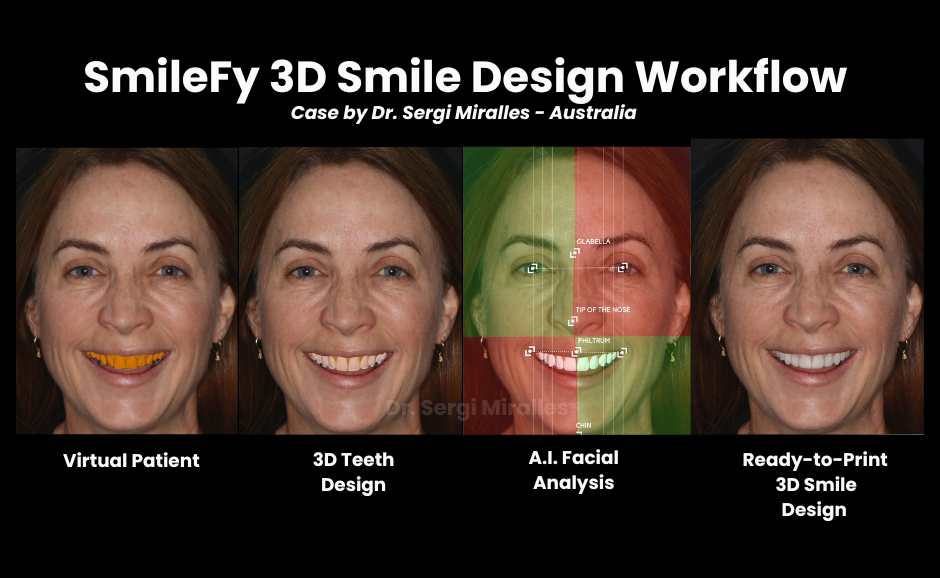
To create the final 3D Smile Design, a frontal facial smile picture and the intraoral scan of the patient were imported and calibrated into the SmileFy App.
The calibrated.STL file was superimposed over the frontal facial smiling photo of the patient (Fig. 4).

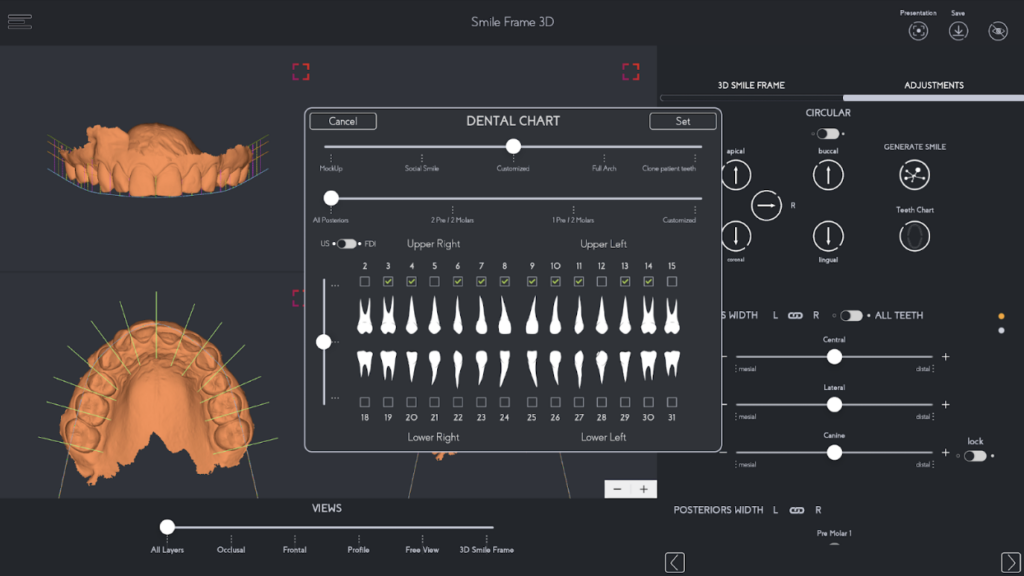
By using the recurring esthetic dental (RED) proportion, the facial guided smile frame was designed, and the following were planned using the clinical findings as a reference to guide the 3D Smile Design (Fig.5A, 5B).
Book a session with us to learn how to use SmileFy like a pro!
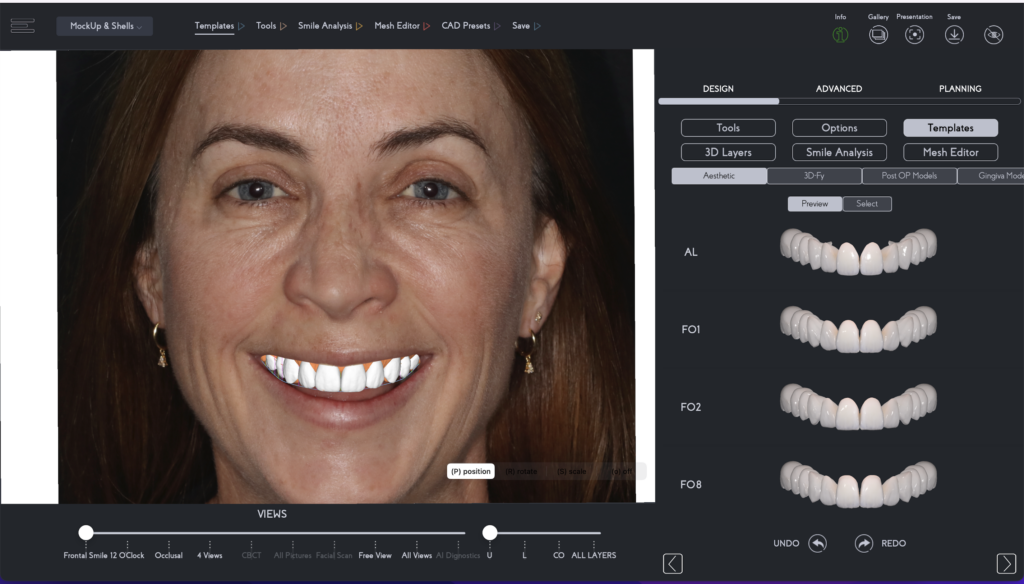
When it comes to teeth selection, you easily choose from a wide variety of 3D natural teeth templates, click on them, and virtually try on the digital patient. This is very beneficial as it facilitates the workflow by enhancing the aesthetic portion of the treatment plan and reducing the need to redo work, making it a highly advantageous tool for dental professionals.

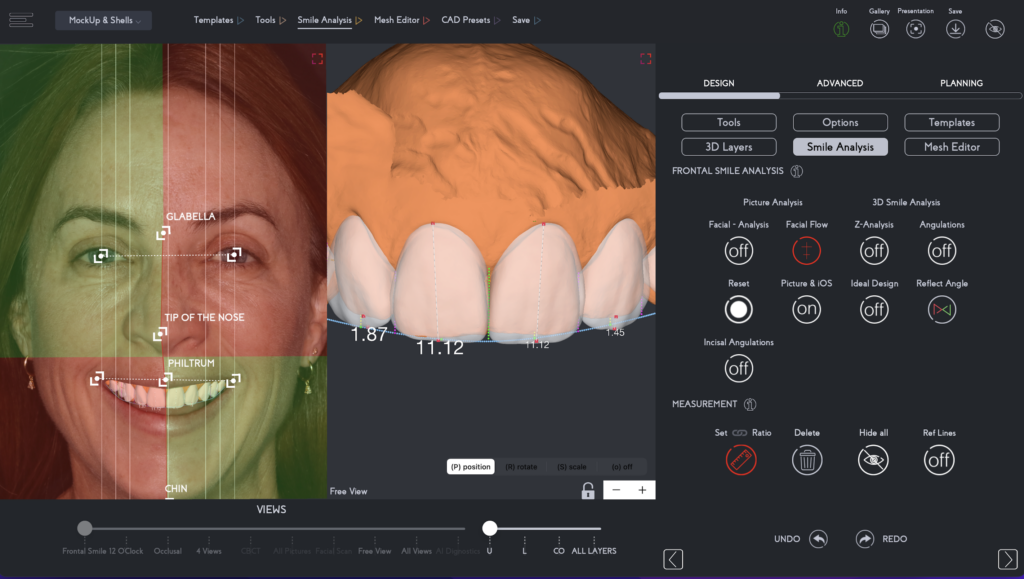
The application utilizes advanced AI technology to enhance the balance and symmetry of an individual's facial features. This is achieved through an in-depth analysis of a frontal facial photograph, which enables dental professionals to establish a connecting line between specific points on the face, such as the glabella, nose bridge, philtrum, and chin, to determine the patient’s facial flow (an evaluation of the face to give harmony and proper balance to the facial structures and smile). Leading to a personalized solution for achieving optimal balance and harmony in their facial structures and smile. (Fig.7).
A gingivoplasty was performed to correct the gingival asymmetry affecting the upper incisors, and the buccal corridor was broadened, adding volume to the back teeth on both upper quadrants. (Fig.8A, 8B).
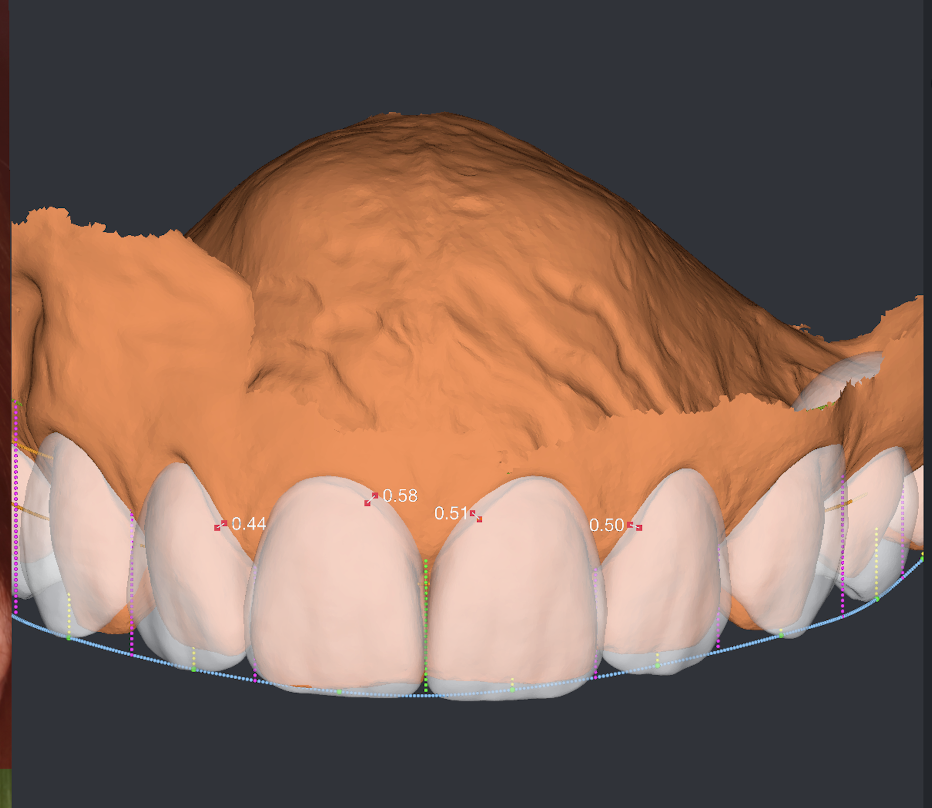
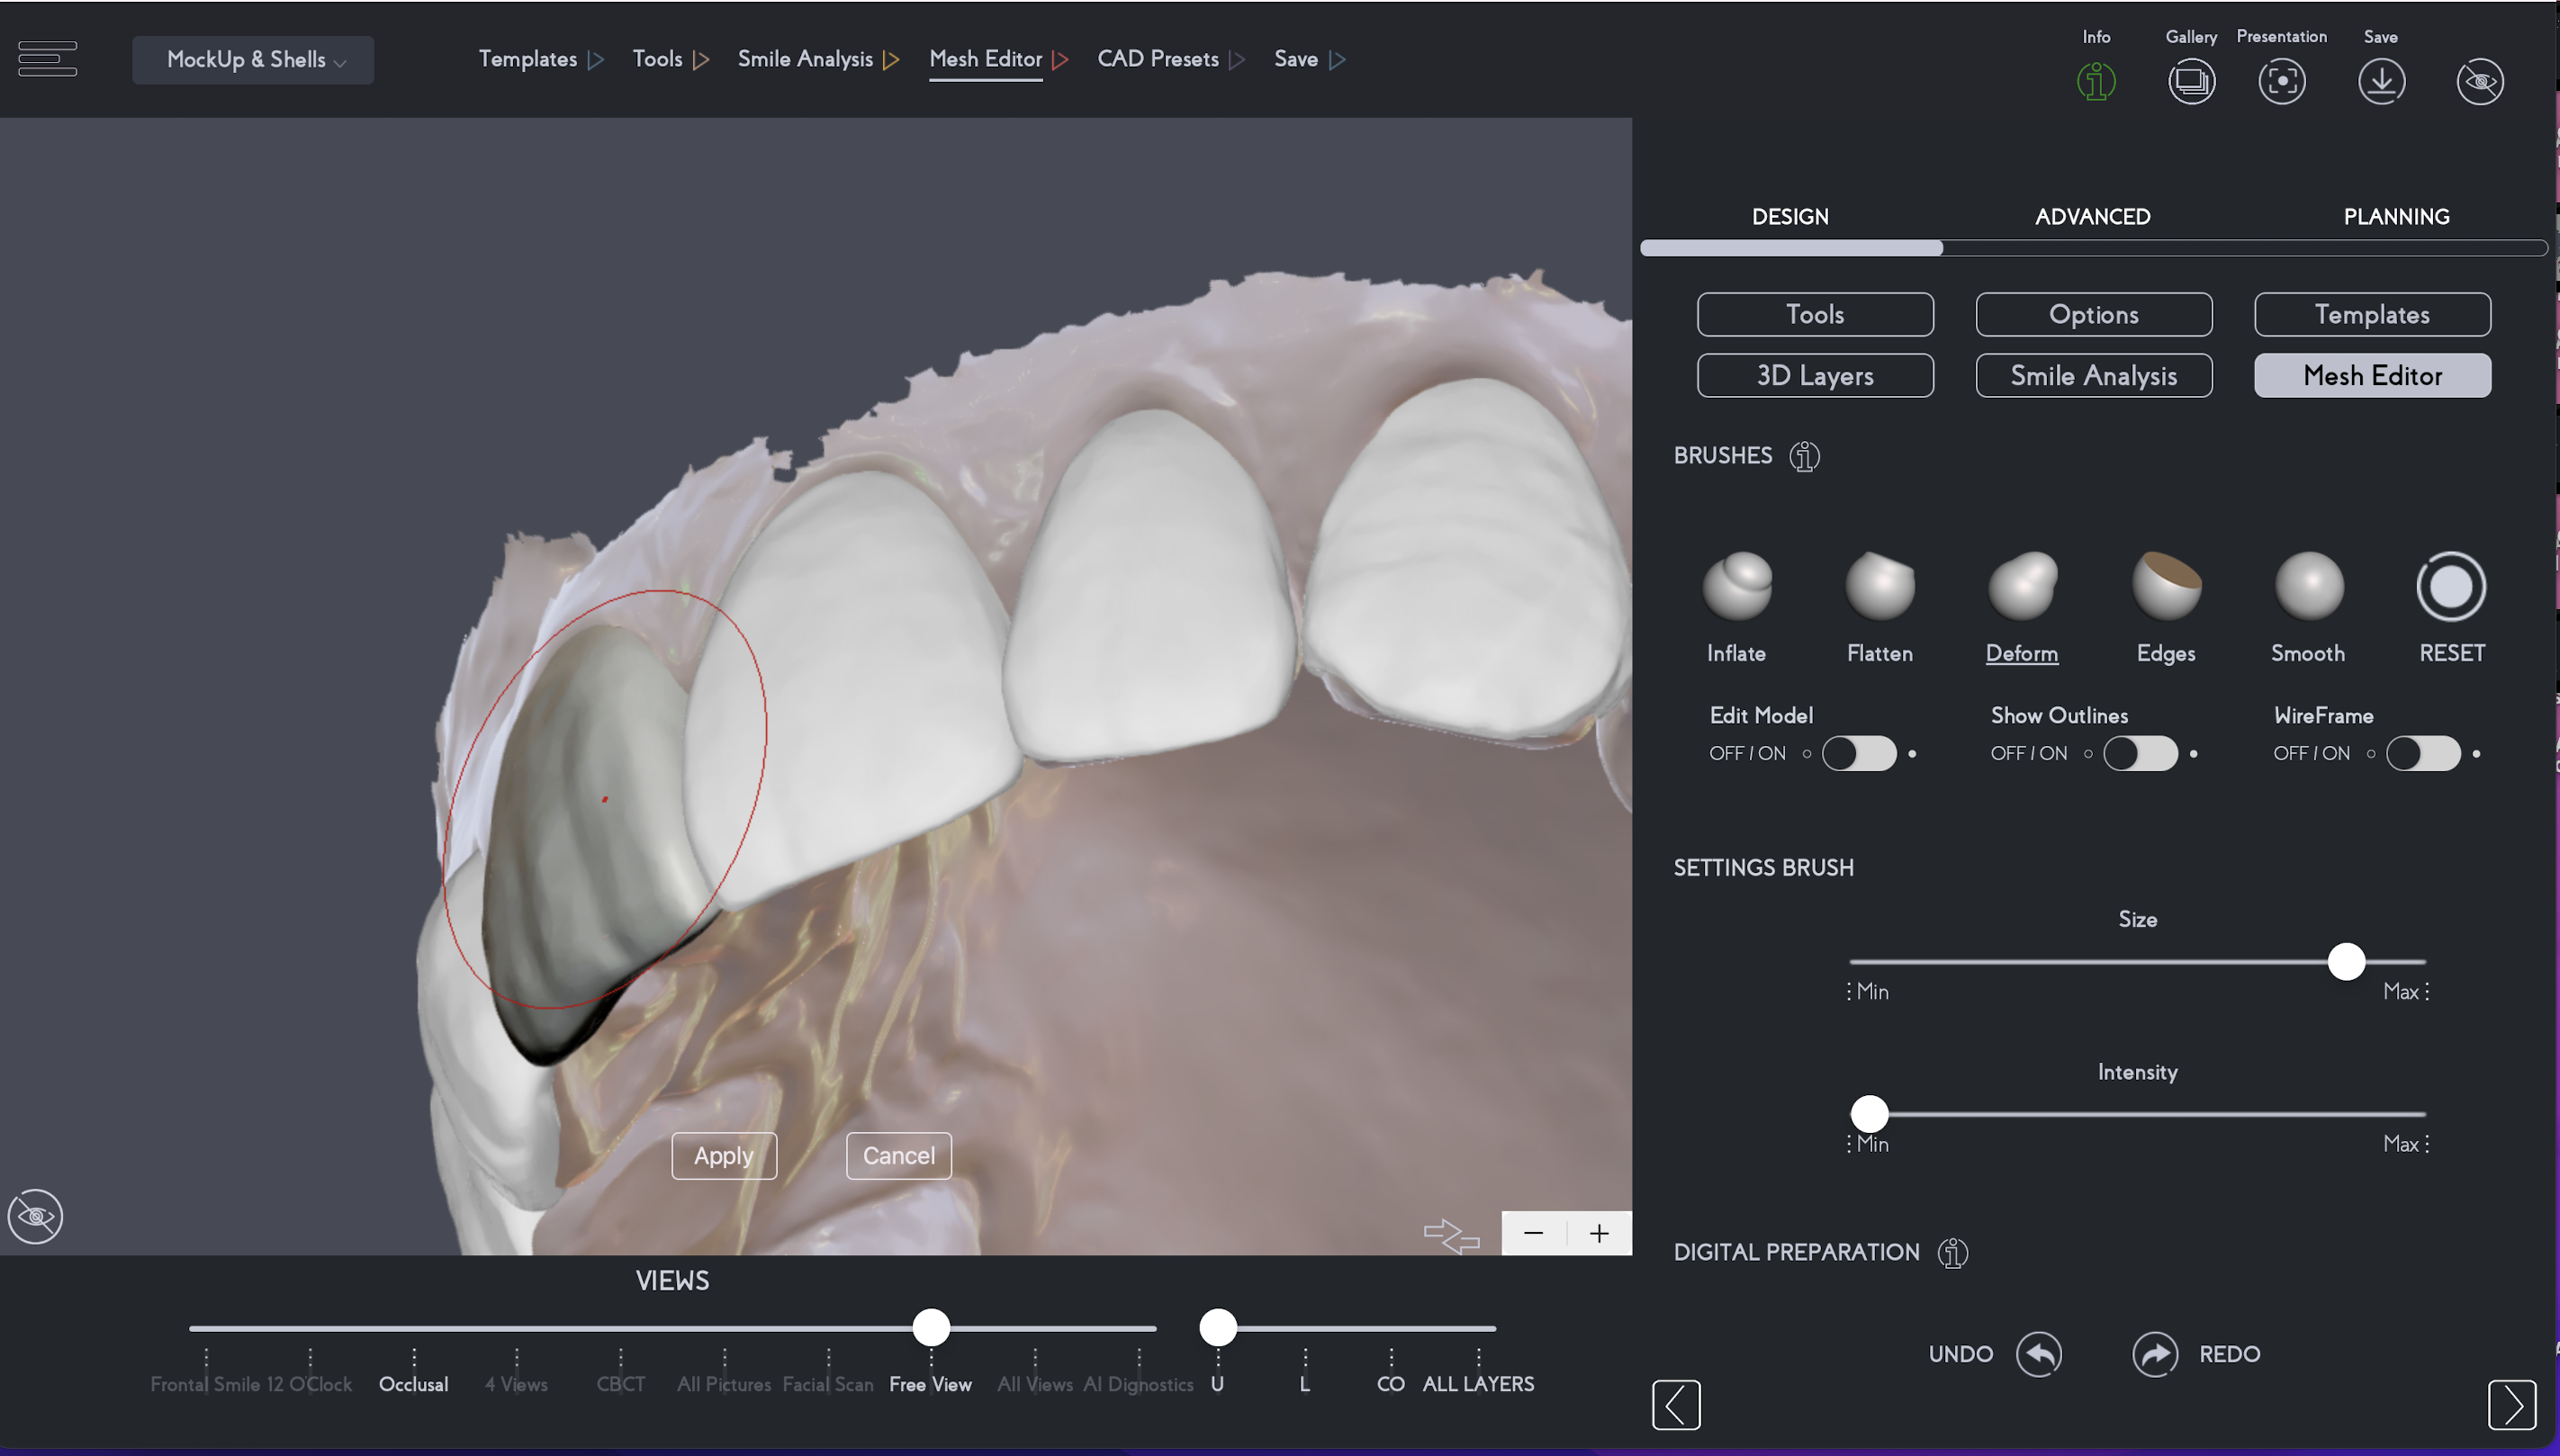
Digital Wax-up was done on the original digital model using the mesh editor feature available on SmileFy to have the ideal position and shape of the future restoration and to guide the doctor on tooth preparation (Fig.9A, 9B, 9C).
No limitations were found to be considered with her lower dentition.
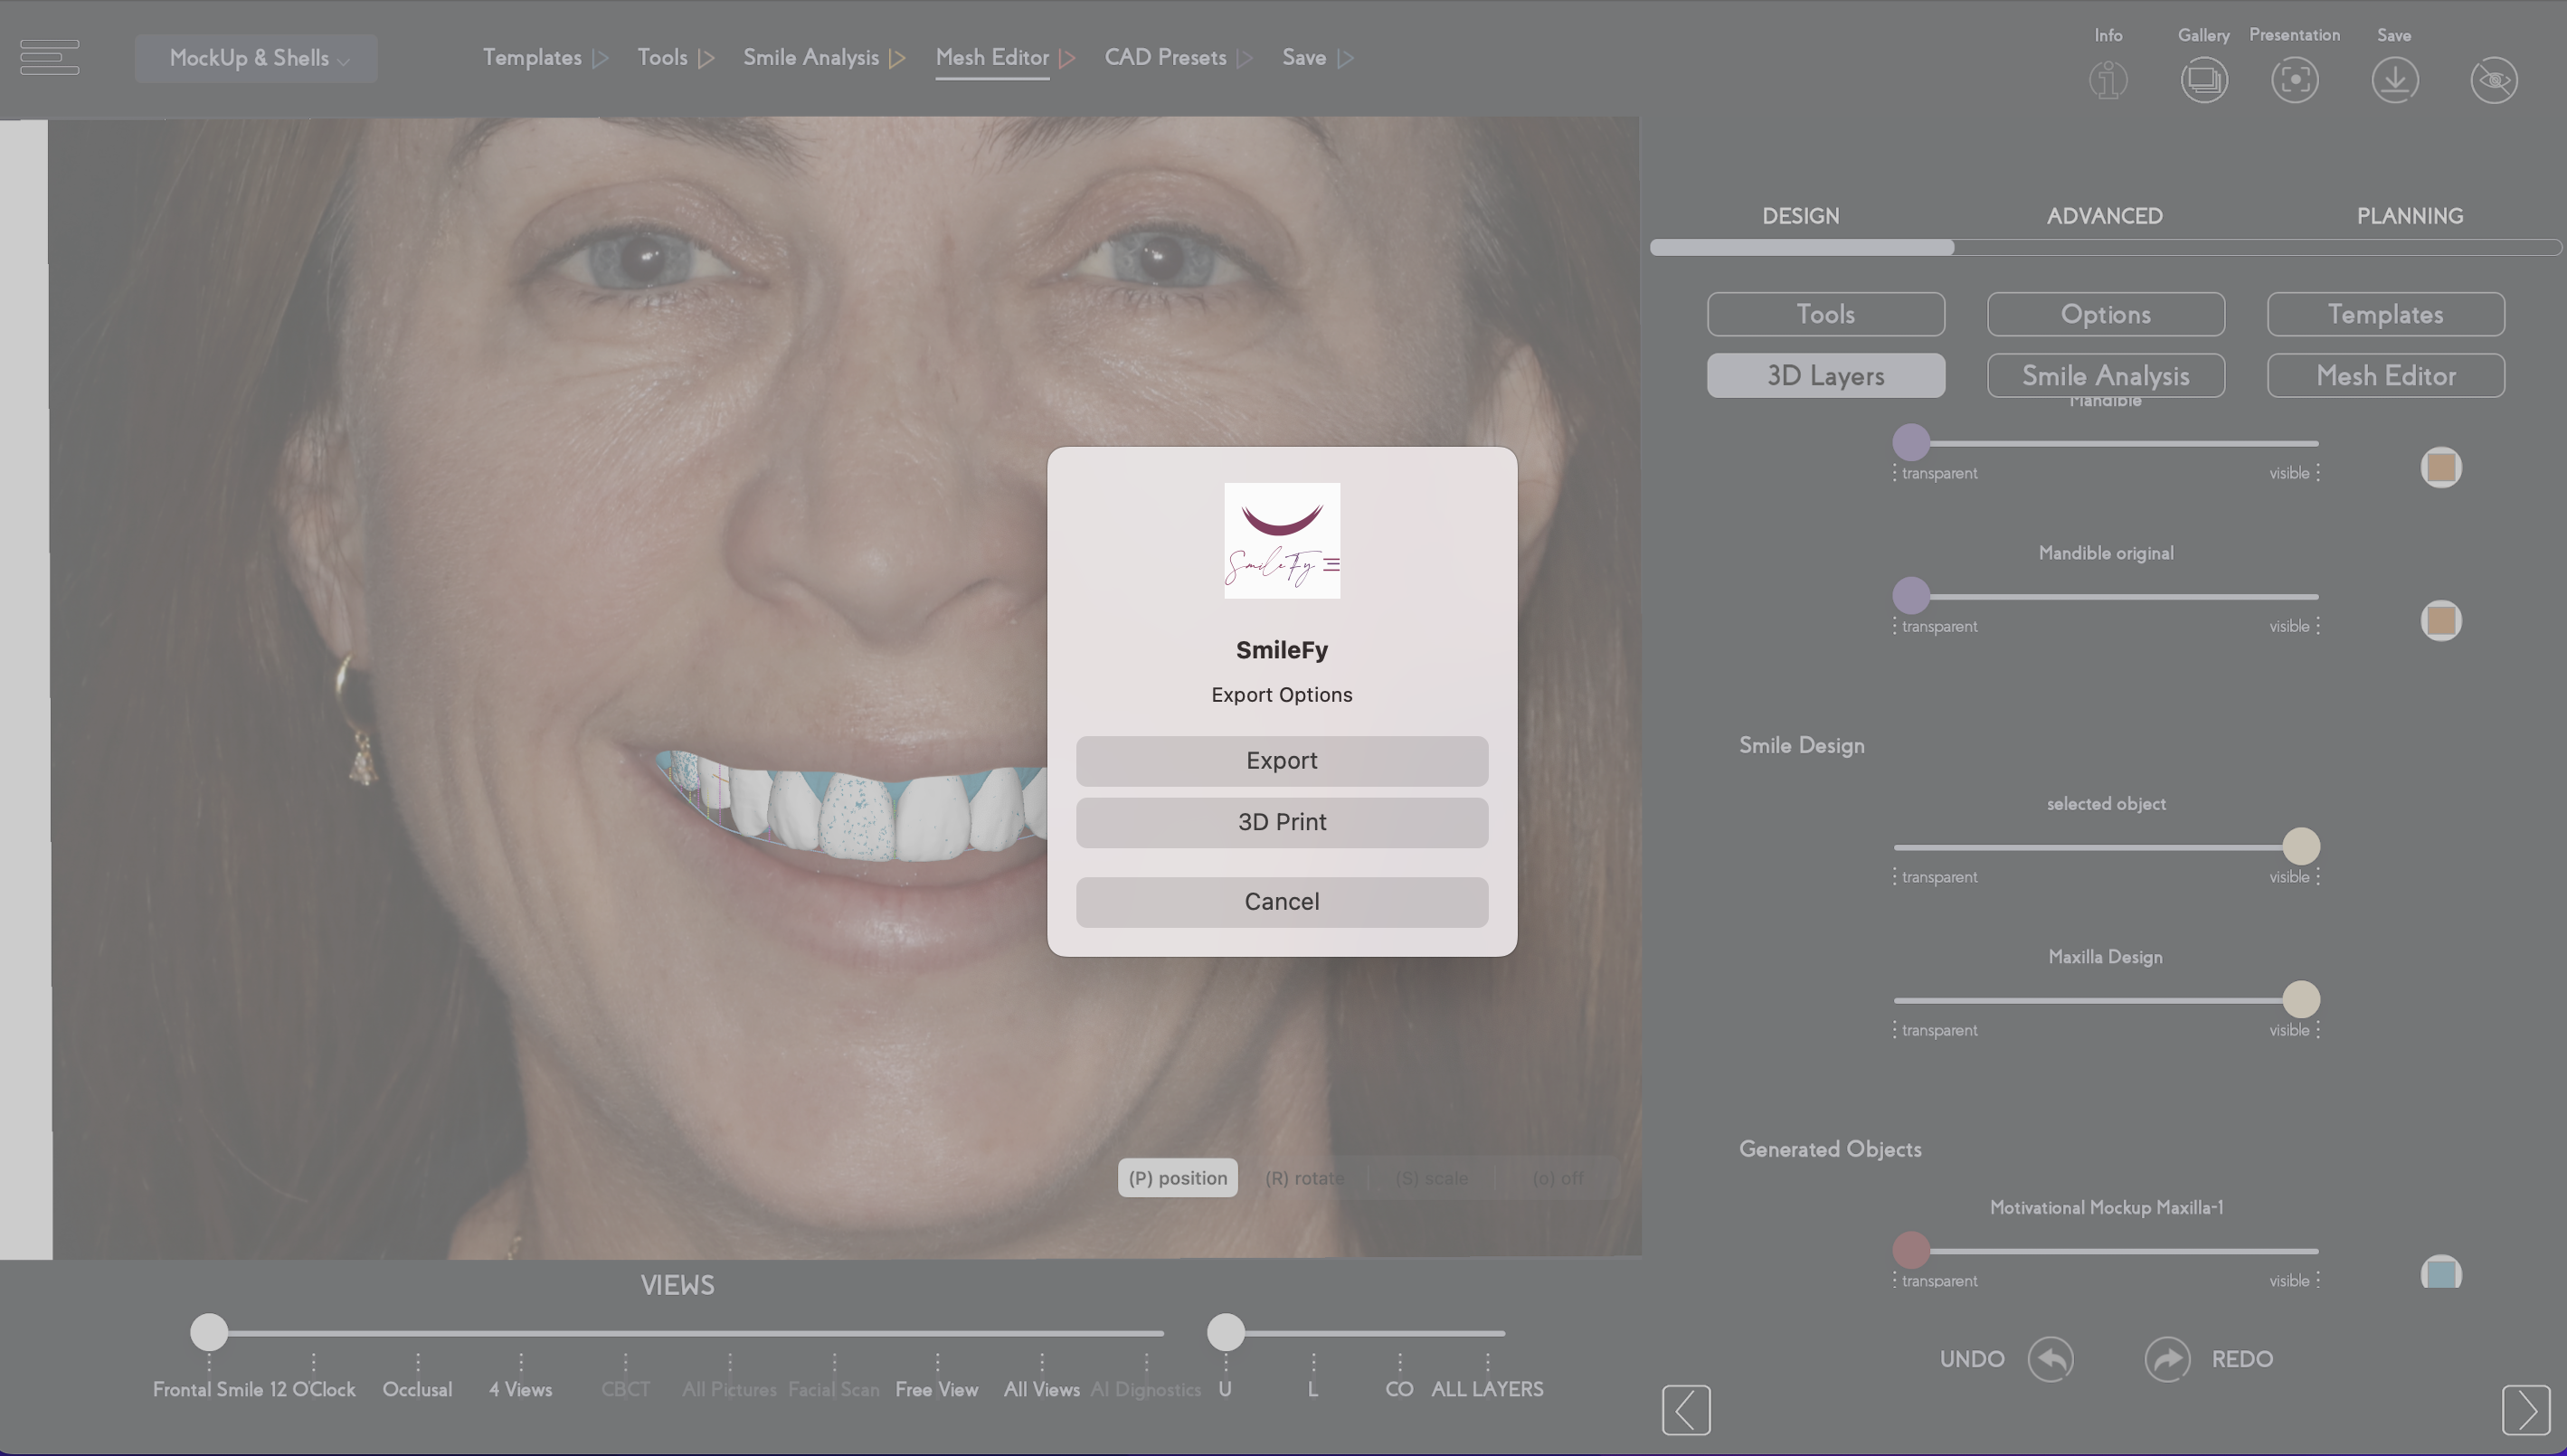
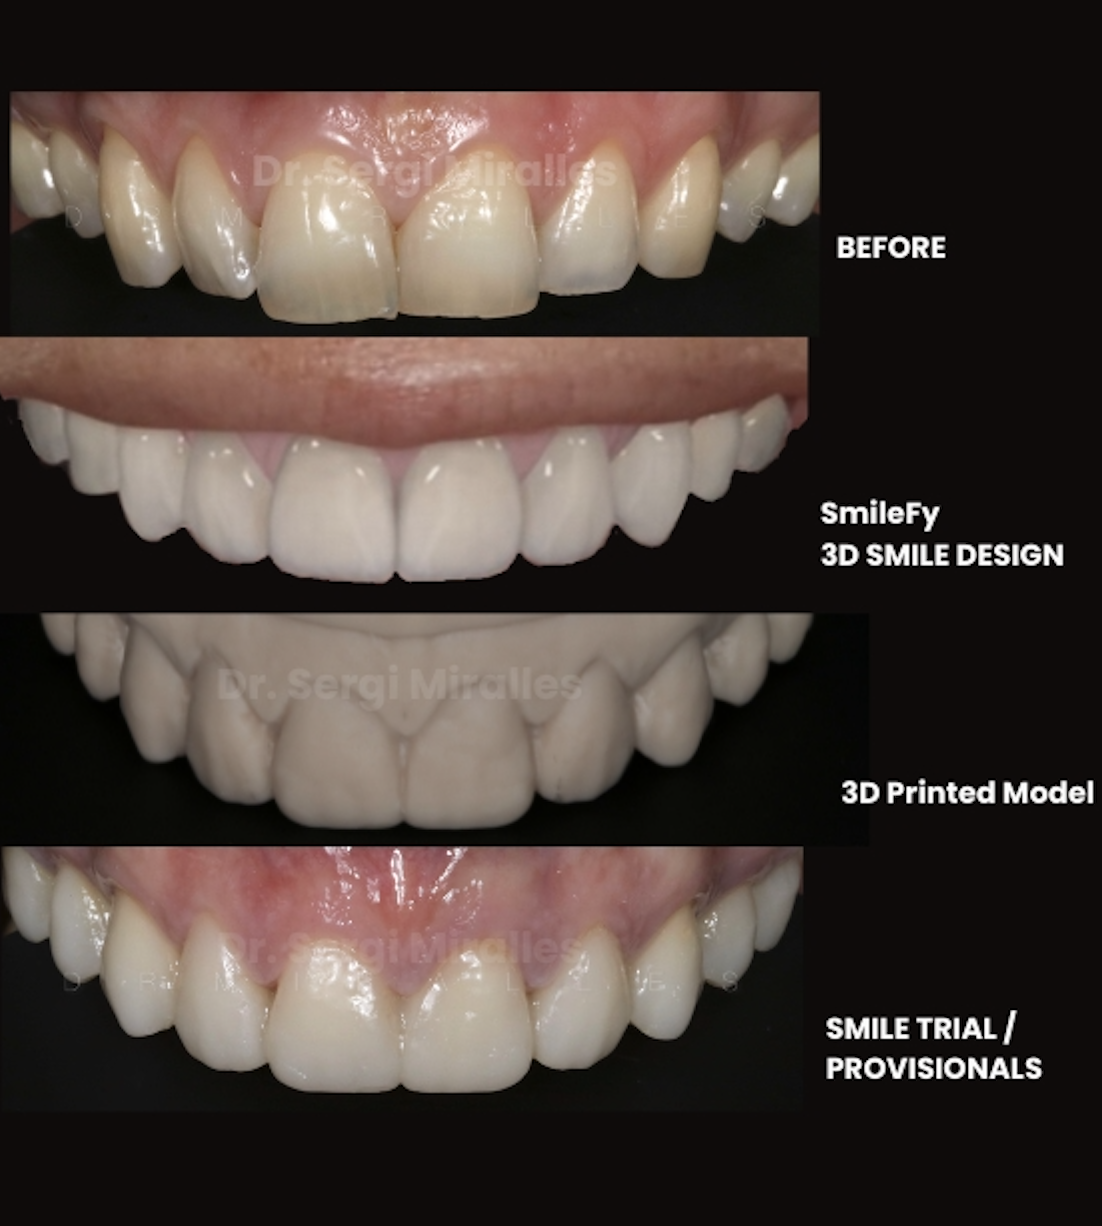
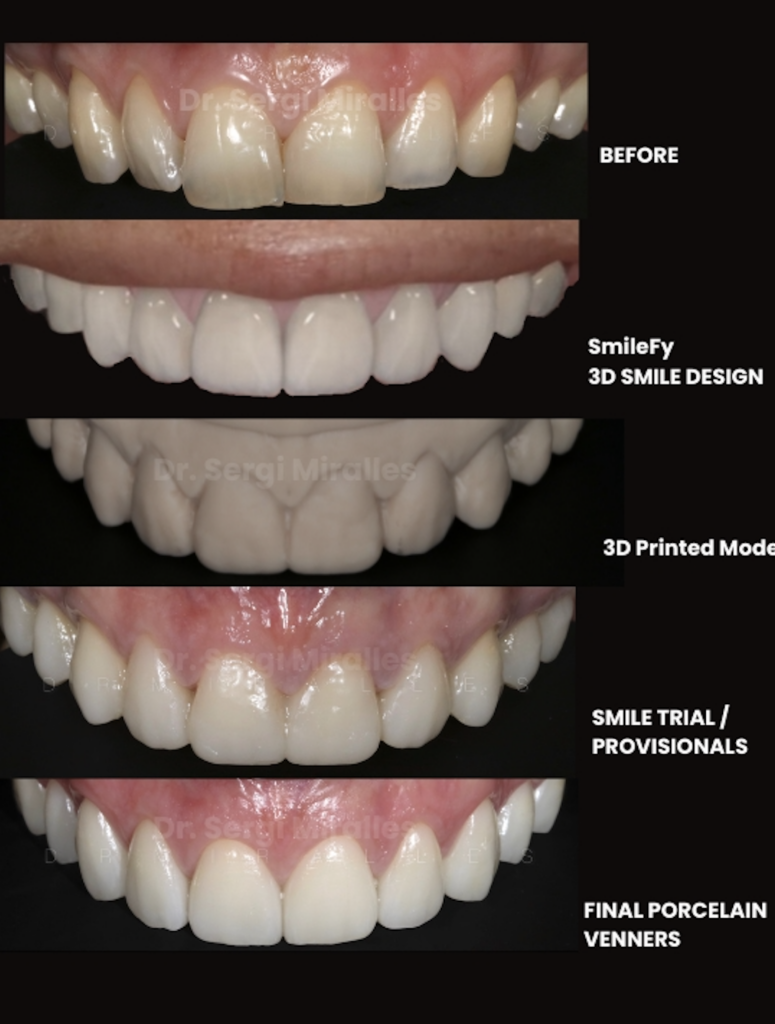
The files were exported as a 3D print-ready document (.stl file) and sent to printing (Fig.10).
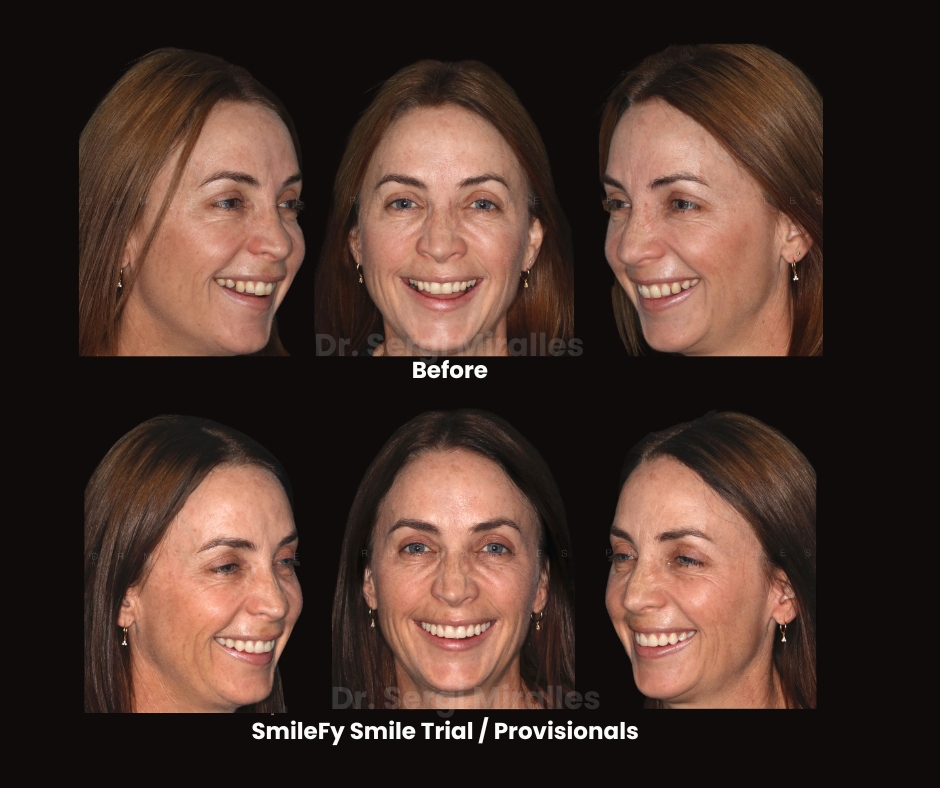
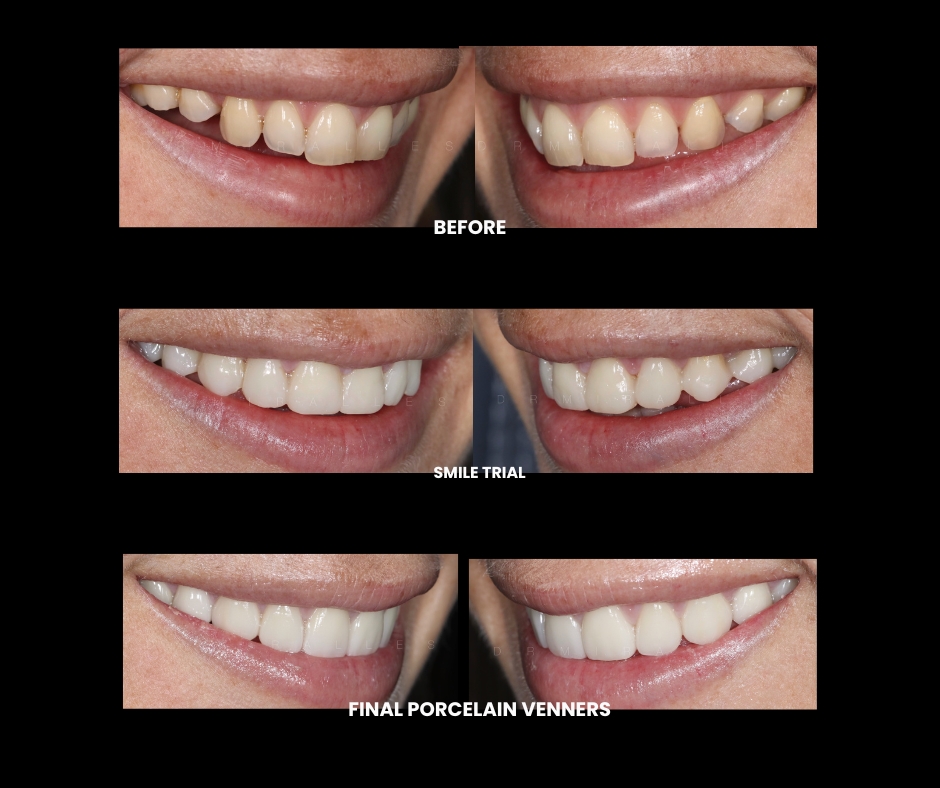
Printed Models + in-mouth Smile Trial:
A silicone key was fabricated to create a mock-up out of bis-acryl resin. The mock-up was placed onto the patient’s teeth, and when shown to her, she expressed how satisfied she was with the aesthetics and natural look of her new smile.
The Clinical procedure:
Stage 0: No teeth whitening was performed before the minimally invasive restorative procedure.
Stage 1: Based on the facially-guided digital design, the diagnostic wax-up guided a gingivoplasty on 21 to achieve a better gingival margin position. Then, 10 upper anterior teeth were prepped, digital impressions were taken, and a set of temporaries were inserted.
The diagnostic 3D wax-up was used as a guide to place the provisional veneers (Fig. 11).
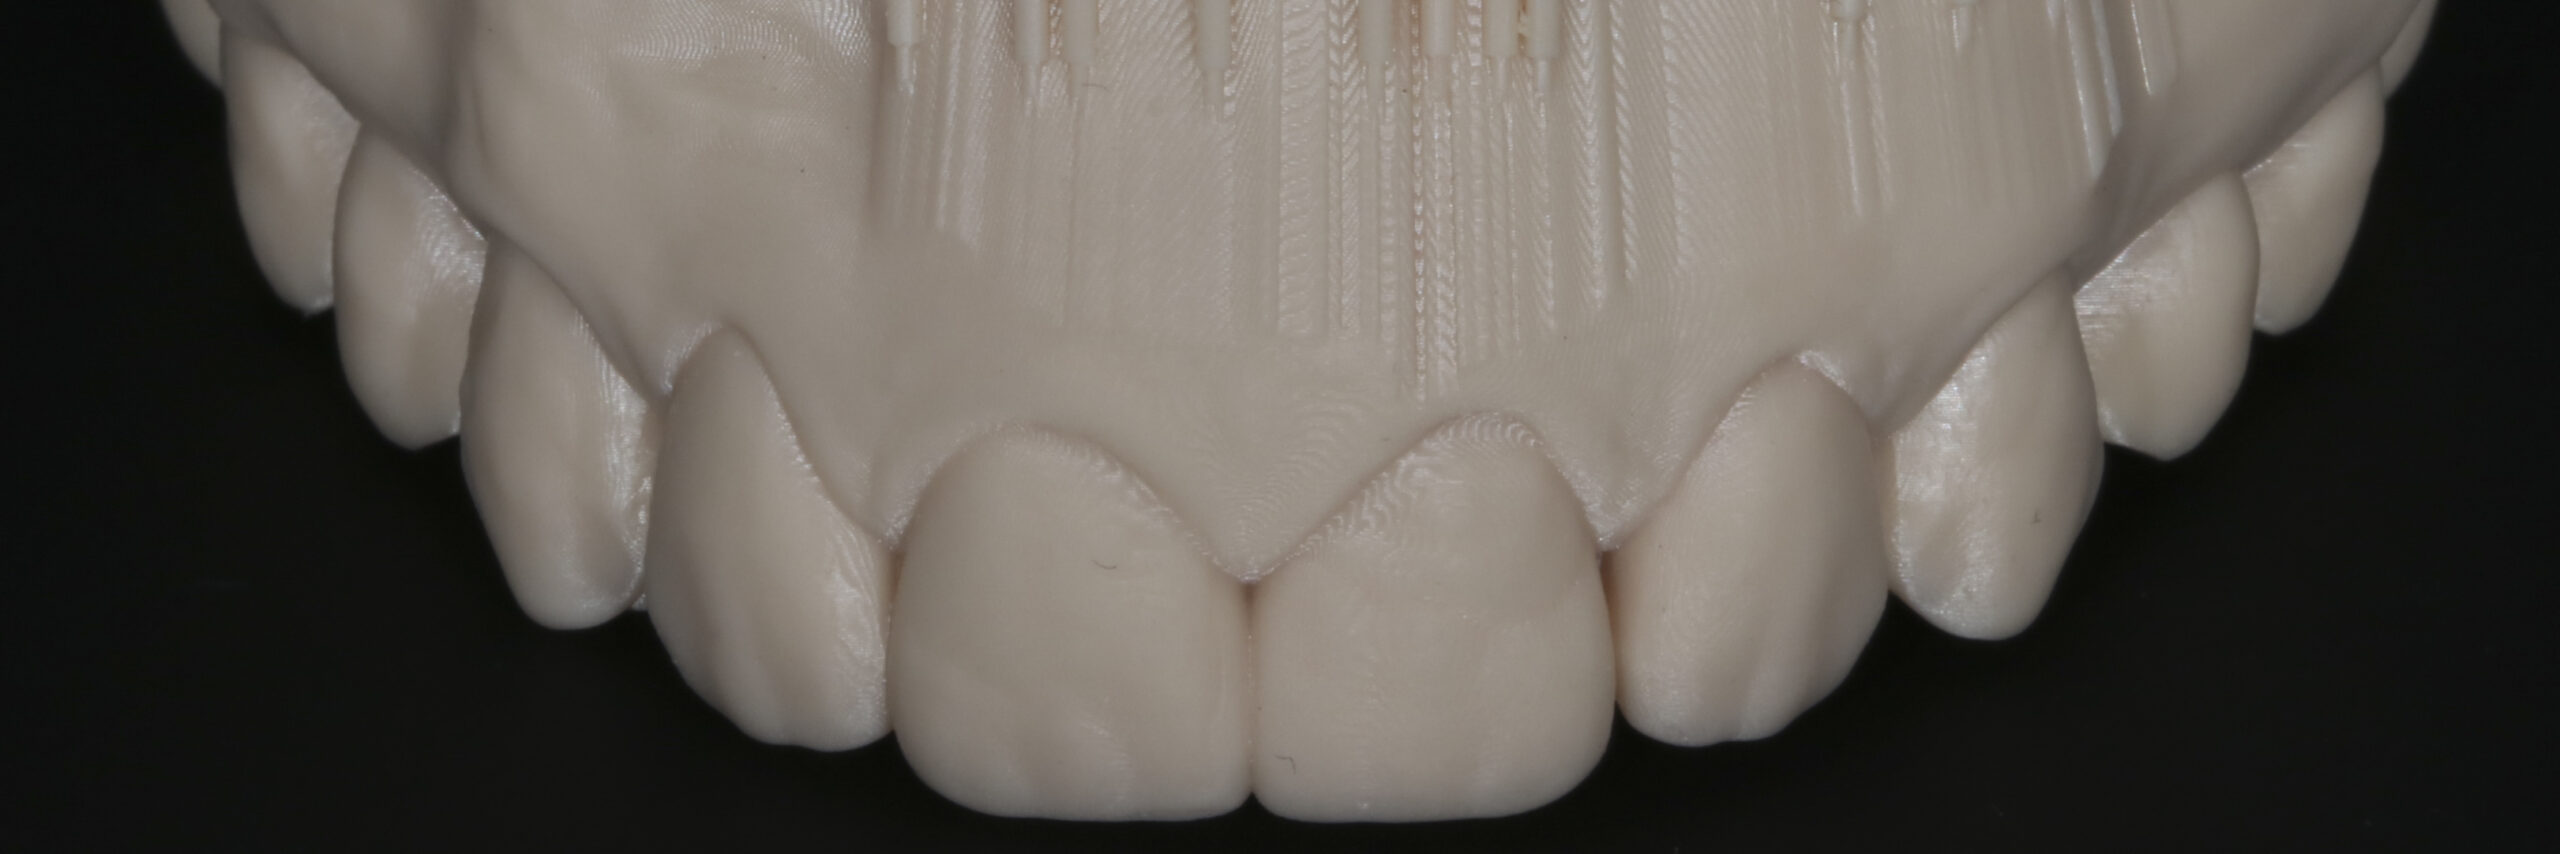
Stage 2: After a quick recovery period, the gums & temporaries were re-assessed (Fig.12). No adjustments were needed, and a final teeth impression was taken before hand-crafting the final porcelain veneers.
To better collaborate with the dental technician, the following documents were exported from the SmileFy app and sent to the dental laboratory via Dropbox:
- All initial pictures and clinical measurements.
- 2D Smile simulation image.
- 3D teeth template (shapes overlapped on her teeth) digital files.
- 3D wax-up digital files.
Written instructions, final prepped teeth position impression, and other details to consider were sent to the lab to layer the final 10 LiDiSi veneers (Fig.13).

The final porcelain veneers were then imported into the dental laboratory’s CAD/CAM software, pressed, and layered.
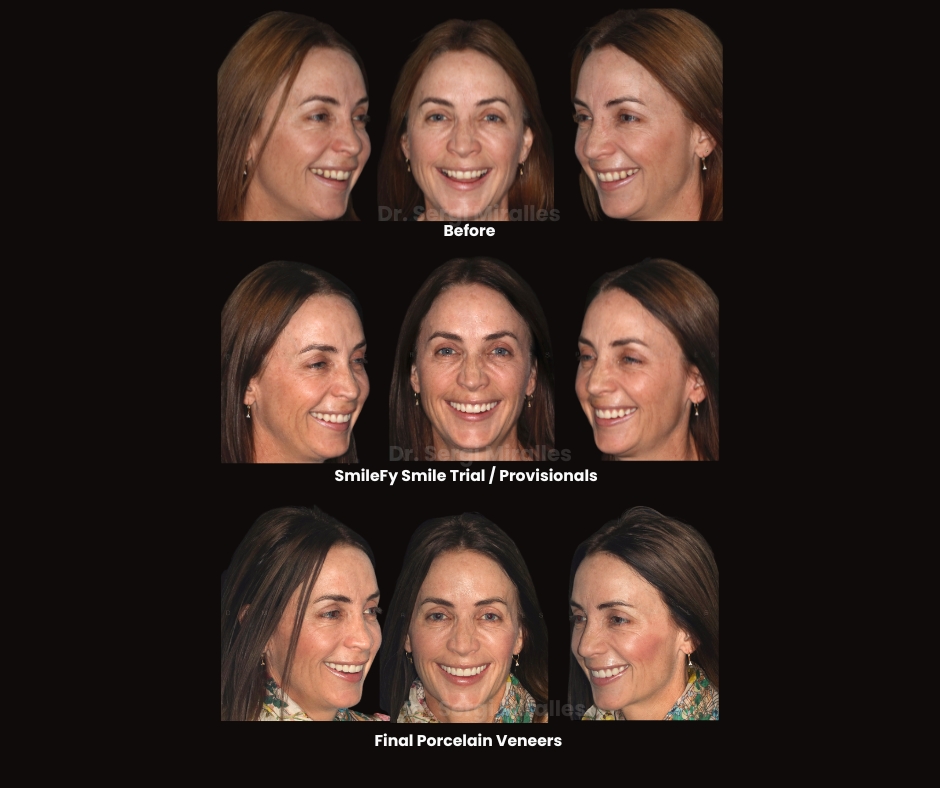
Stage 3: The 10 anterior porcelain veneers were delivered to the dental practice based on the 3D teeth templates and mockup files exported from the 3D smile design created on the SmileFy App. The 10 porcelain veneers and the prepped teeth were conditioned in accordance with the manufacturer's instructions and treated following an adhesive cementation protocol. The occlusion was evaluated, and final polishing was performed. (Fig 14A, 14B).
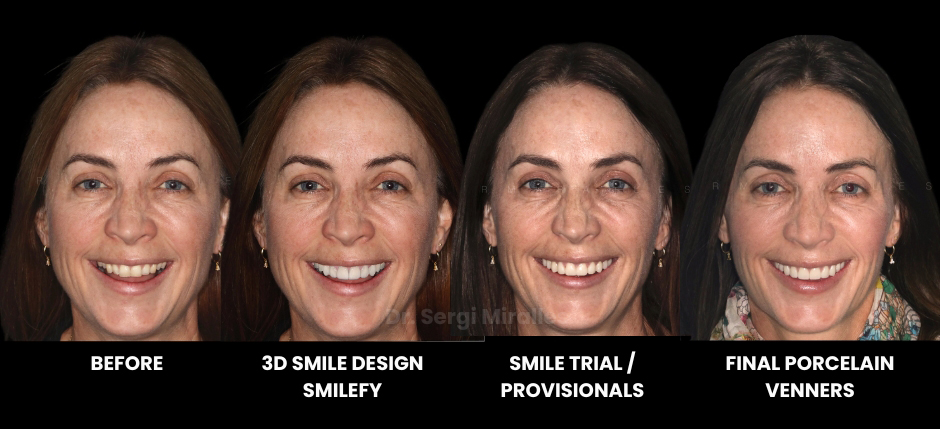
Stage 4: A follow-up appointment was booked a week after to asses any potential post-operative symptoms, gum health status, and occlusion stability,… A night guard was inserted, and final pictures were taken.
The patient was given the necessary post-operative instructions. The patient was satisfied with the final outcome at that stage, and the case was considered completed. (Fig. 15).
The Patient’s Satisfaction:
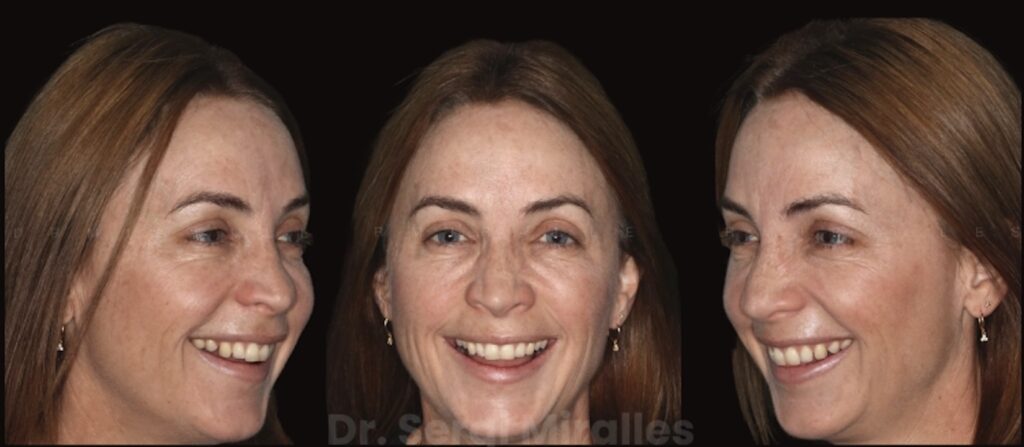
The patient was really happy with the results and the overall experience. After seeing the temporaries and the 3d wax/up, she emphasized how predictable the final result was. After the follow-up appointment where the temporaries were reviewed, she went for an almost 2 weeks cruise around some pacific islands and had no functional nor aesthetic issues whatsoever”.- Dr. Sergi Miralles (Fig. 16A, 16B, 16C).
The Conclusion:
SmileFy is a world-renowned software available to every dentist who wants to elevate his/her dental workflows and patients' experiences.
With one purpose in mind, the SmileFy App helps doctors worldwide achieve better outcomes through facially generated smile designs and printable mockups as an essential tool to guide them and their dental technicians and, most importantly, to deliver an outstanding patient experience.