")

Case Report Information
- Case Report byDr. Andres Reyes and Dr. Allan Queiroz
- Information
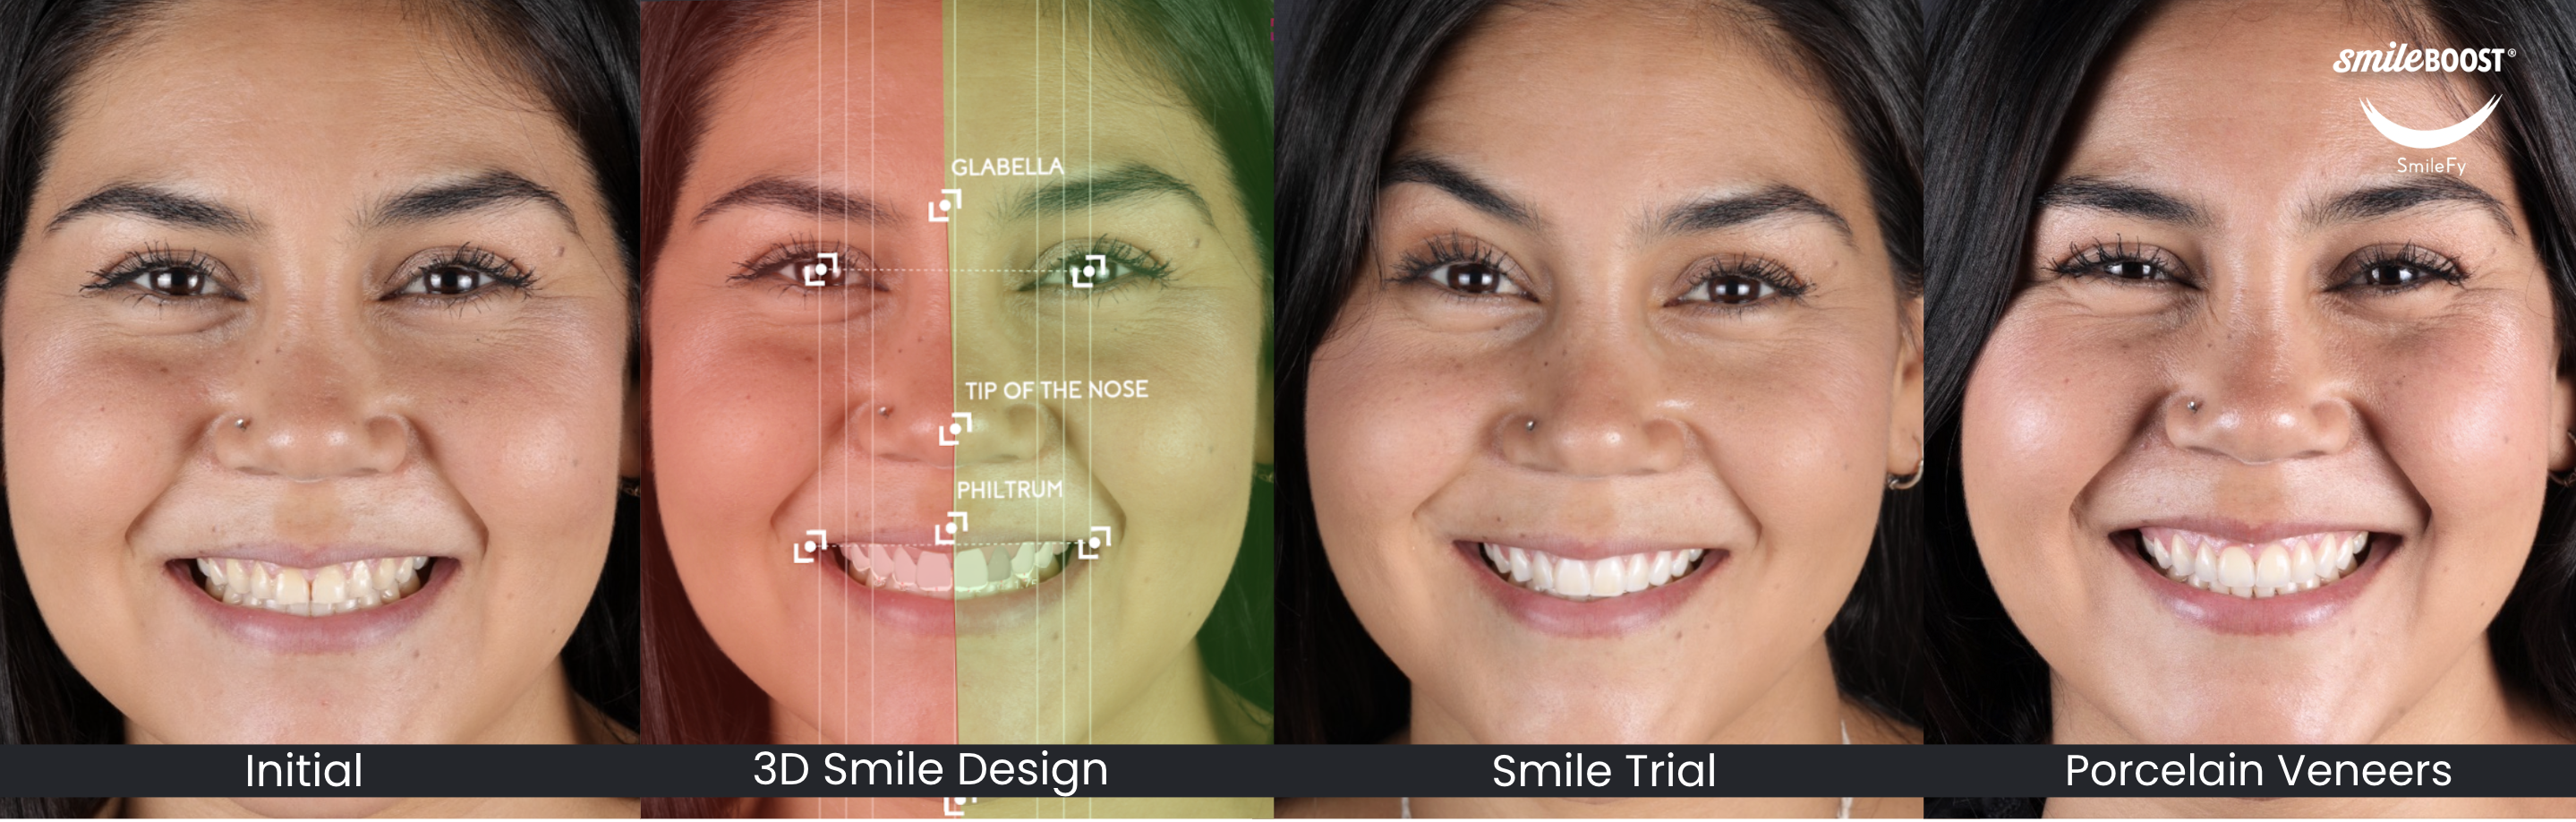
Talented Dr. Andrés Reyes and Dr. Allan Queiroz showcase the in-office 3D Smile Design for an Open-Method Clinical Prep Sequence and Bonding of Dental Porcelain Veneers utilizing the SmileFy technology and an advanced Open-Method clinical technique to achieve outstanding natural restorations.
Introduction:
Digital workflows in ceramic laminate veneers have been presented as the ultimate solution for optimal dental esthetic outcomes.
This case report aims to showcase the importance of using simple digital methods for in-office planning and how to transfer the information from the digital setting into the patient's mouth to reach conservative and facially harmonic smiles.
The First Appointment
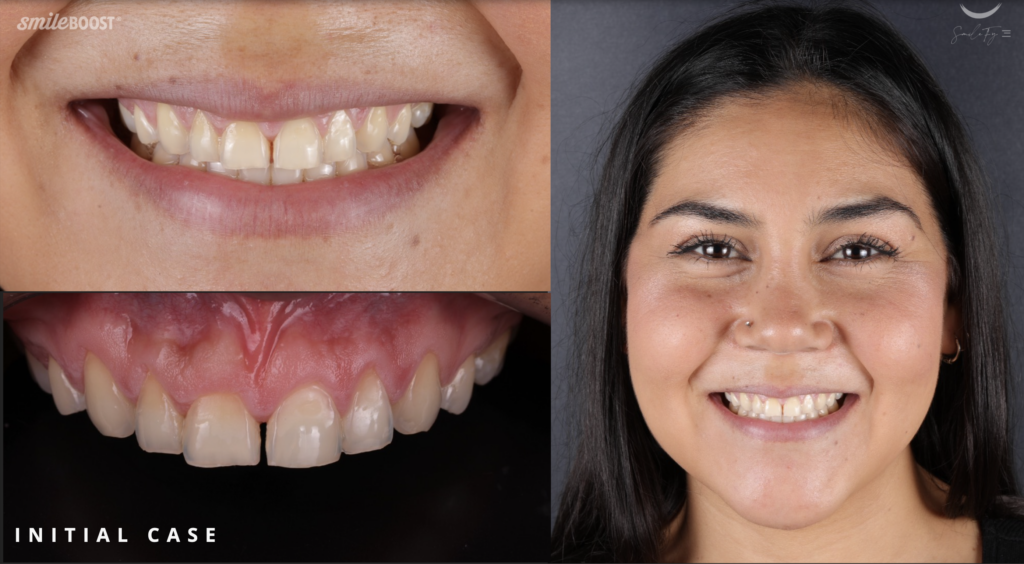
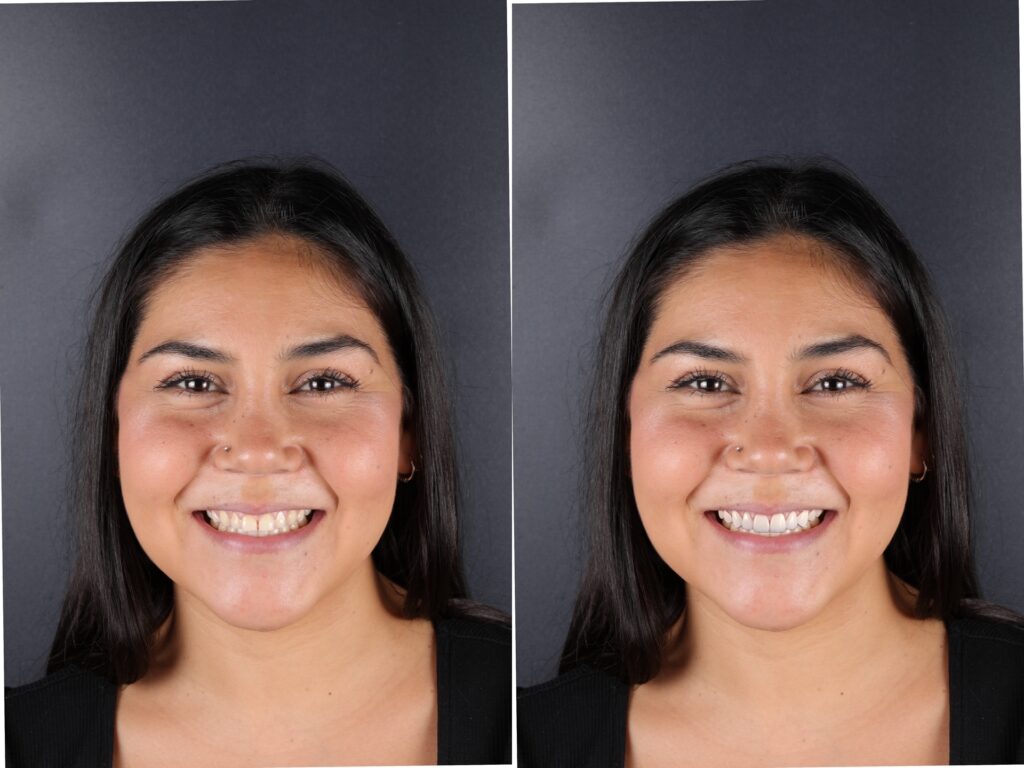
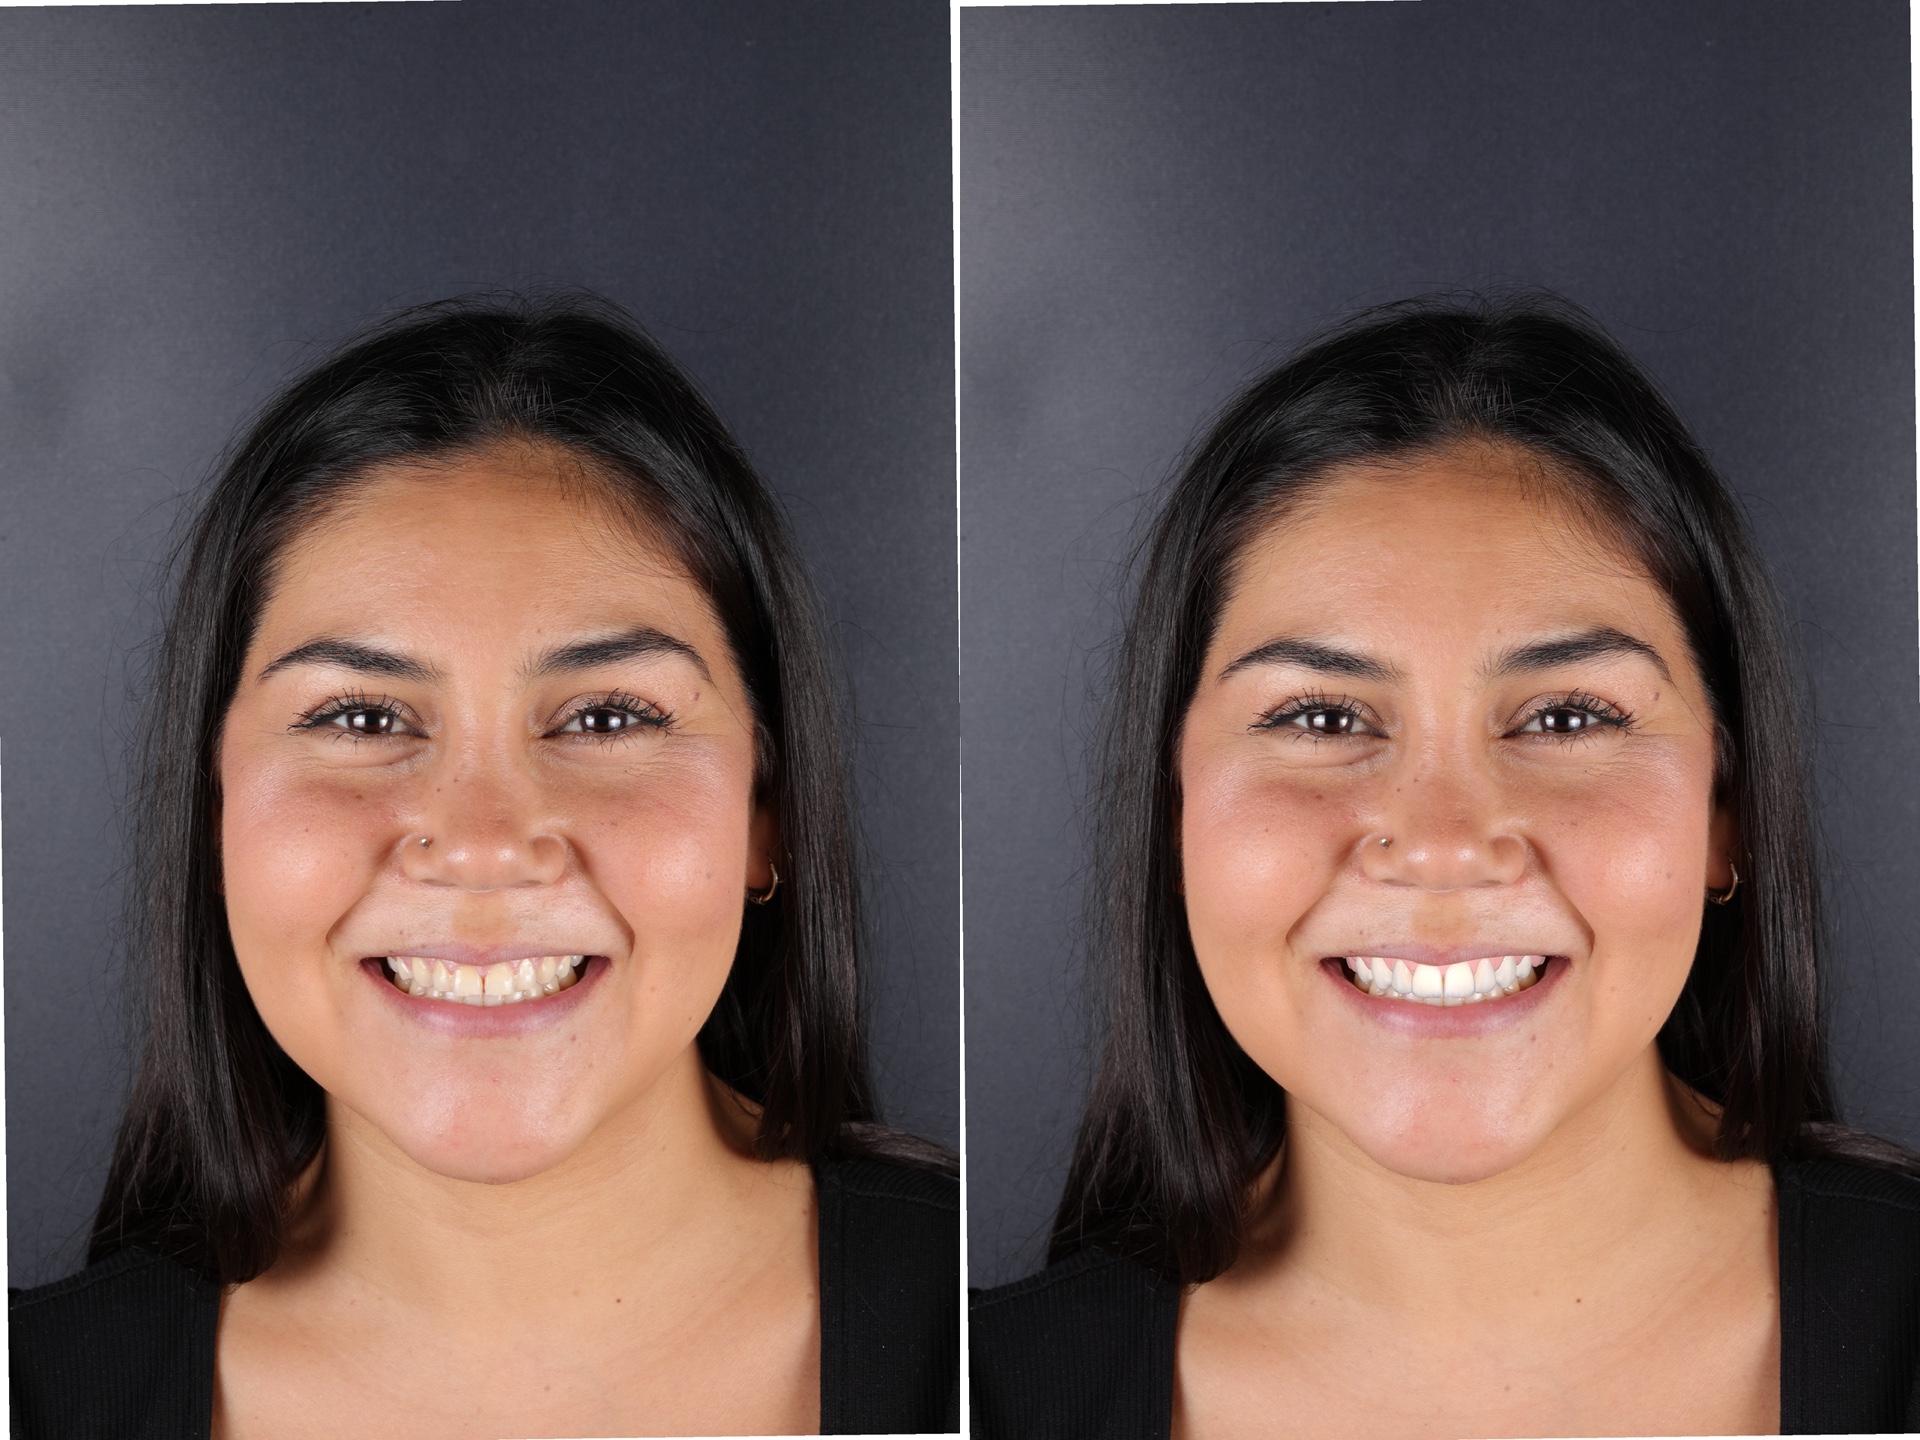
A young adult female patient came to SmileBoost Dental Clinic in Santiago - Chile, whose main complaint was improper teeth proportion ( small in dimension), a diastema, and yellowish teeth shades. Fig.1
Chairside A.I. Smile Simulation
After the necessary clinical examination, the patient was asked to sit straight, and a smiling facial photograph was taken. The A.I. Smile Simulation was quickly created in the SmileFy Software, which allows you to better illustrate and discuss the aesthetic changes and smile enhancements while considering the patient's wishes.
The proposed treatment plan + IO Scanning
Considering the patient’s primary complaints and clinical findings, a Smile Design with 8 disilicate laminated veneers to harmonize her smile with better proportions, texture, and shade was proposed and accepted by the patient. In addition, a digital impression of the upper arch was made with an intraoral scanner to begin a 3D smile planning.
The Inter-Appointment
3D Digital Smile Design Planning
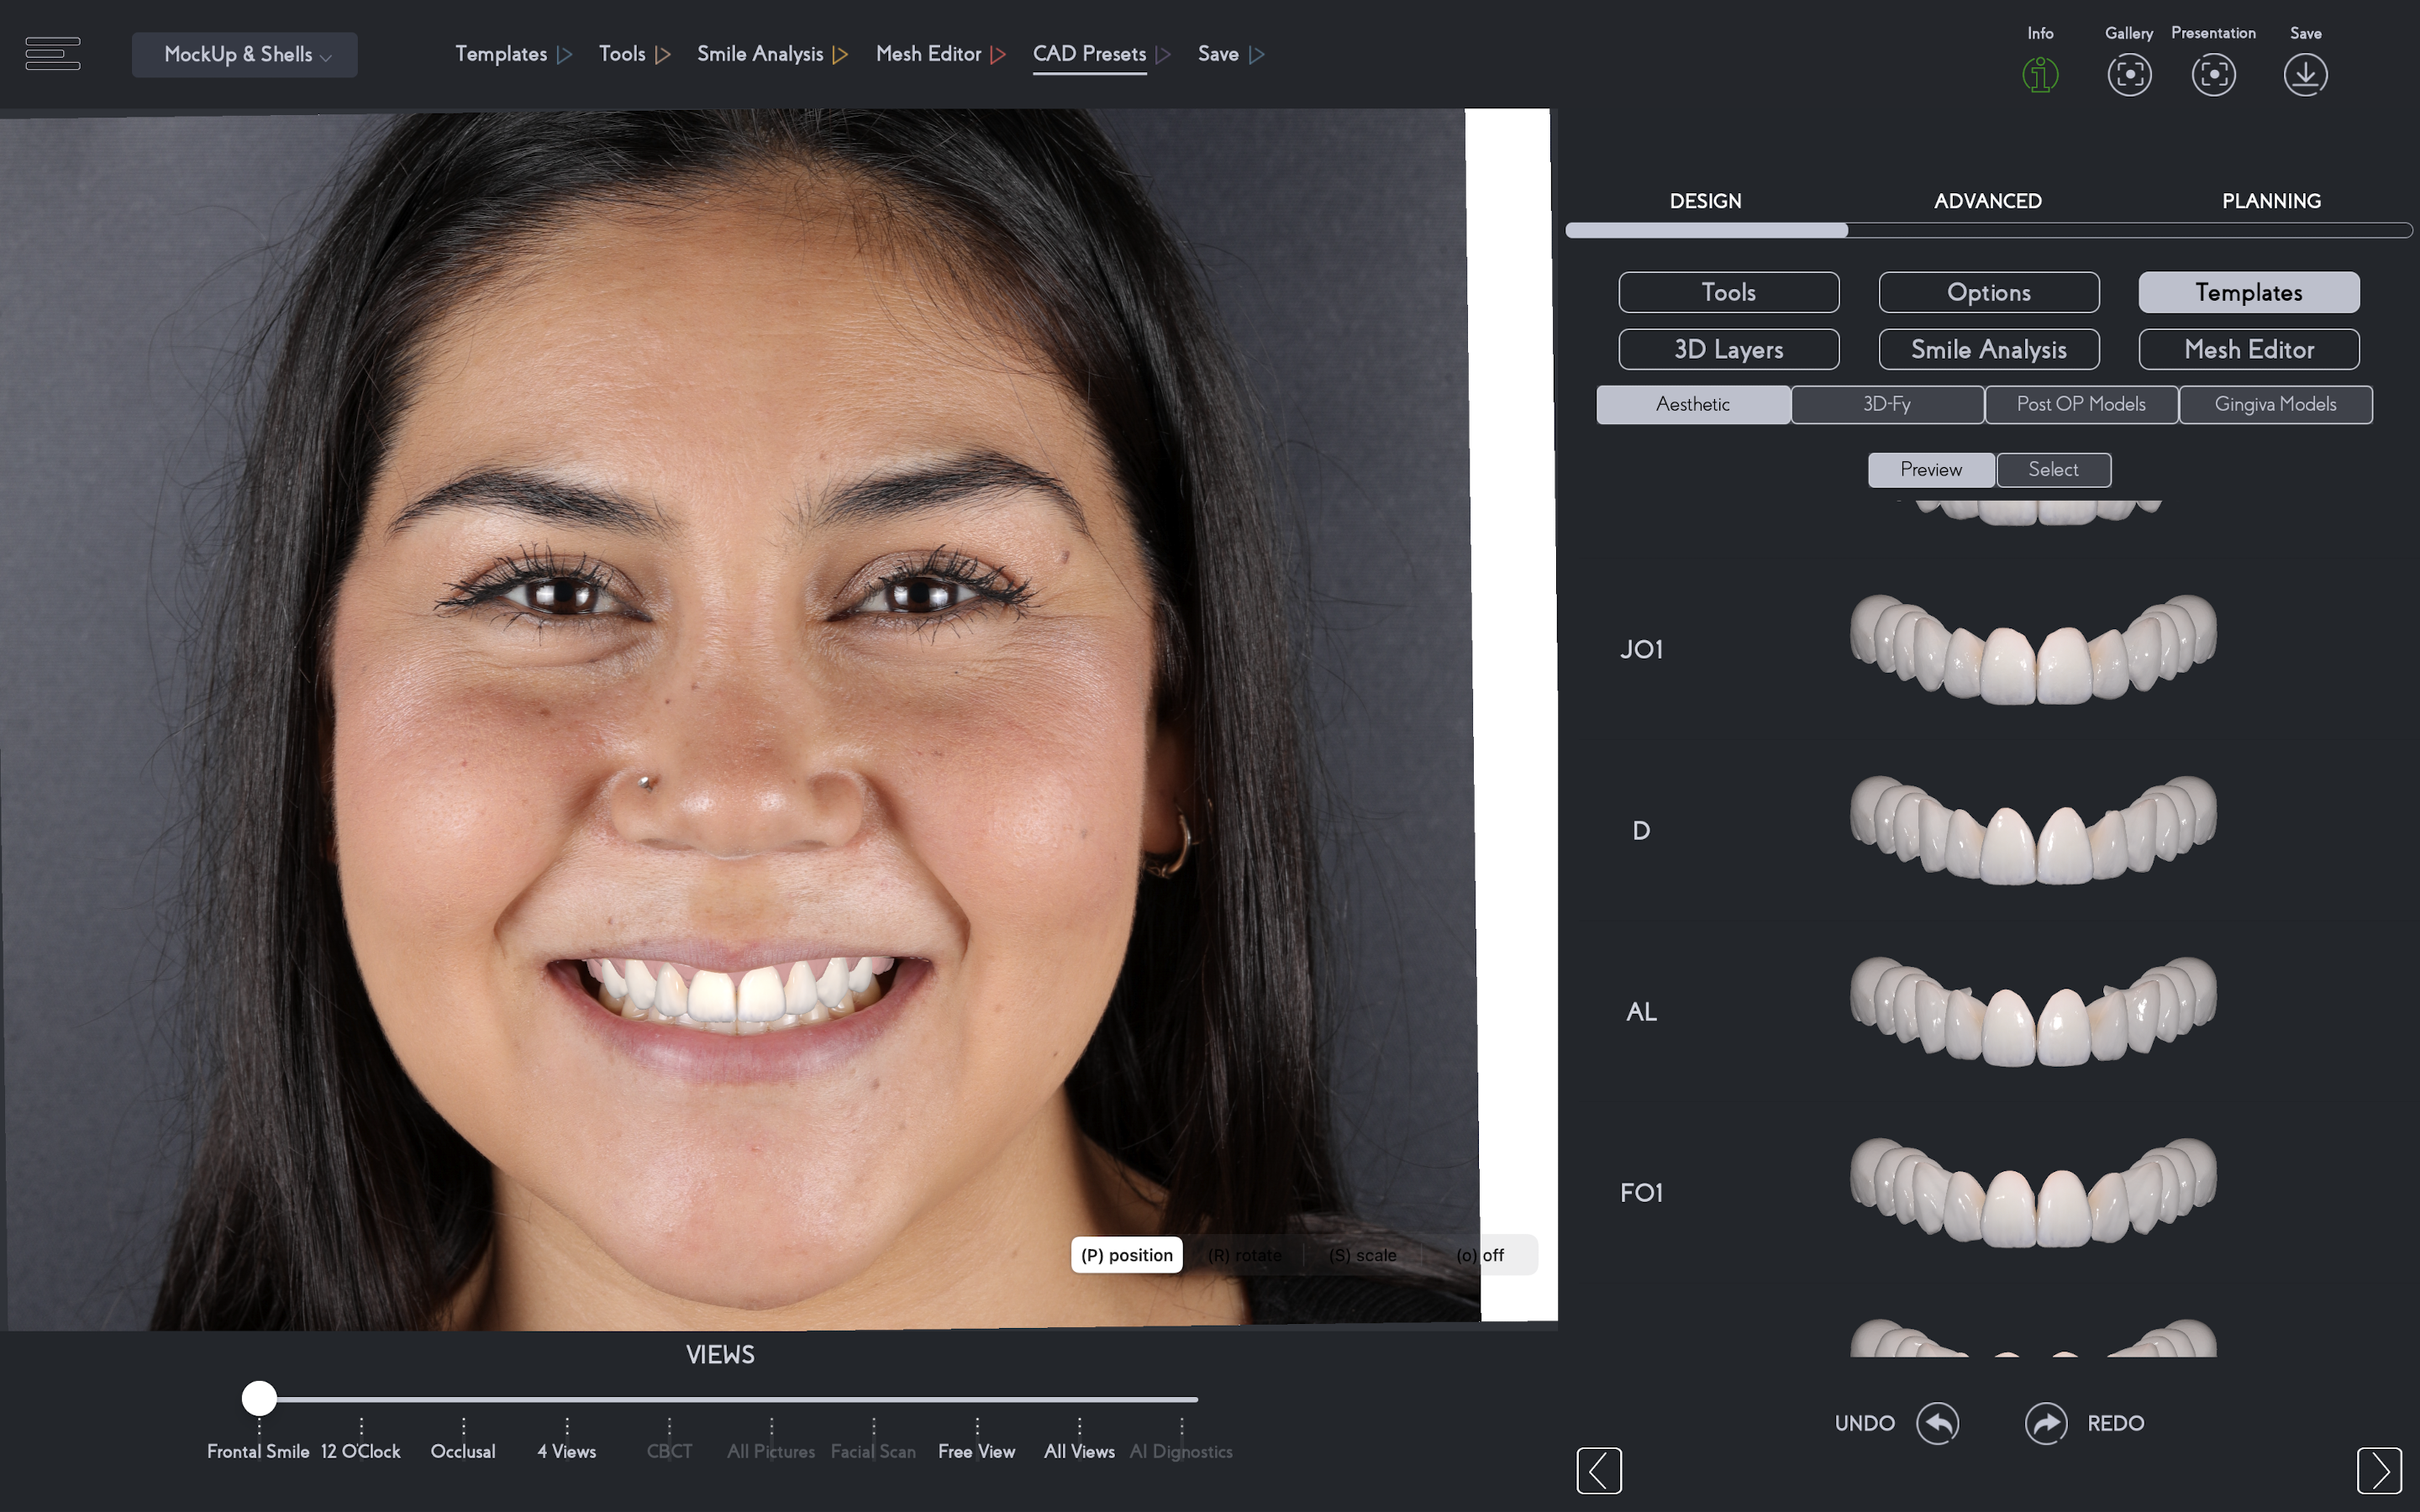
The benefit of creating 3D designs in your practice with SmileFy is that it can select from different teeth shapes, export the model so you can print, and perform a smile trial on your patient's next visit, shortening the overall time and lab cost.
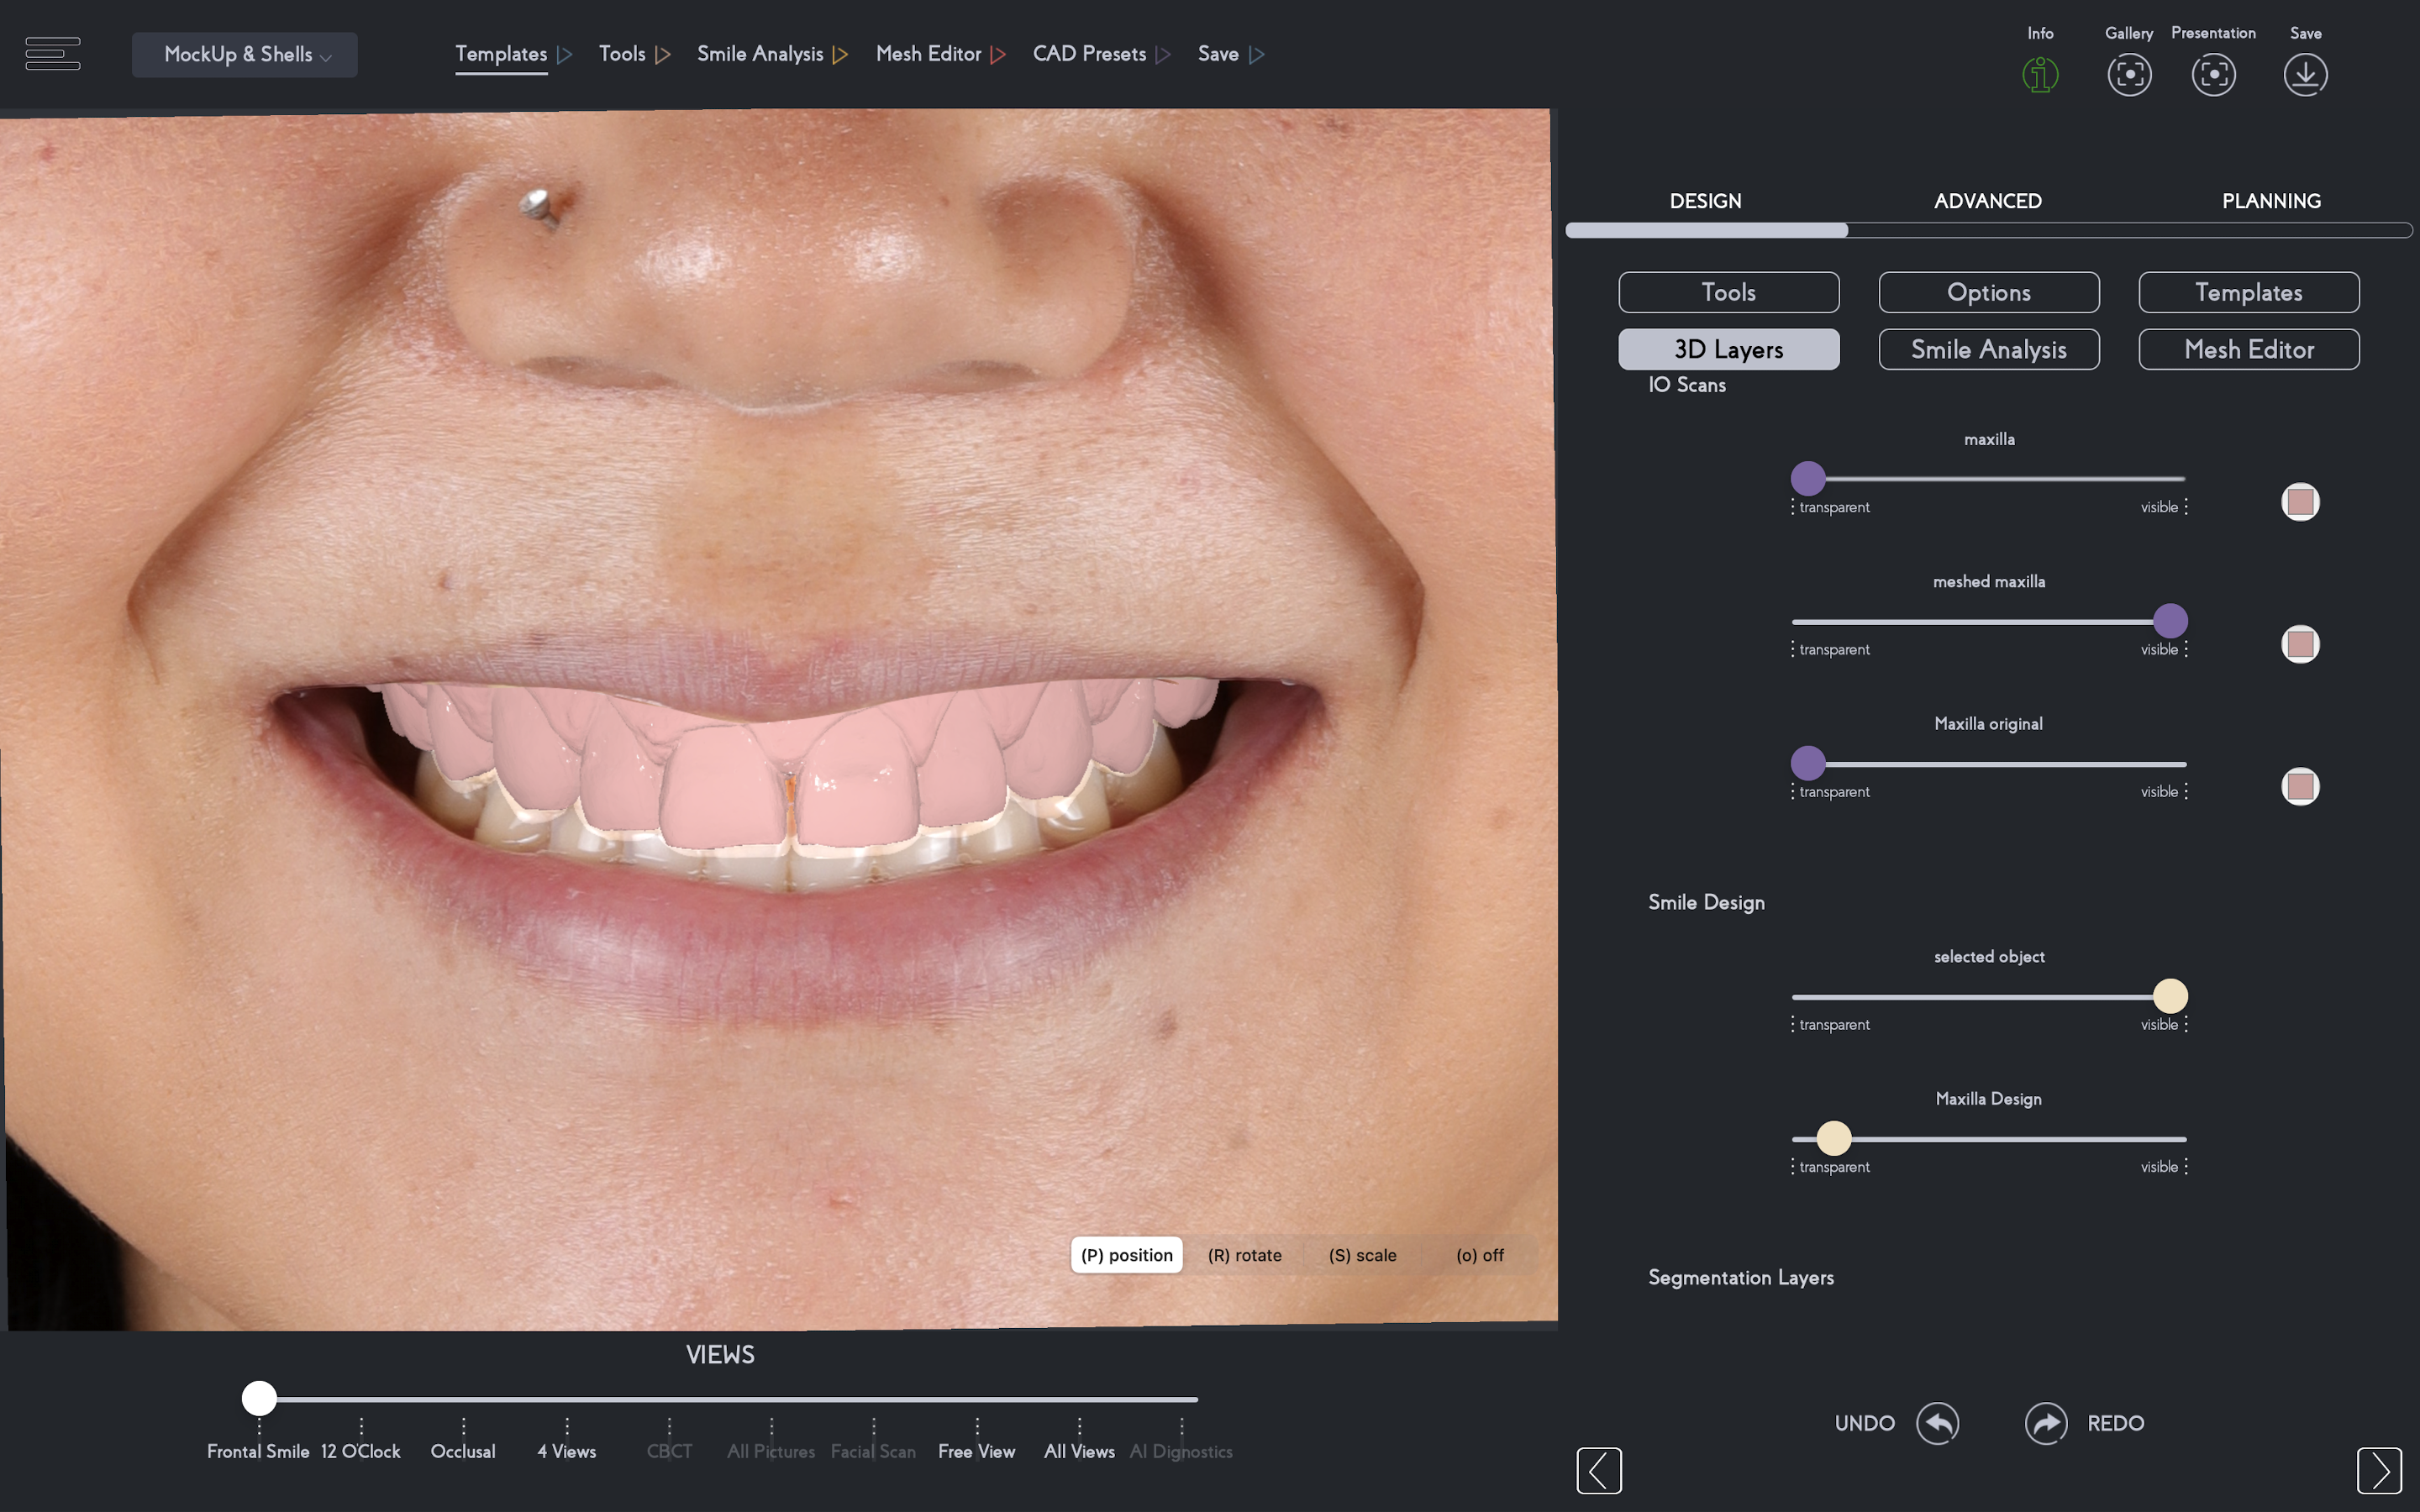
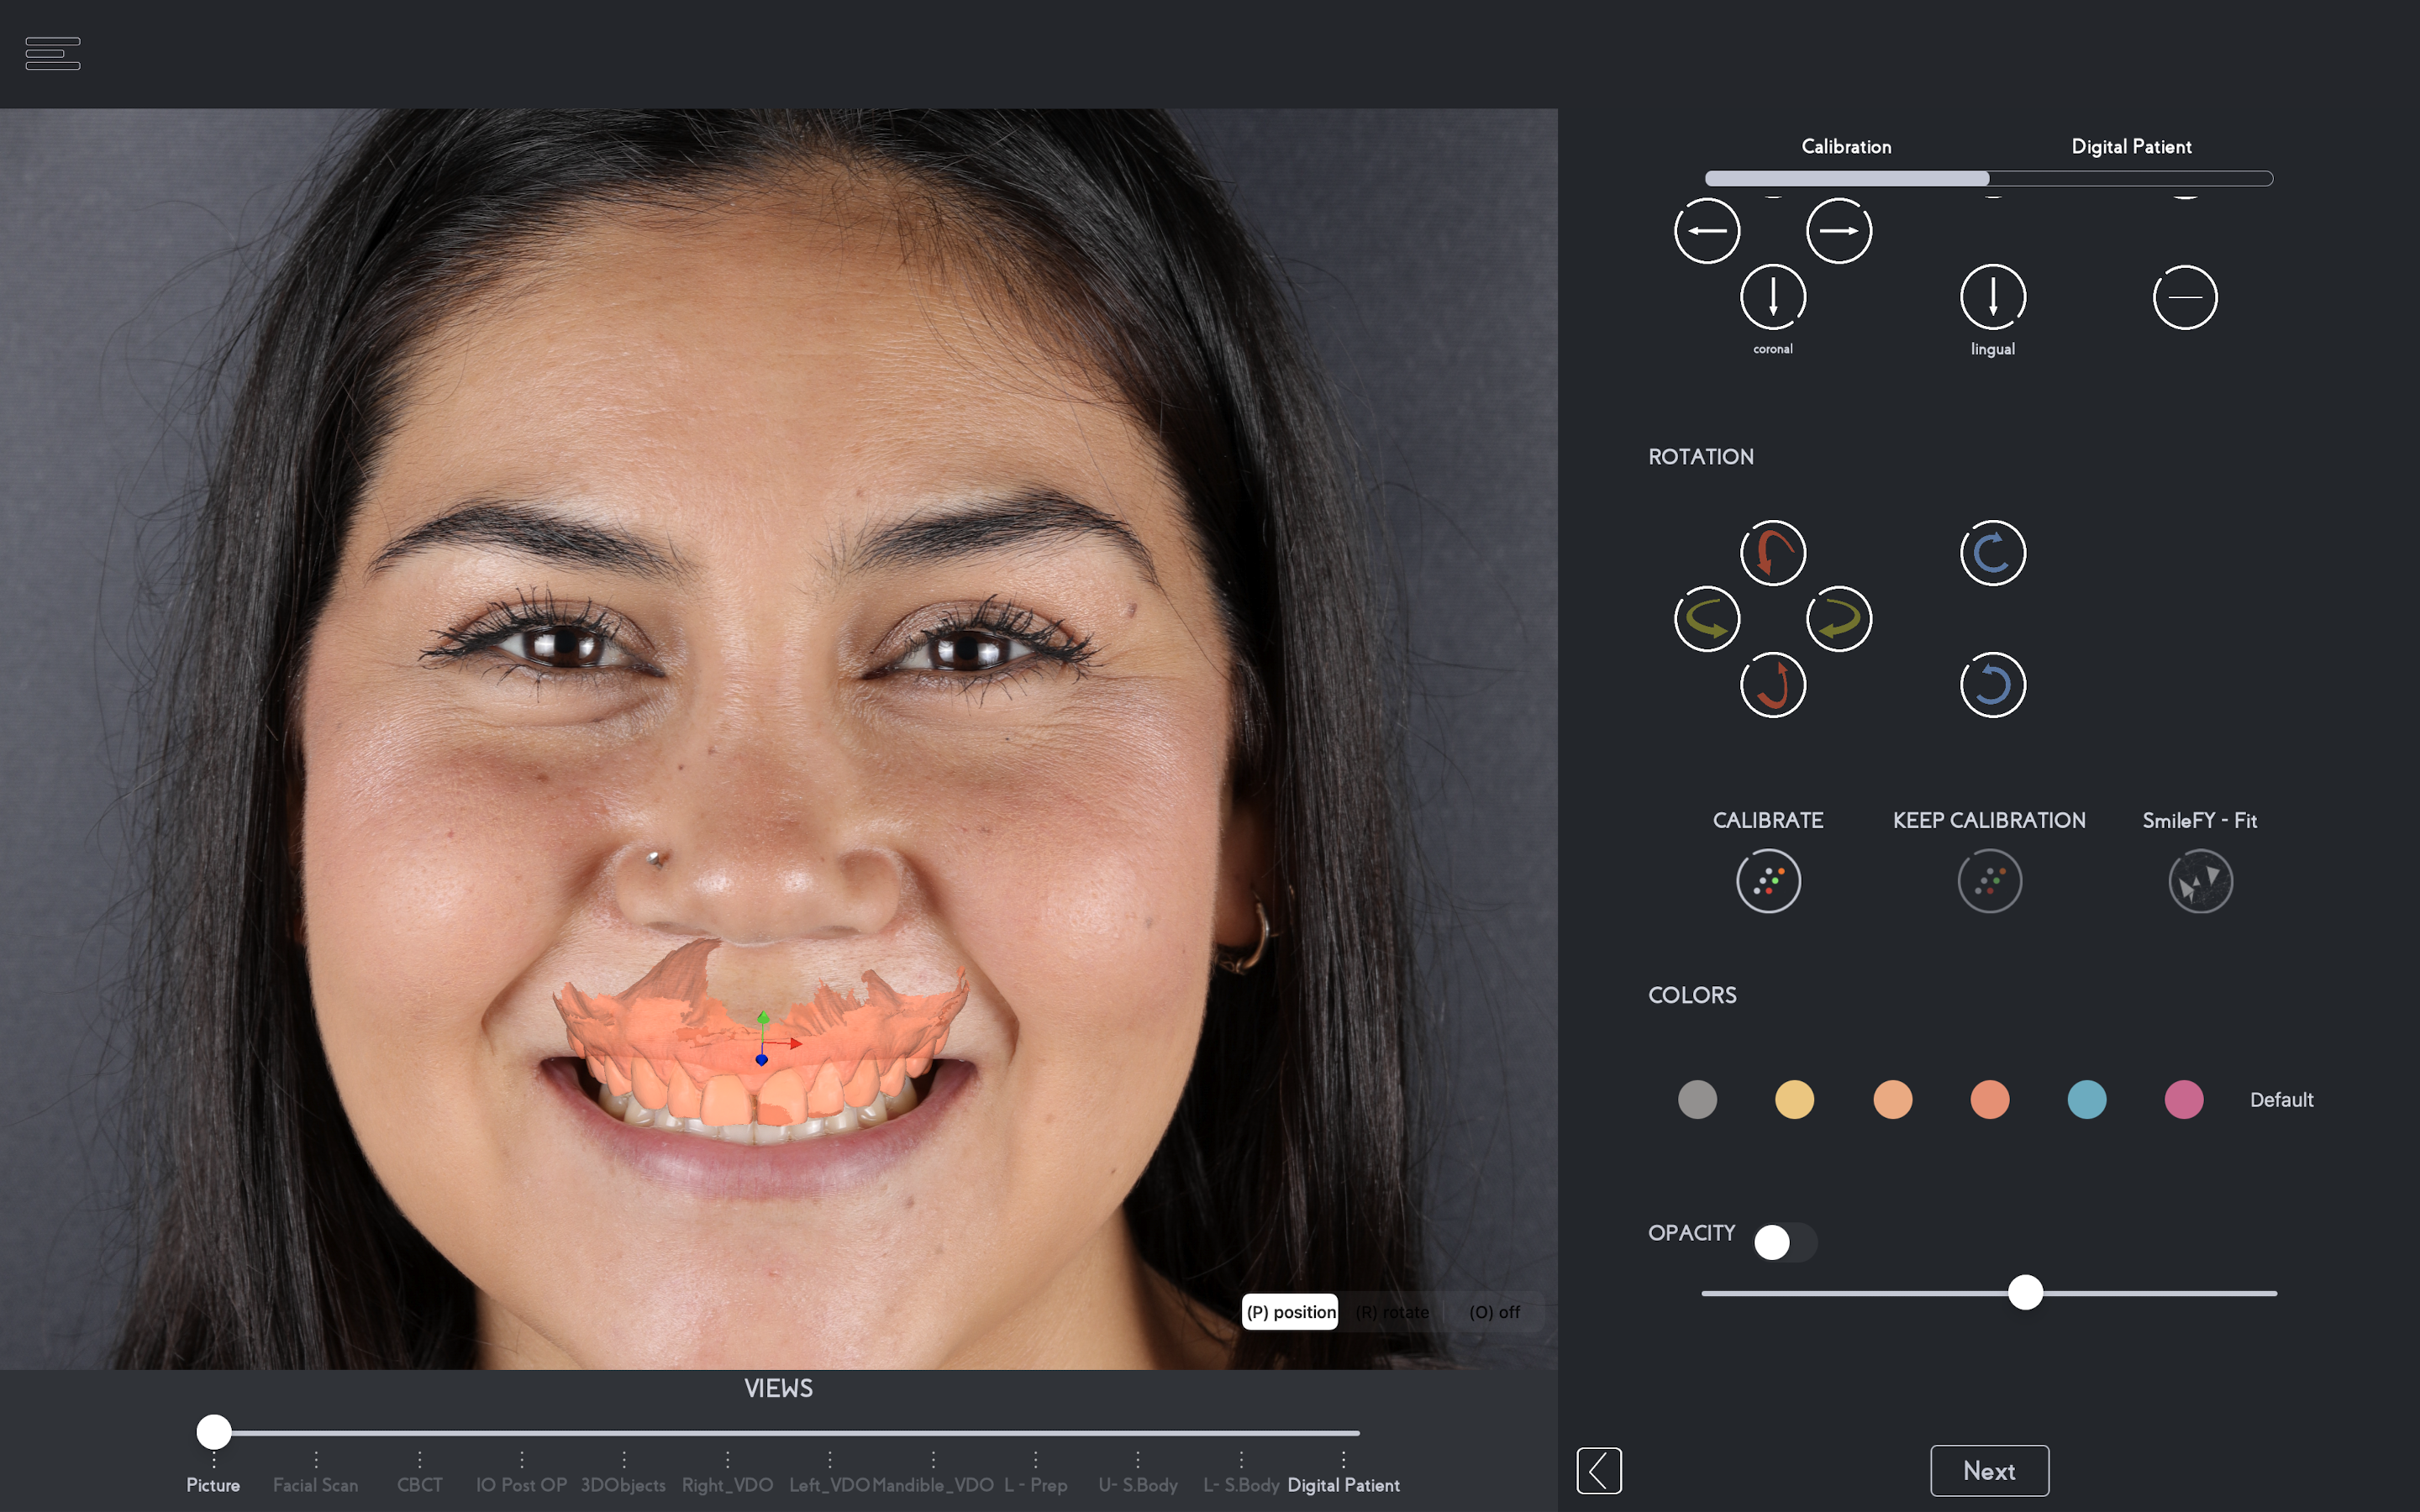
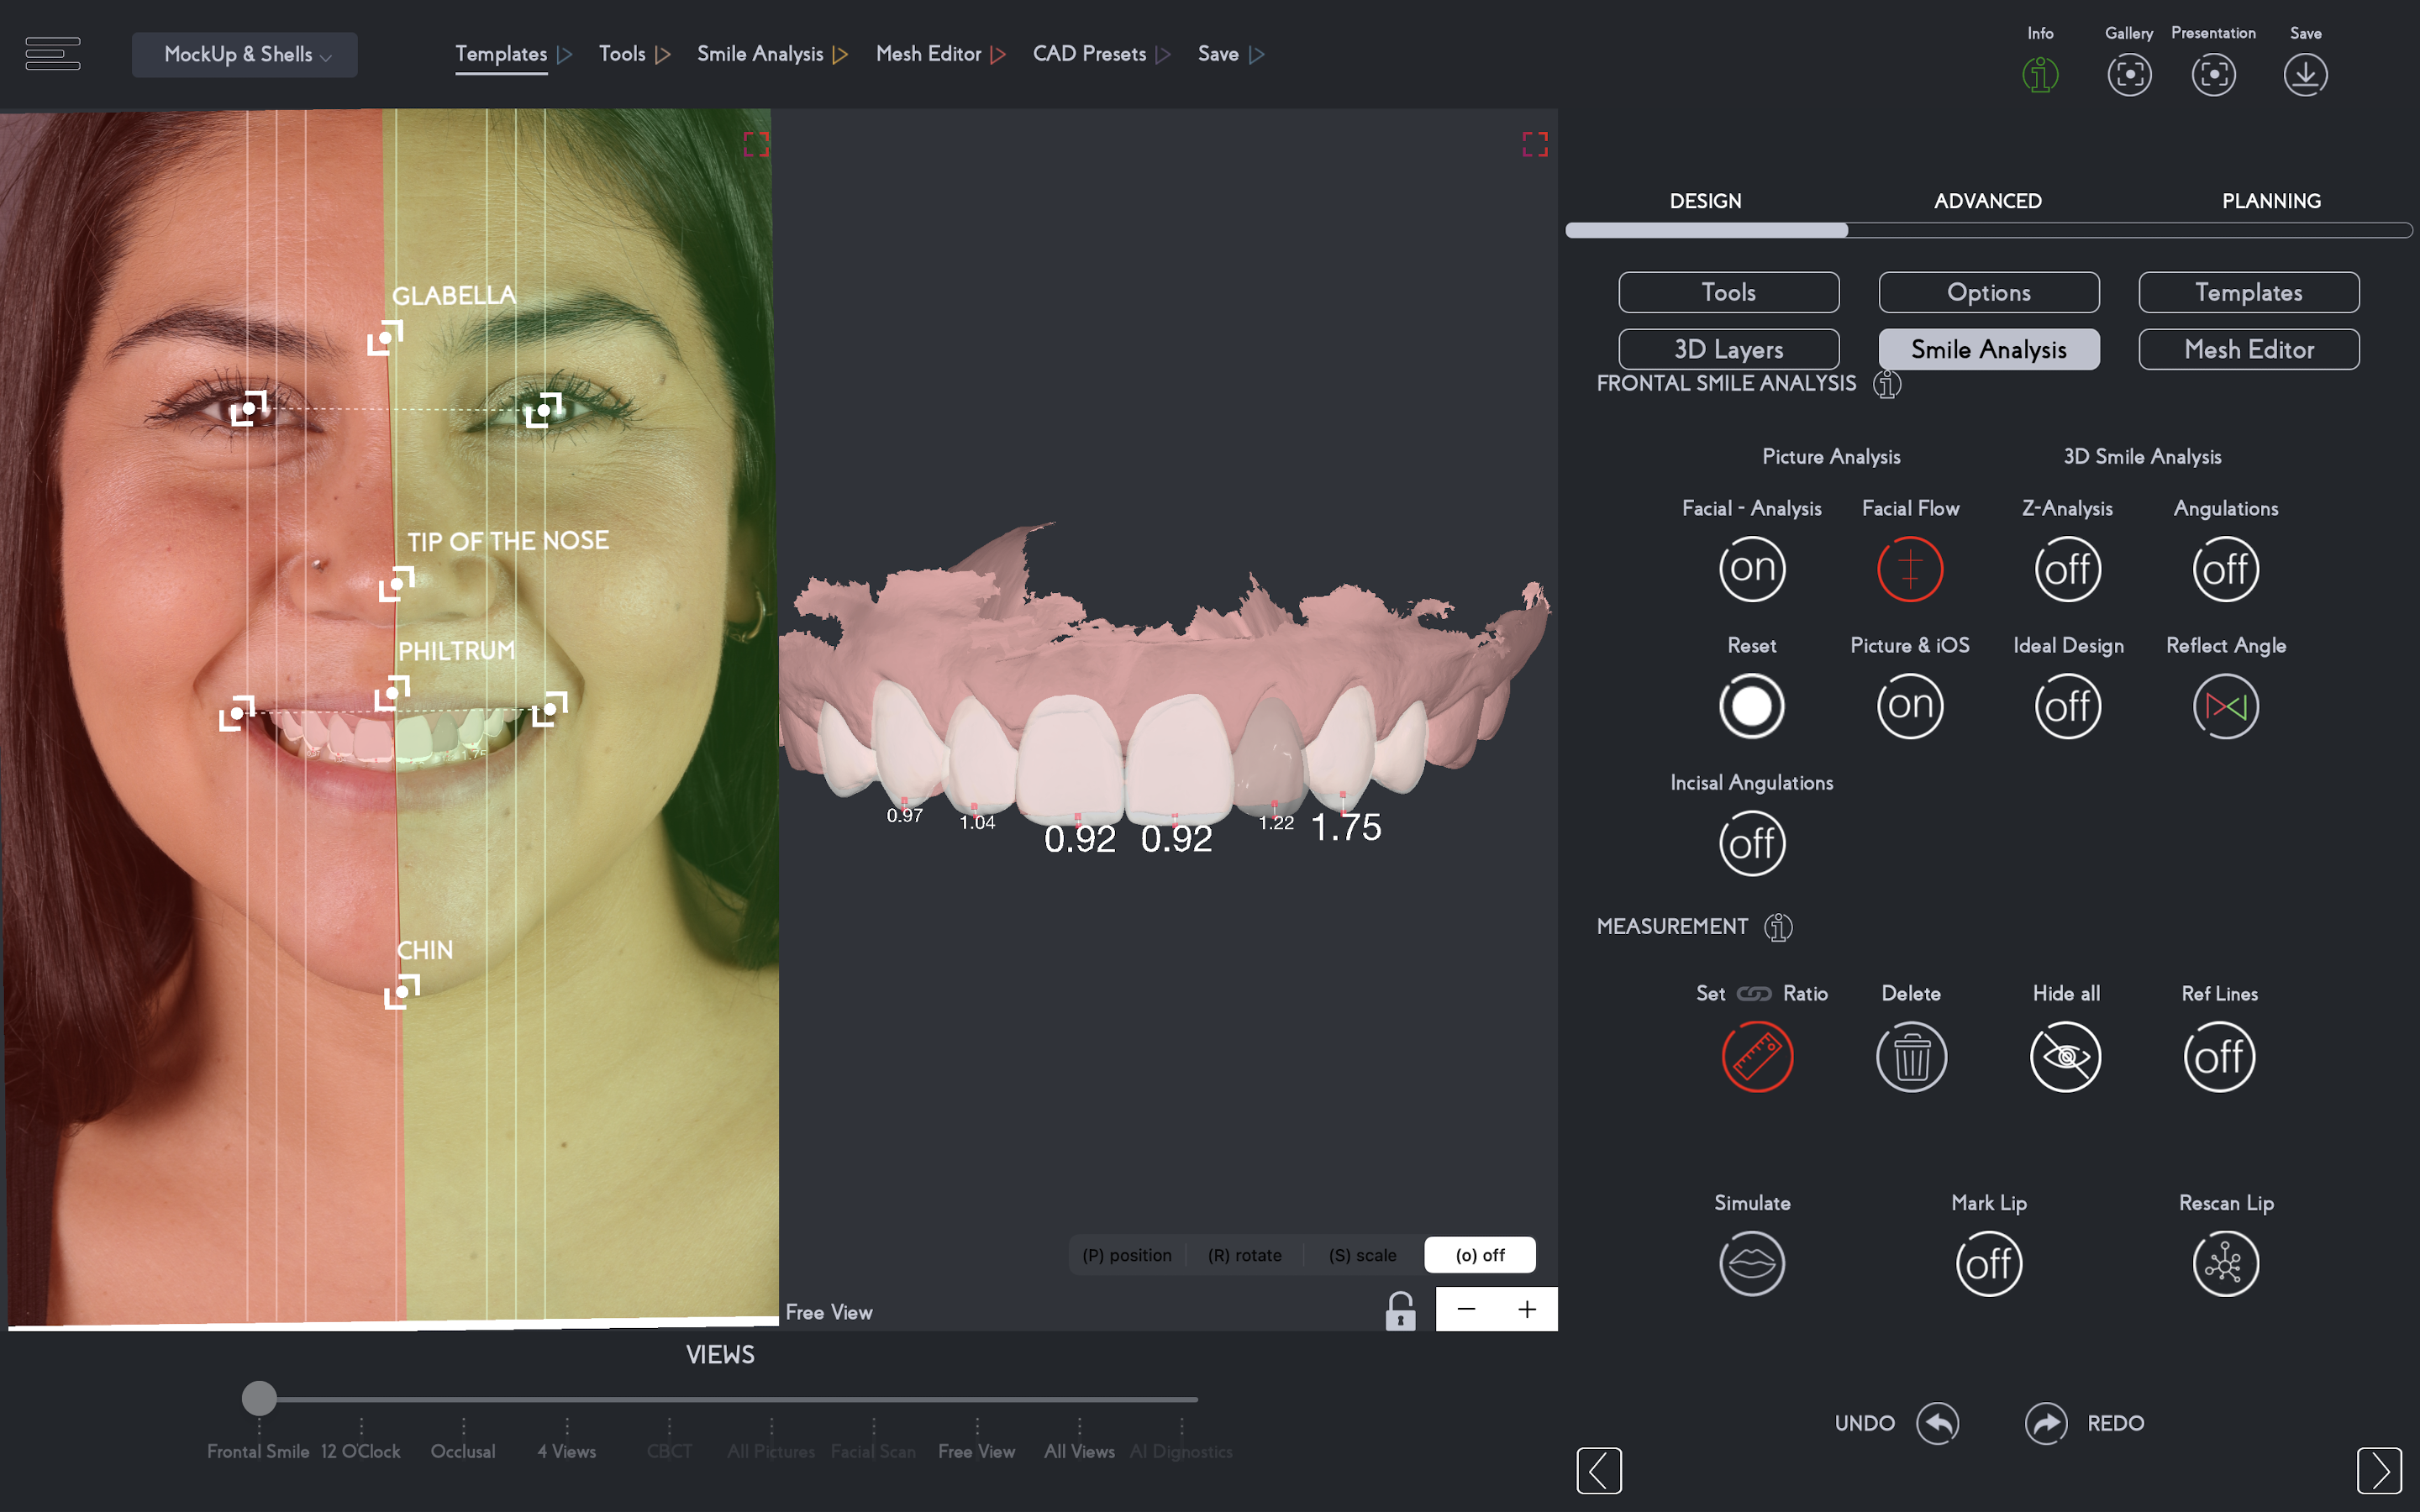
To begin the 3D Digital Smile Design, the patient's upper intraoral scan (.stl file) was superimposed onto the picture to deliver the facially-driven design approach (fig. 3).
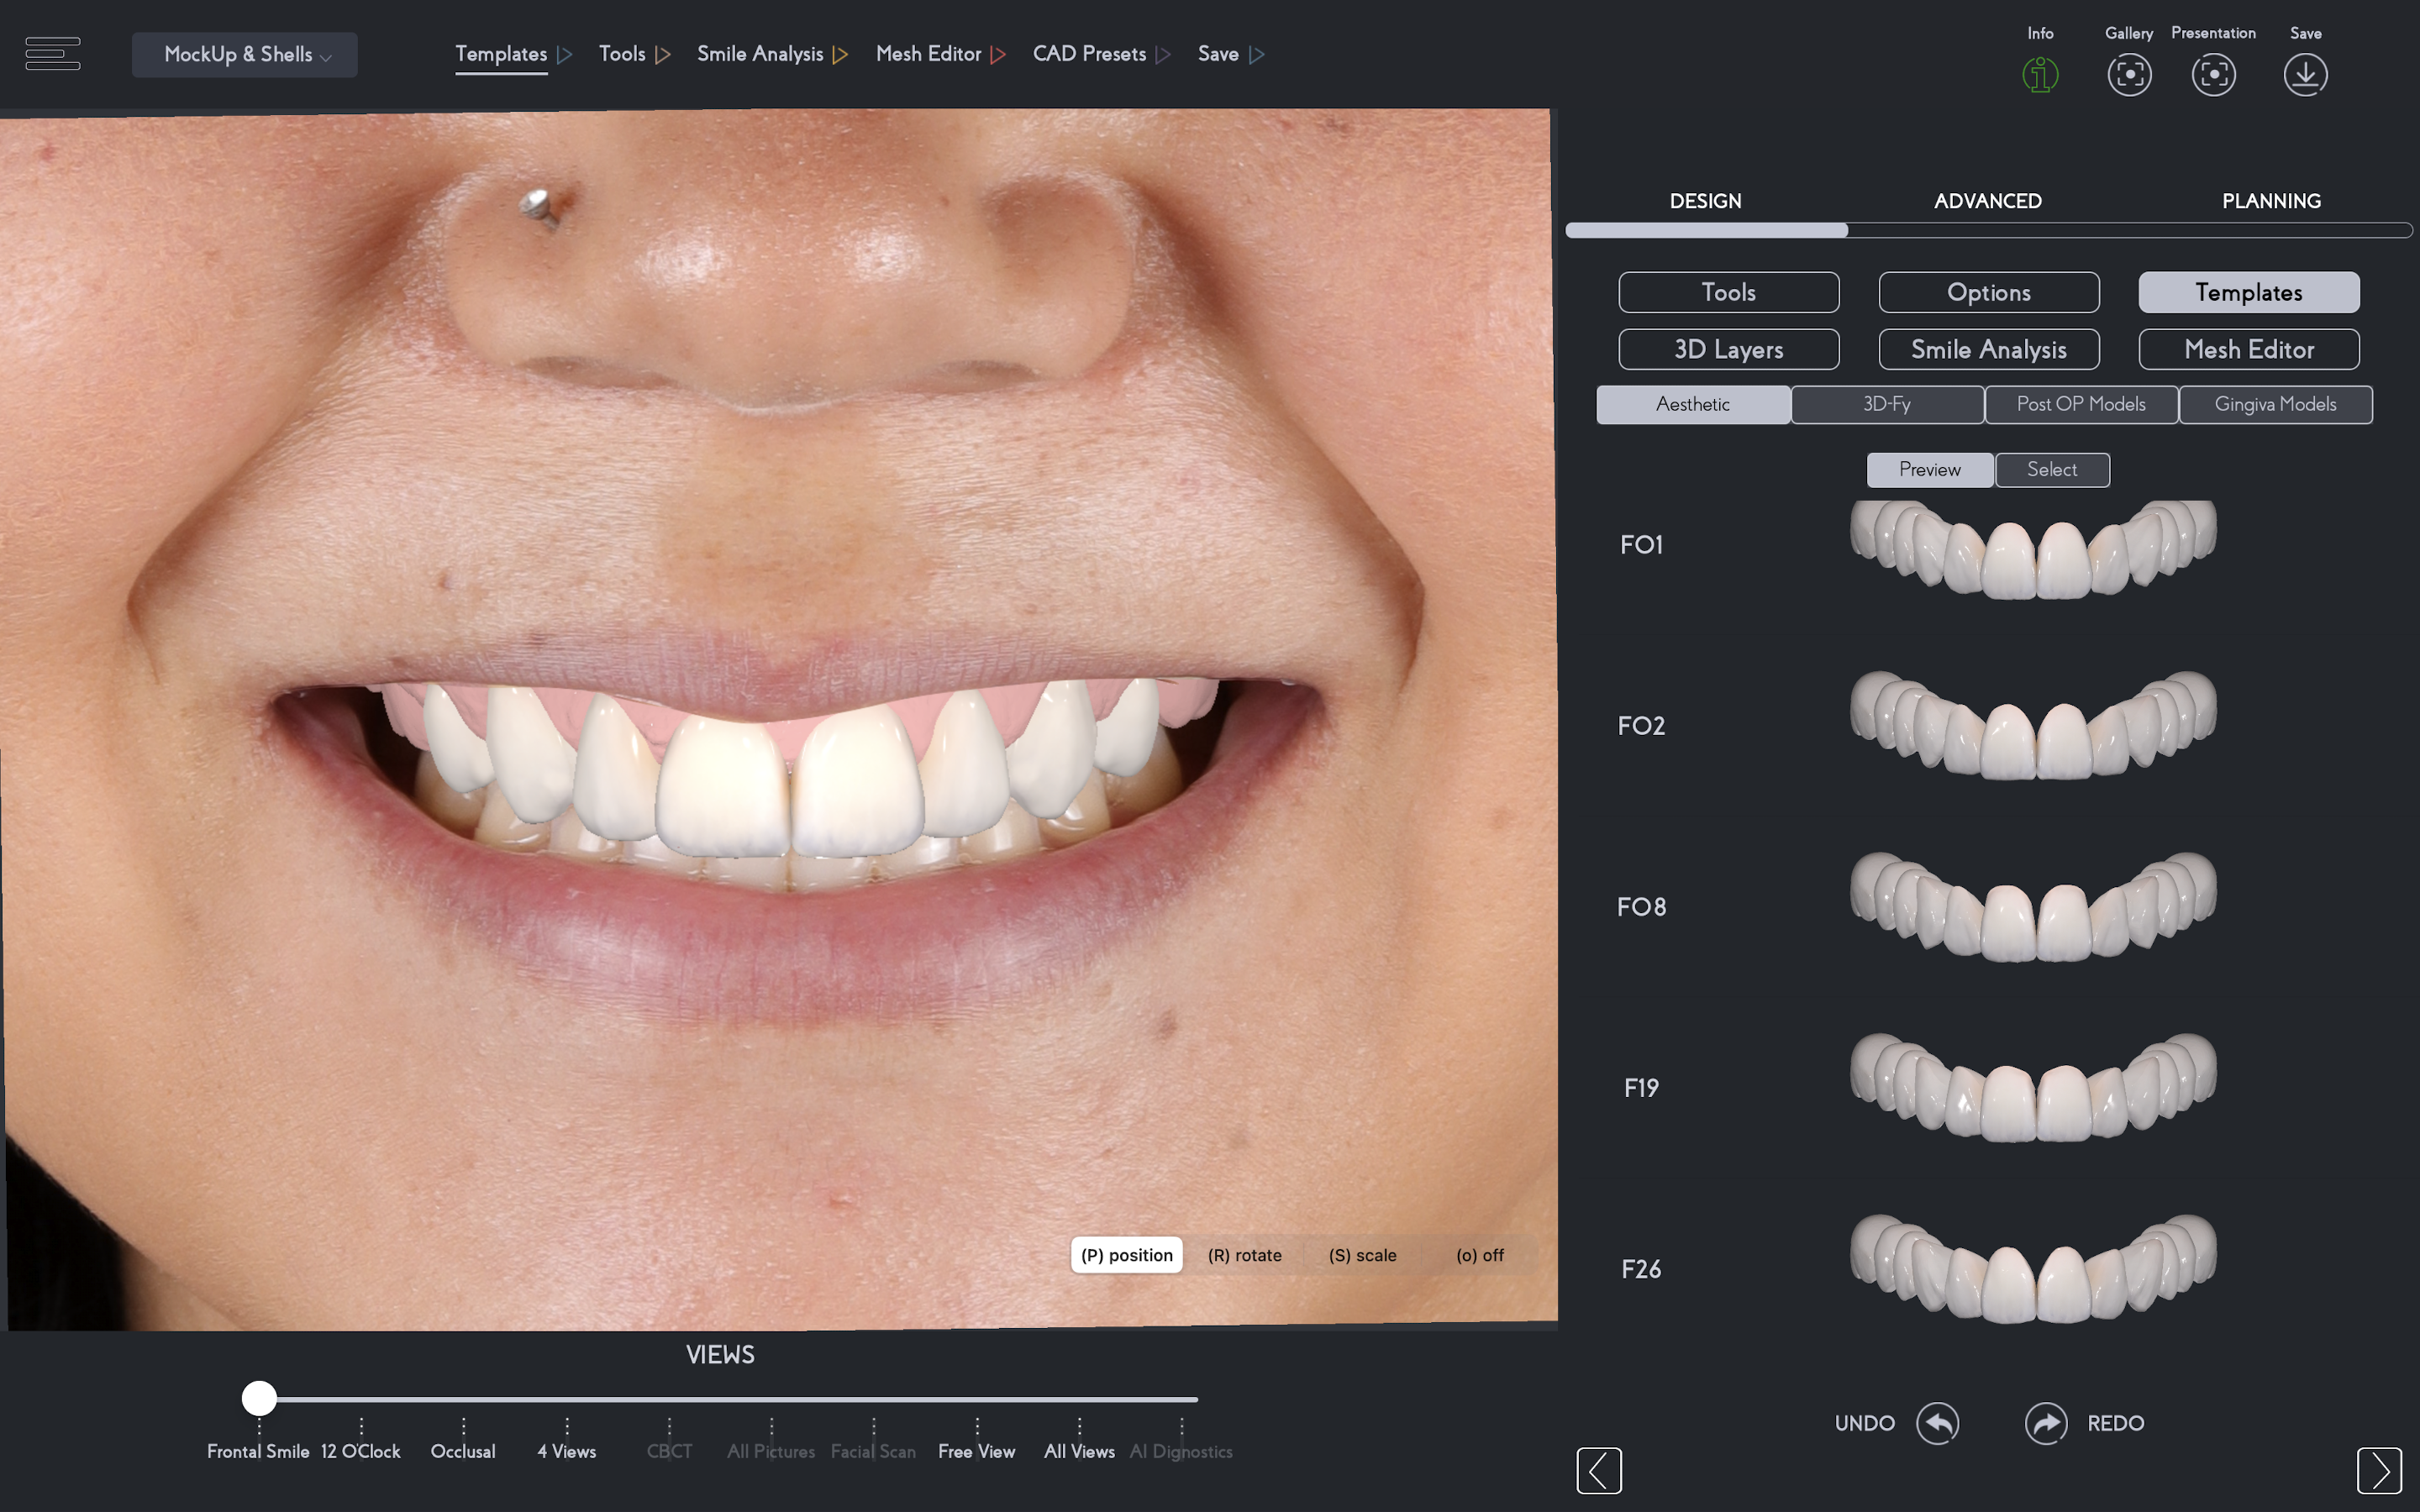
To predetermine the proportion (width and length ratio proportion) and the proper position of the incisal edge and 3D teeth setting and selection, a 3D smile frame is positioned over the IO scan and easily adjusted using the patient's facial landmarks as a guide to its customization. (Fig.4)
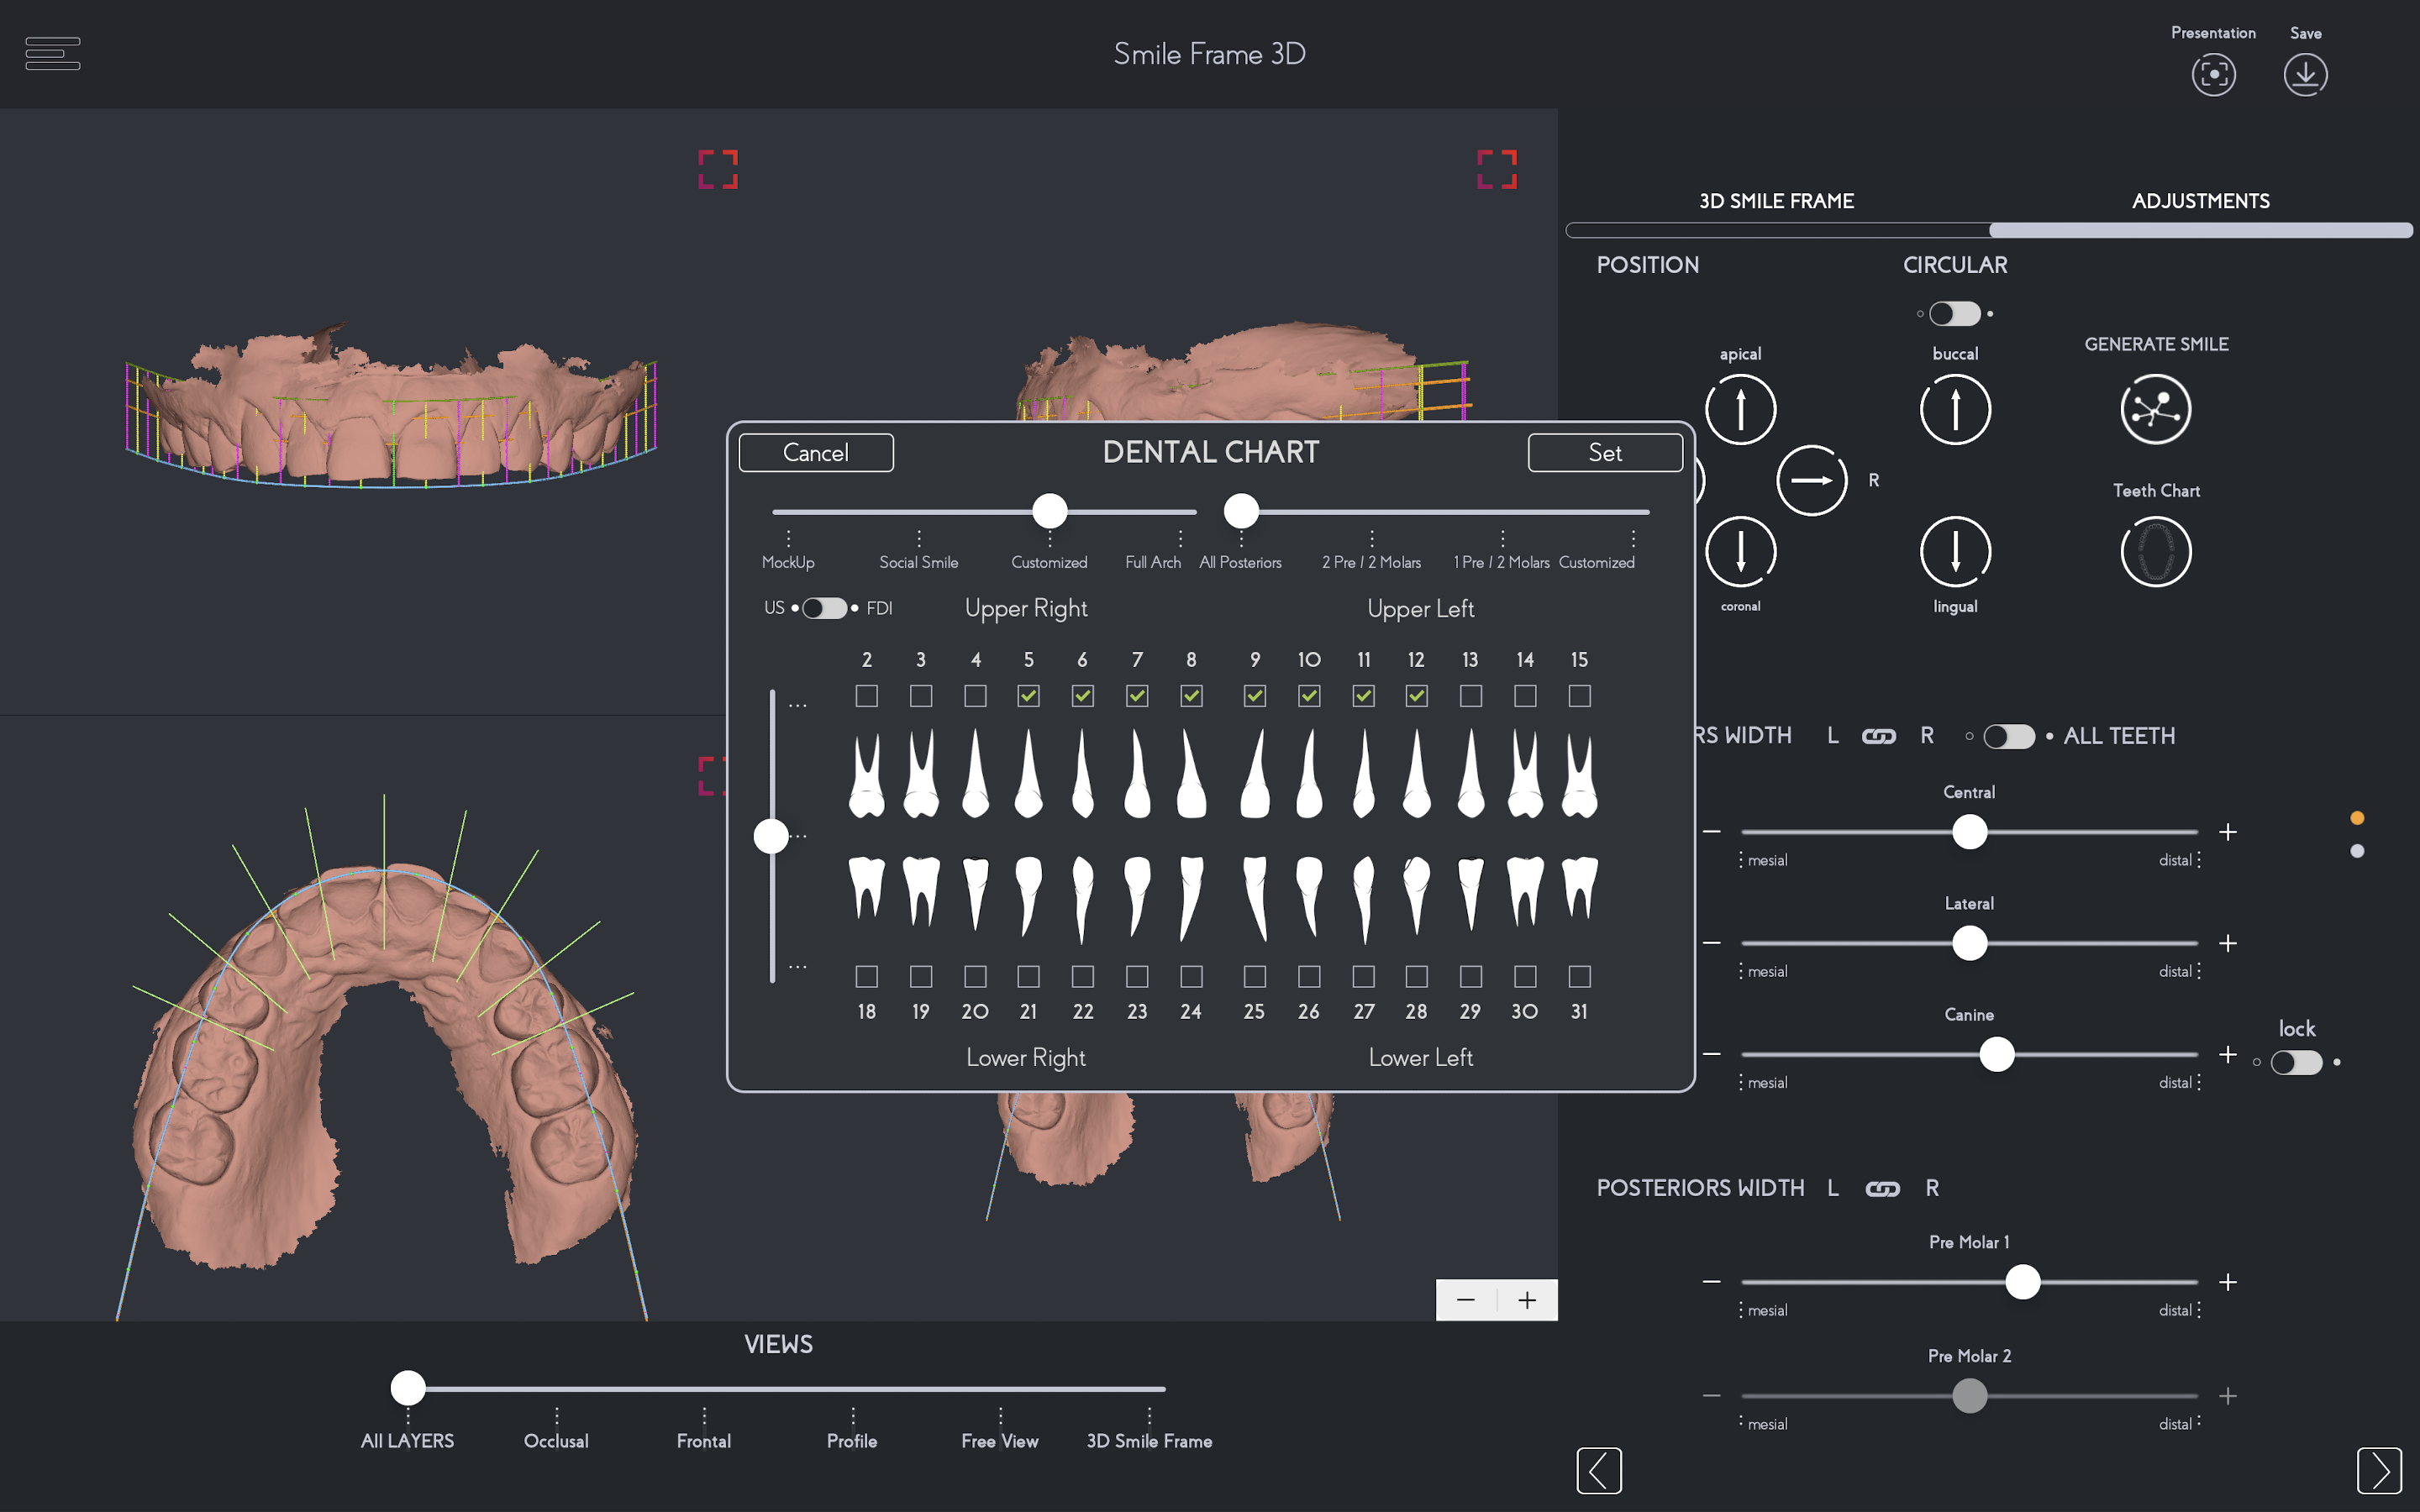
The advances in the 3D SmileFy Smile Design offer a variety of morphologically accurate teeth templates that can be selected and virtually placed over the patient’s photograph and IO scan for facial/dental evaluation
By using the 3D measurement tools, the smile designer (dentist) can preset the 3D thickness and length of the future Digital Smile Design while focusing on the patient's facial features to correct smile cant and volume to create balance in the overall smile with the face.
Digitally measuring the design results in better quality control, facilitating the selection of proper instruments and materials, and clinical planning of the minimally invasive porcelain veneer restoration workflow.
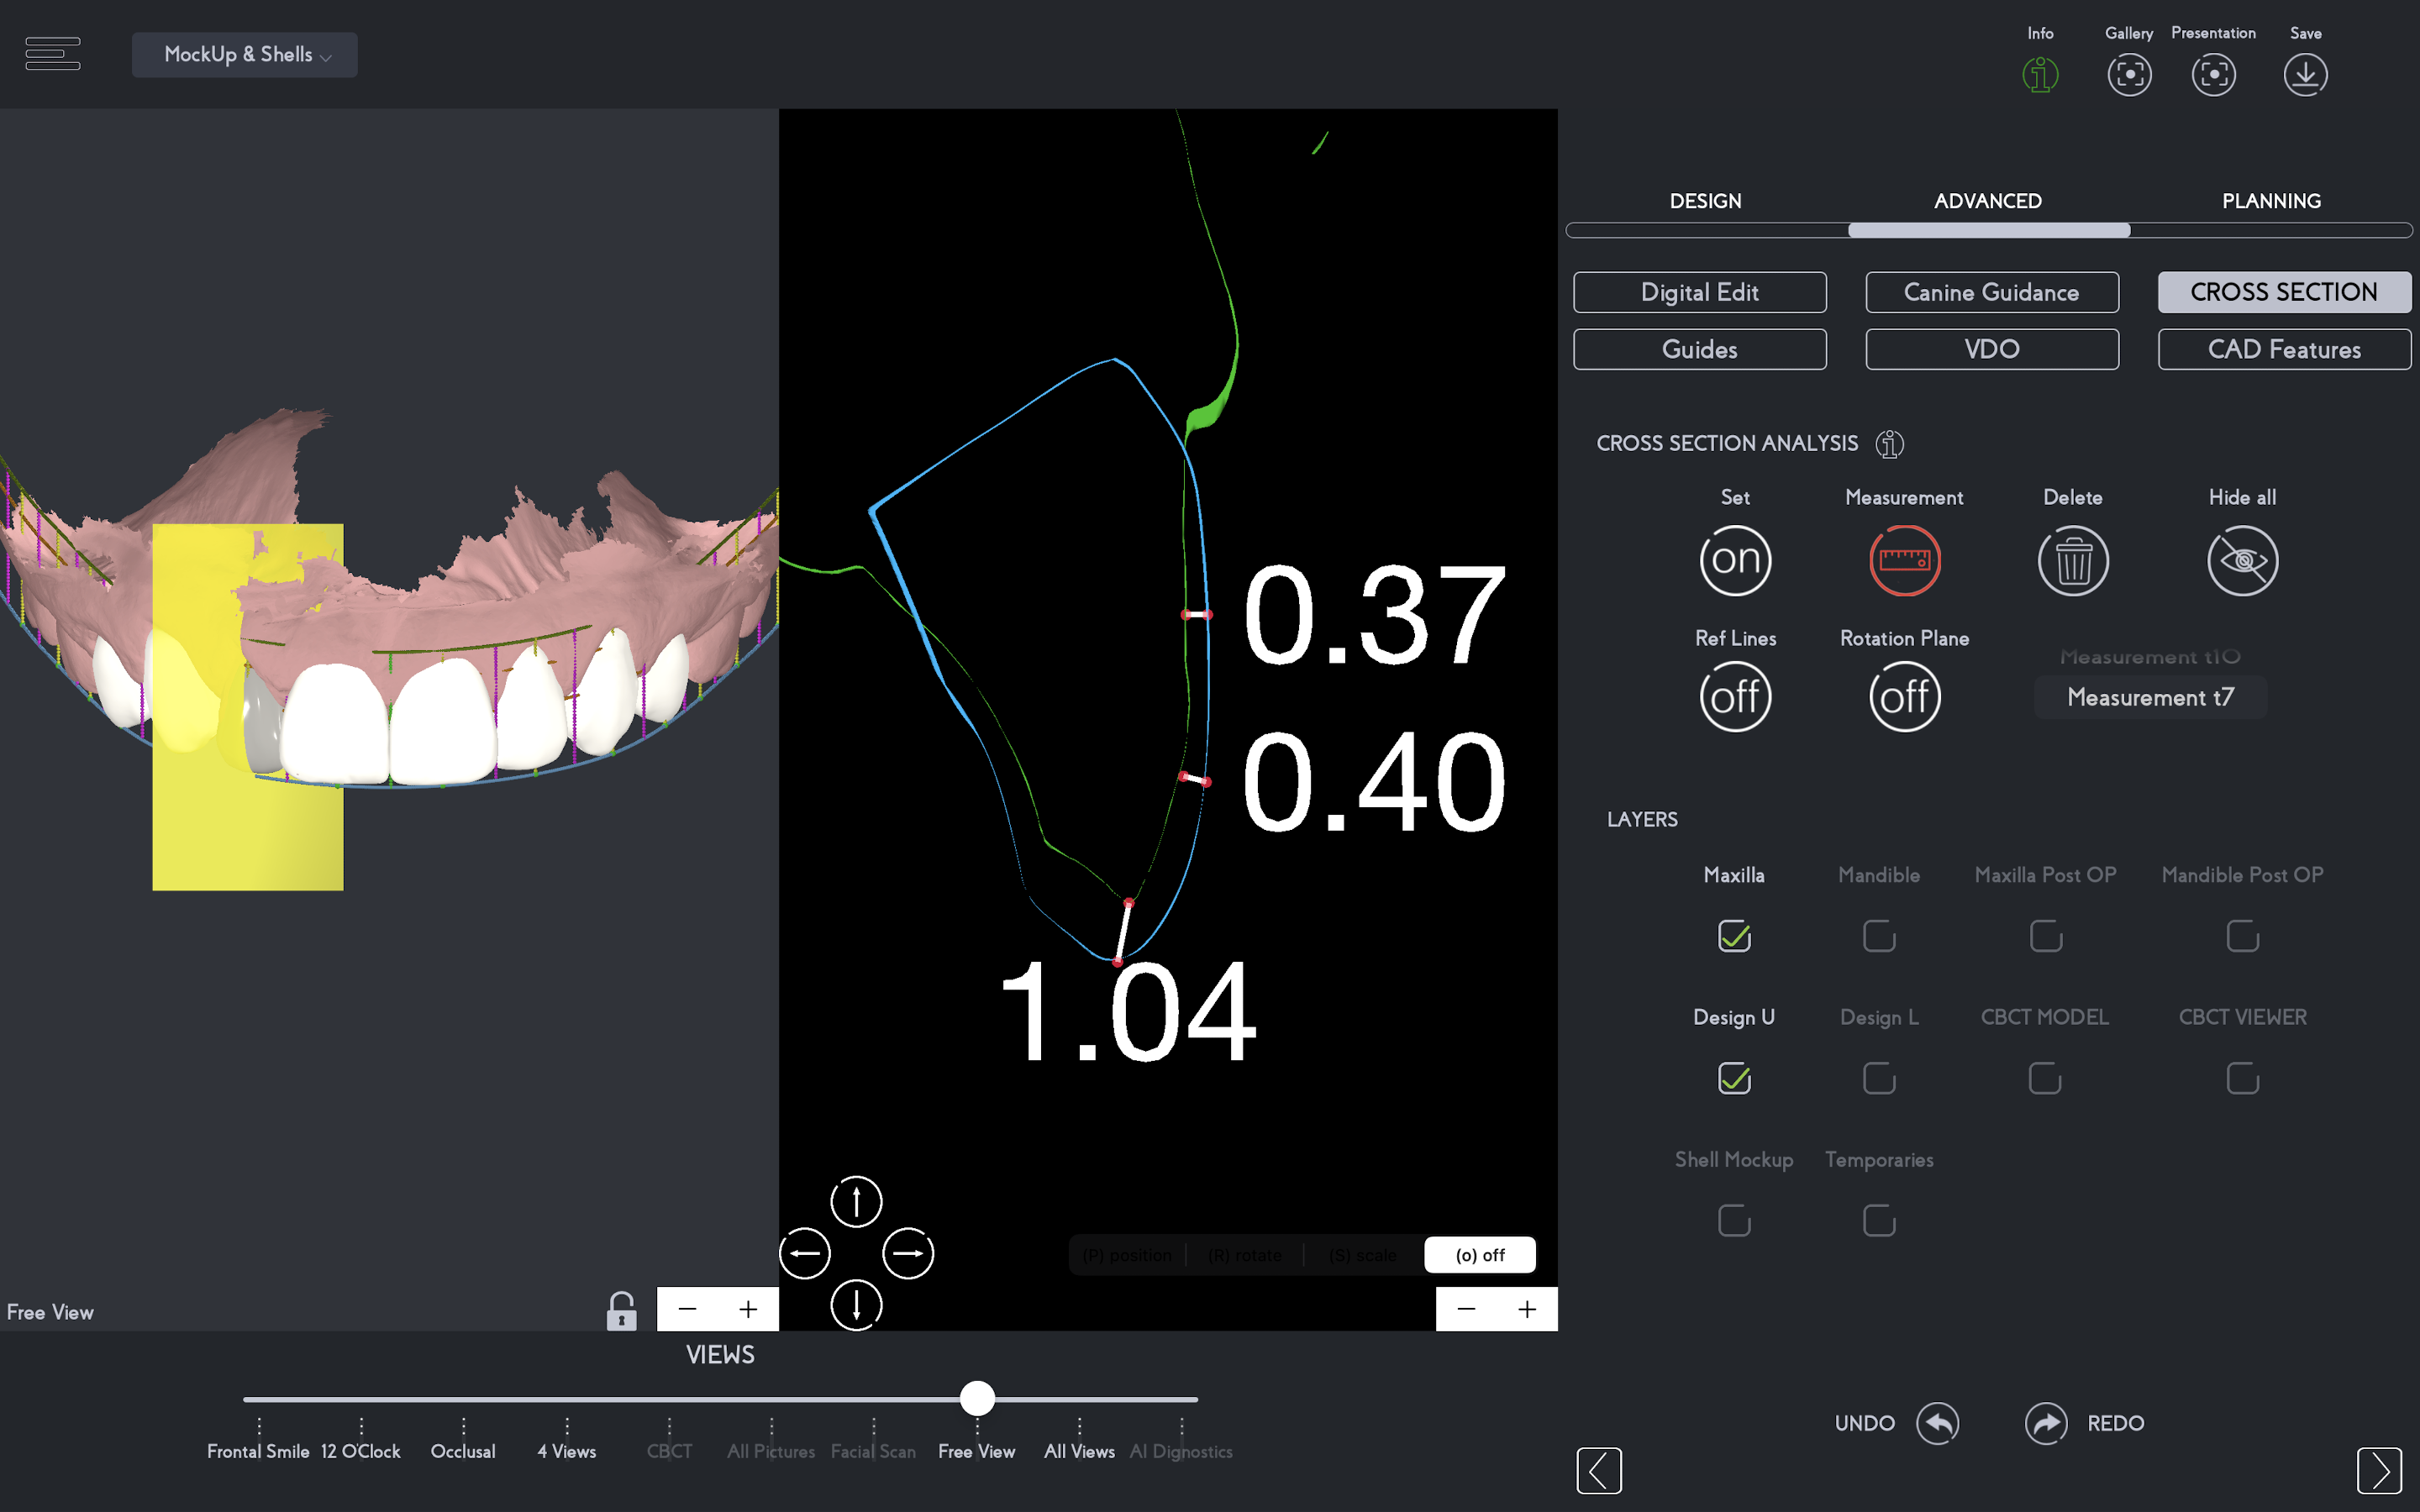
Minimal 3D Digital Free-hand wax-up customizations were made to fine-tune the cervical margins and surface.
Book a session with us to learn how to use SmileFy like a pro!
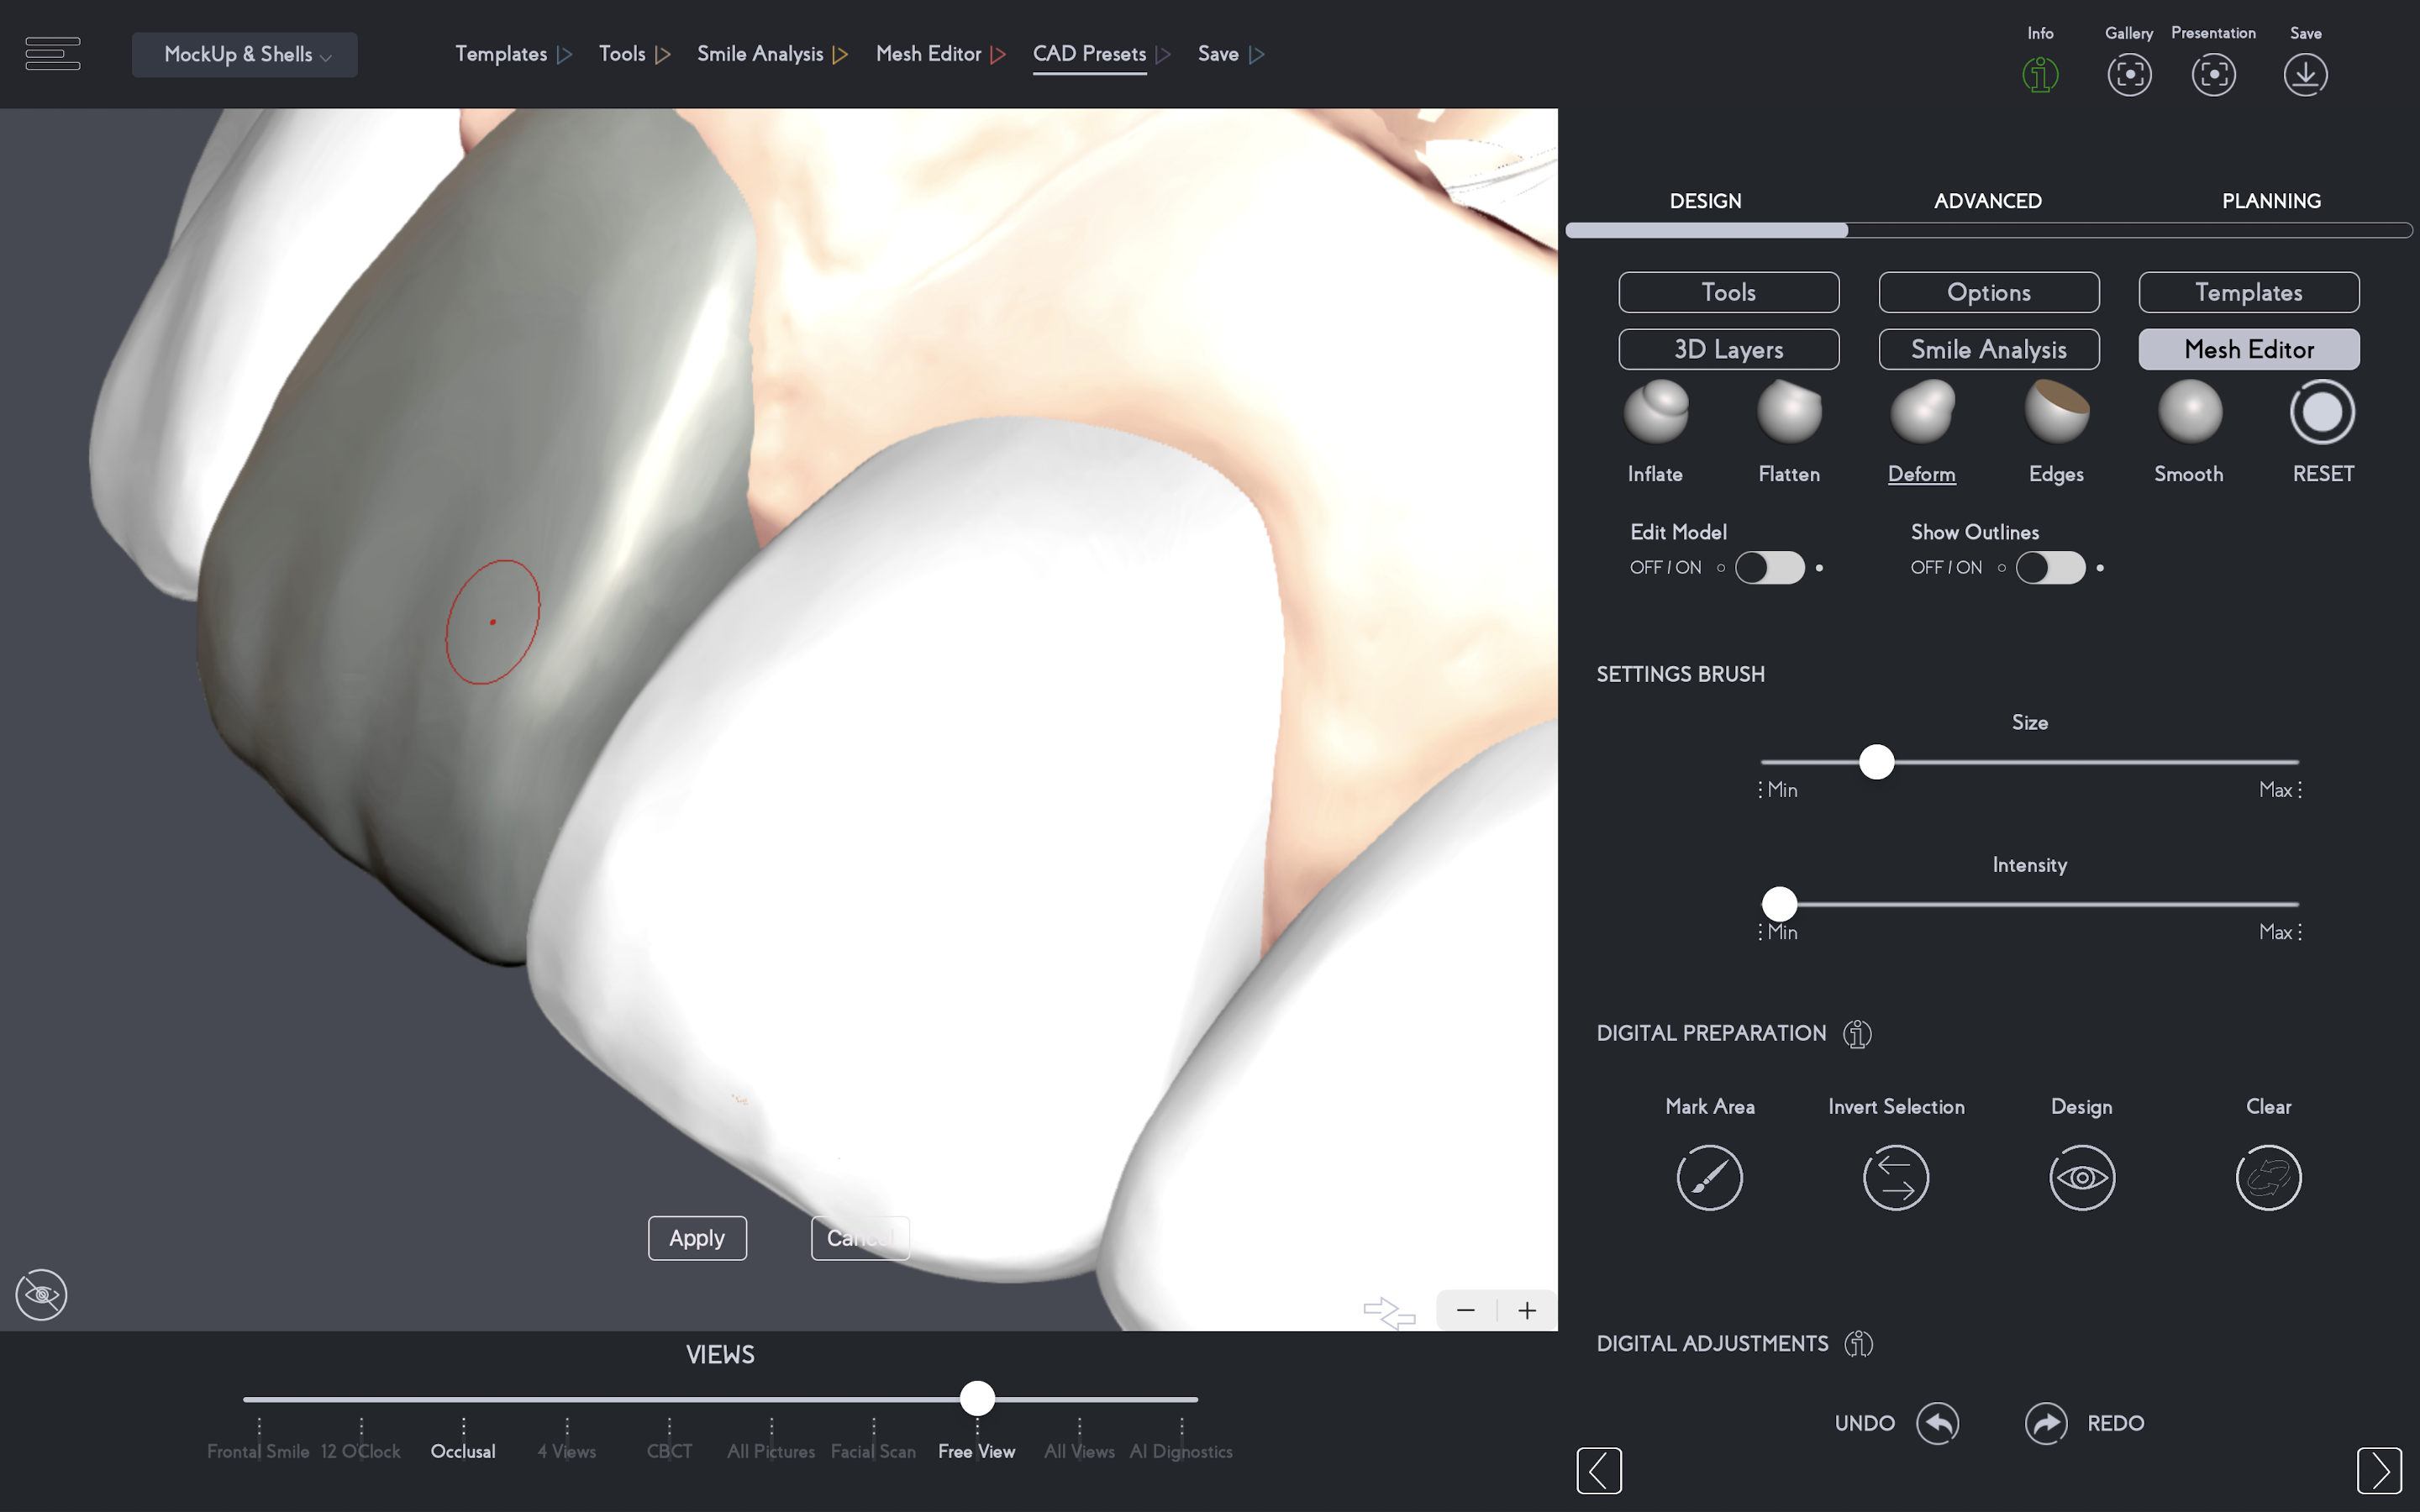
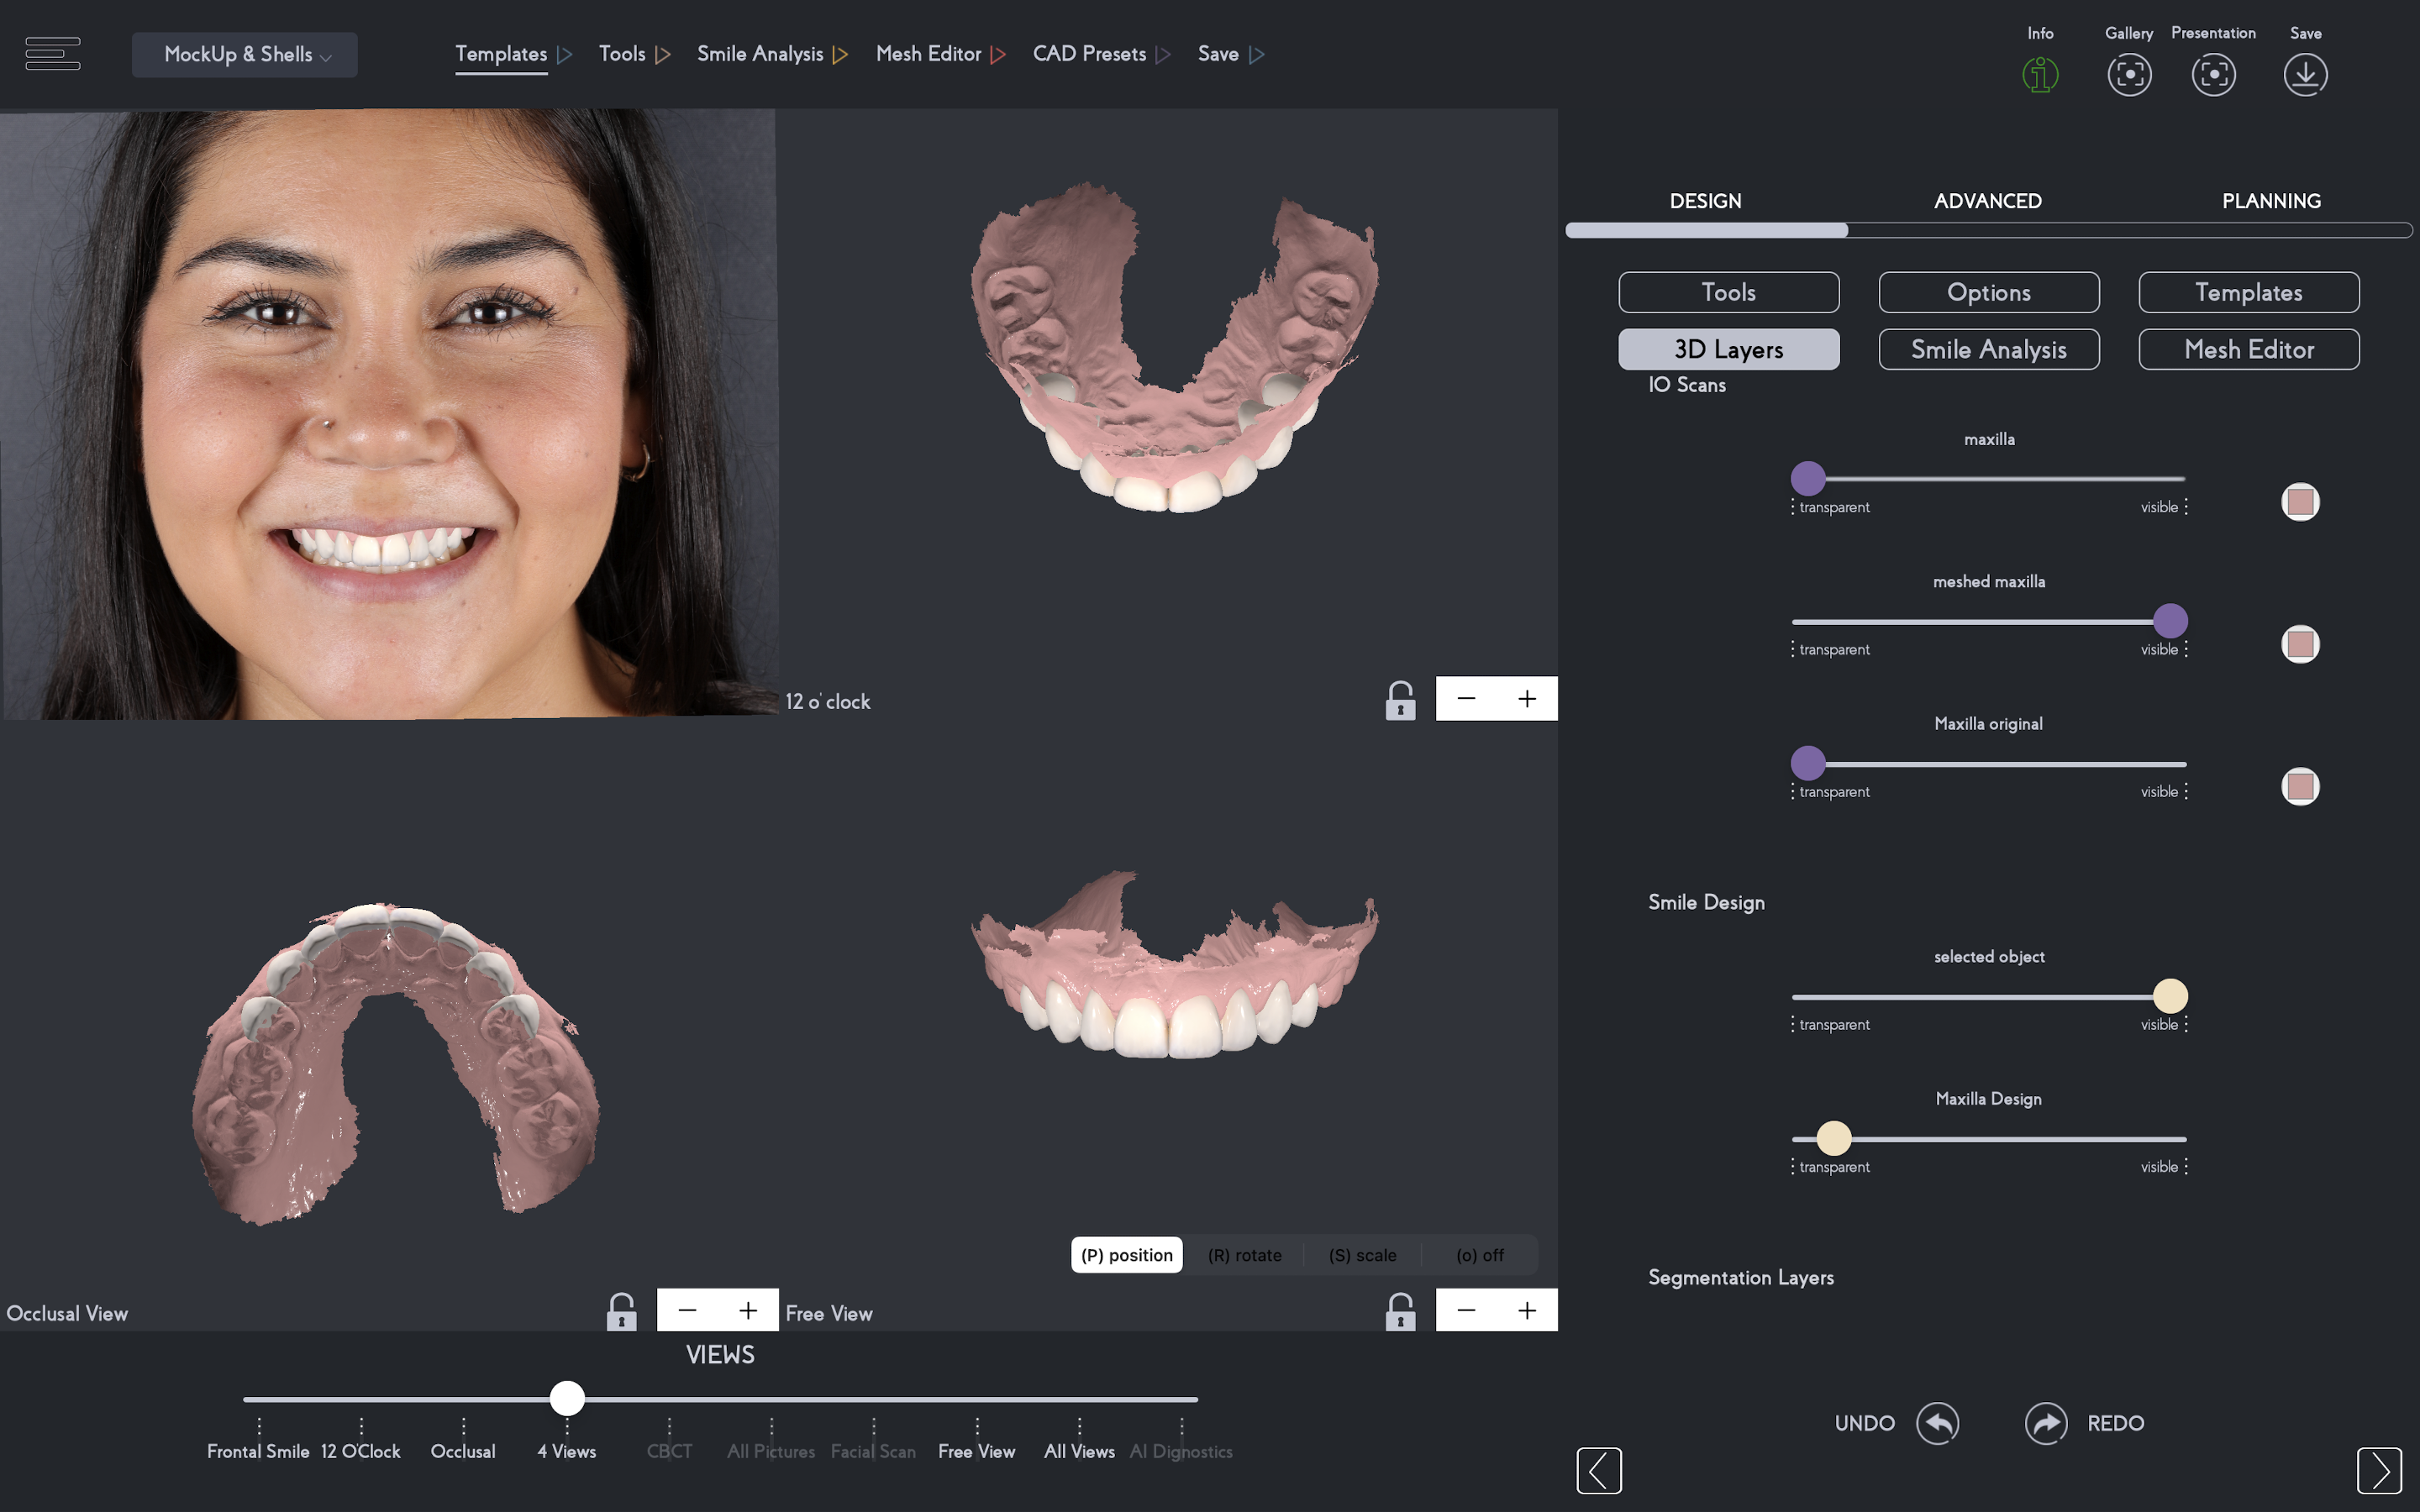
The 3D Smile simulator facilities the visualization of the outcome virtually before printing. (Fig.8)
The software automatically prepared the model, making it exportable and print-ready.
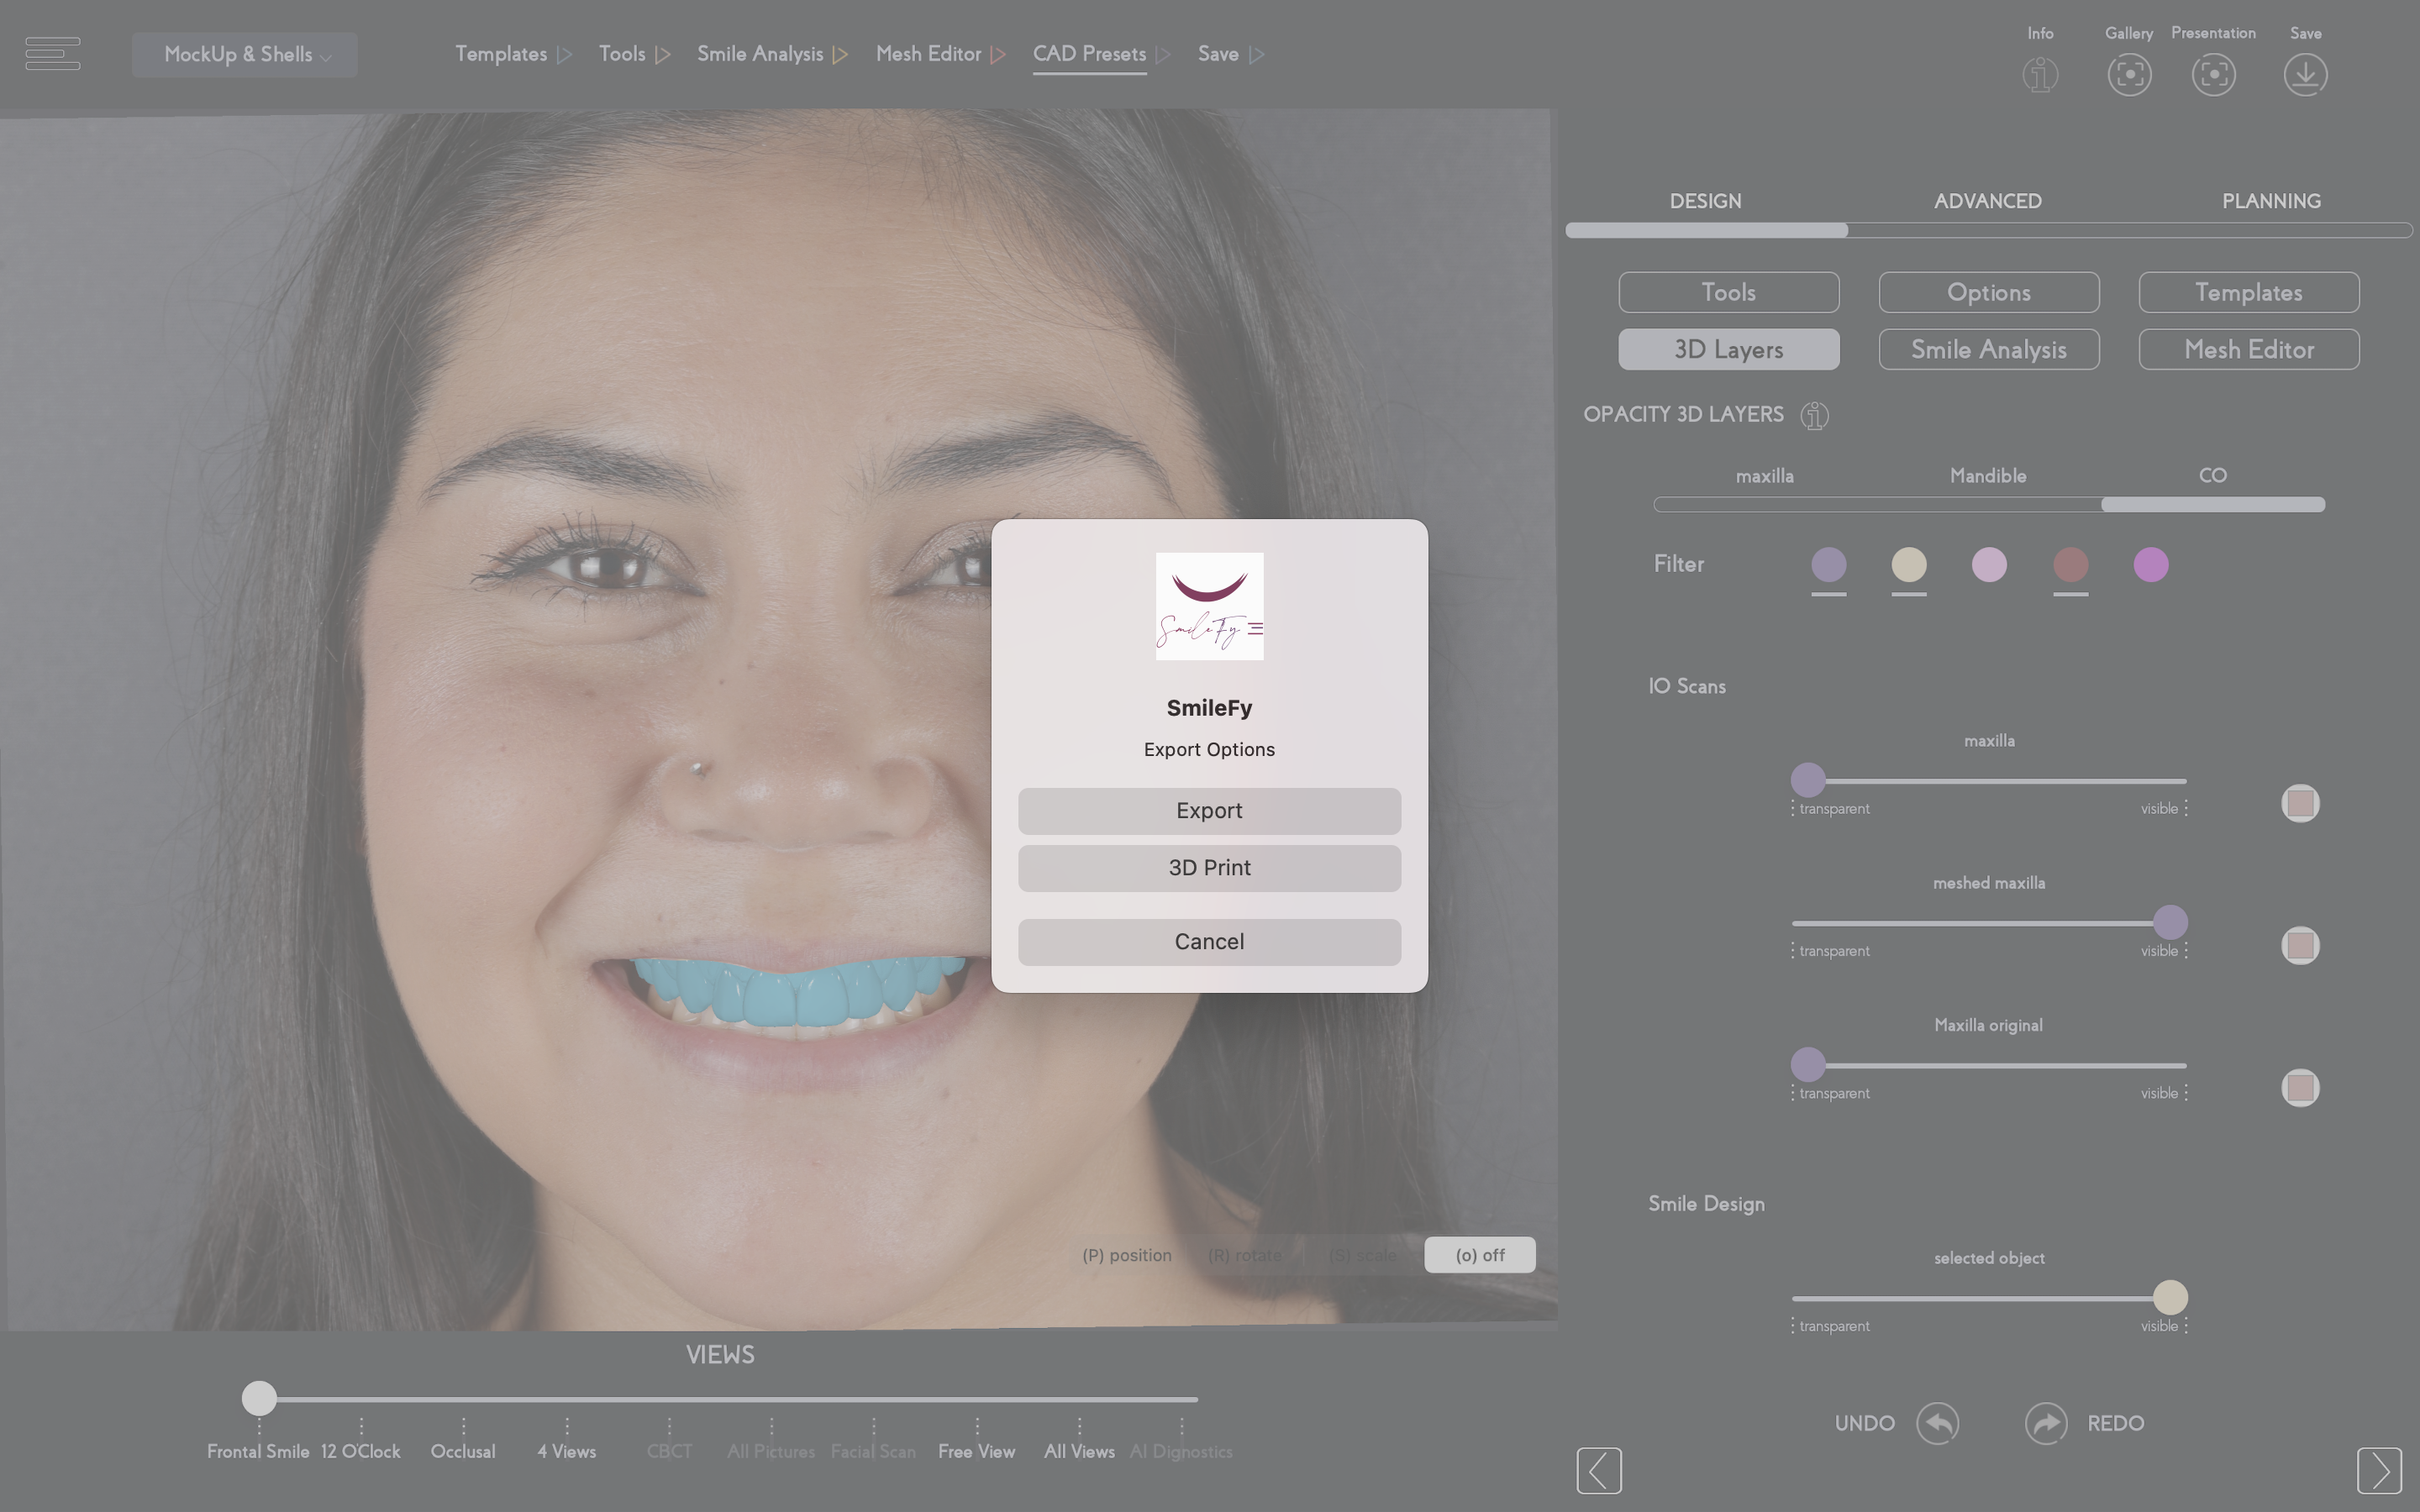
Once ready, the case was exported and 3D printed to perform a smile trial.
The Second Appointment
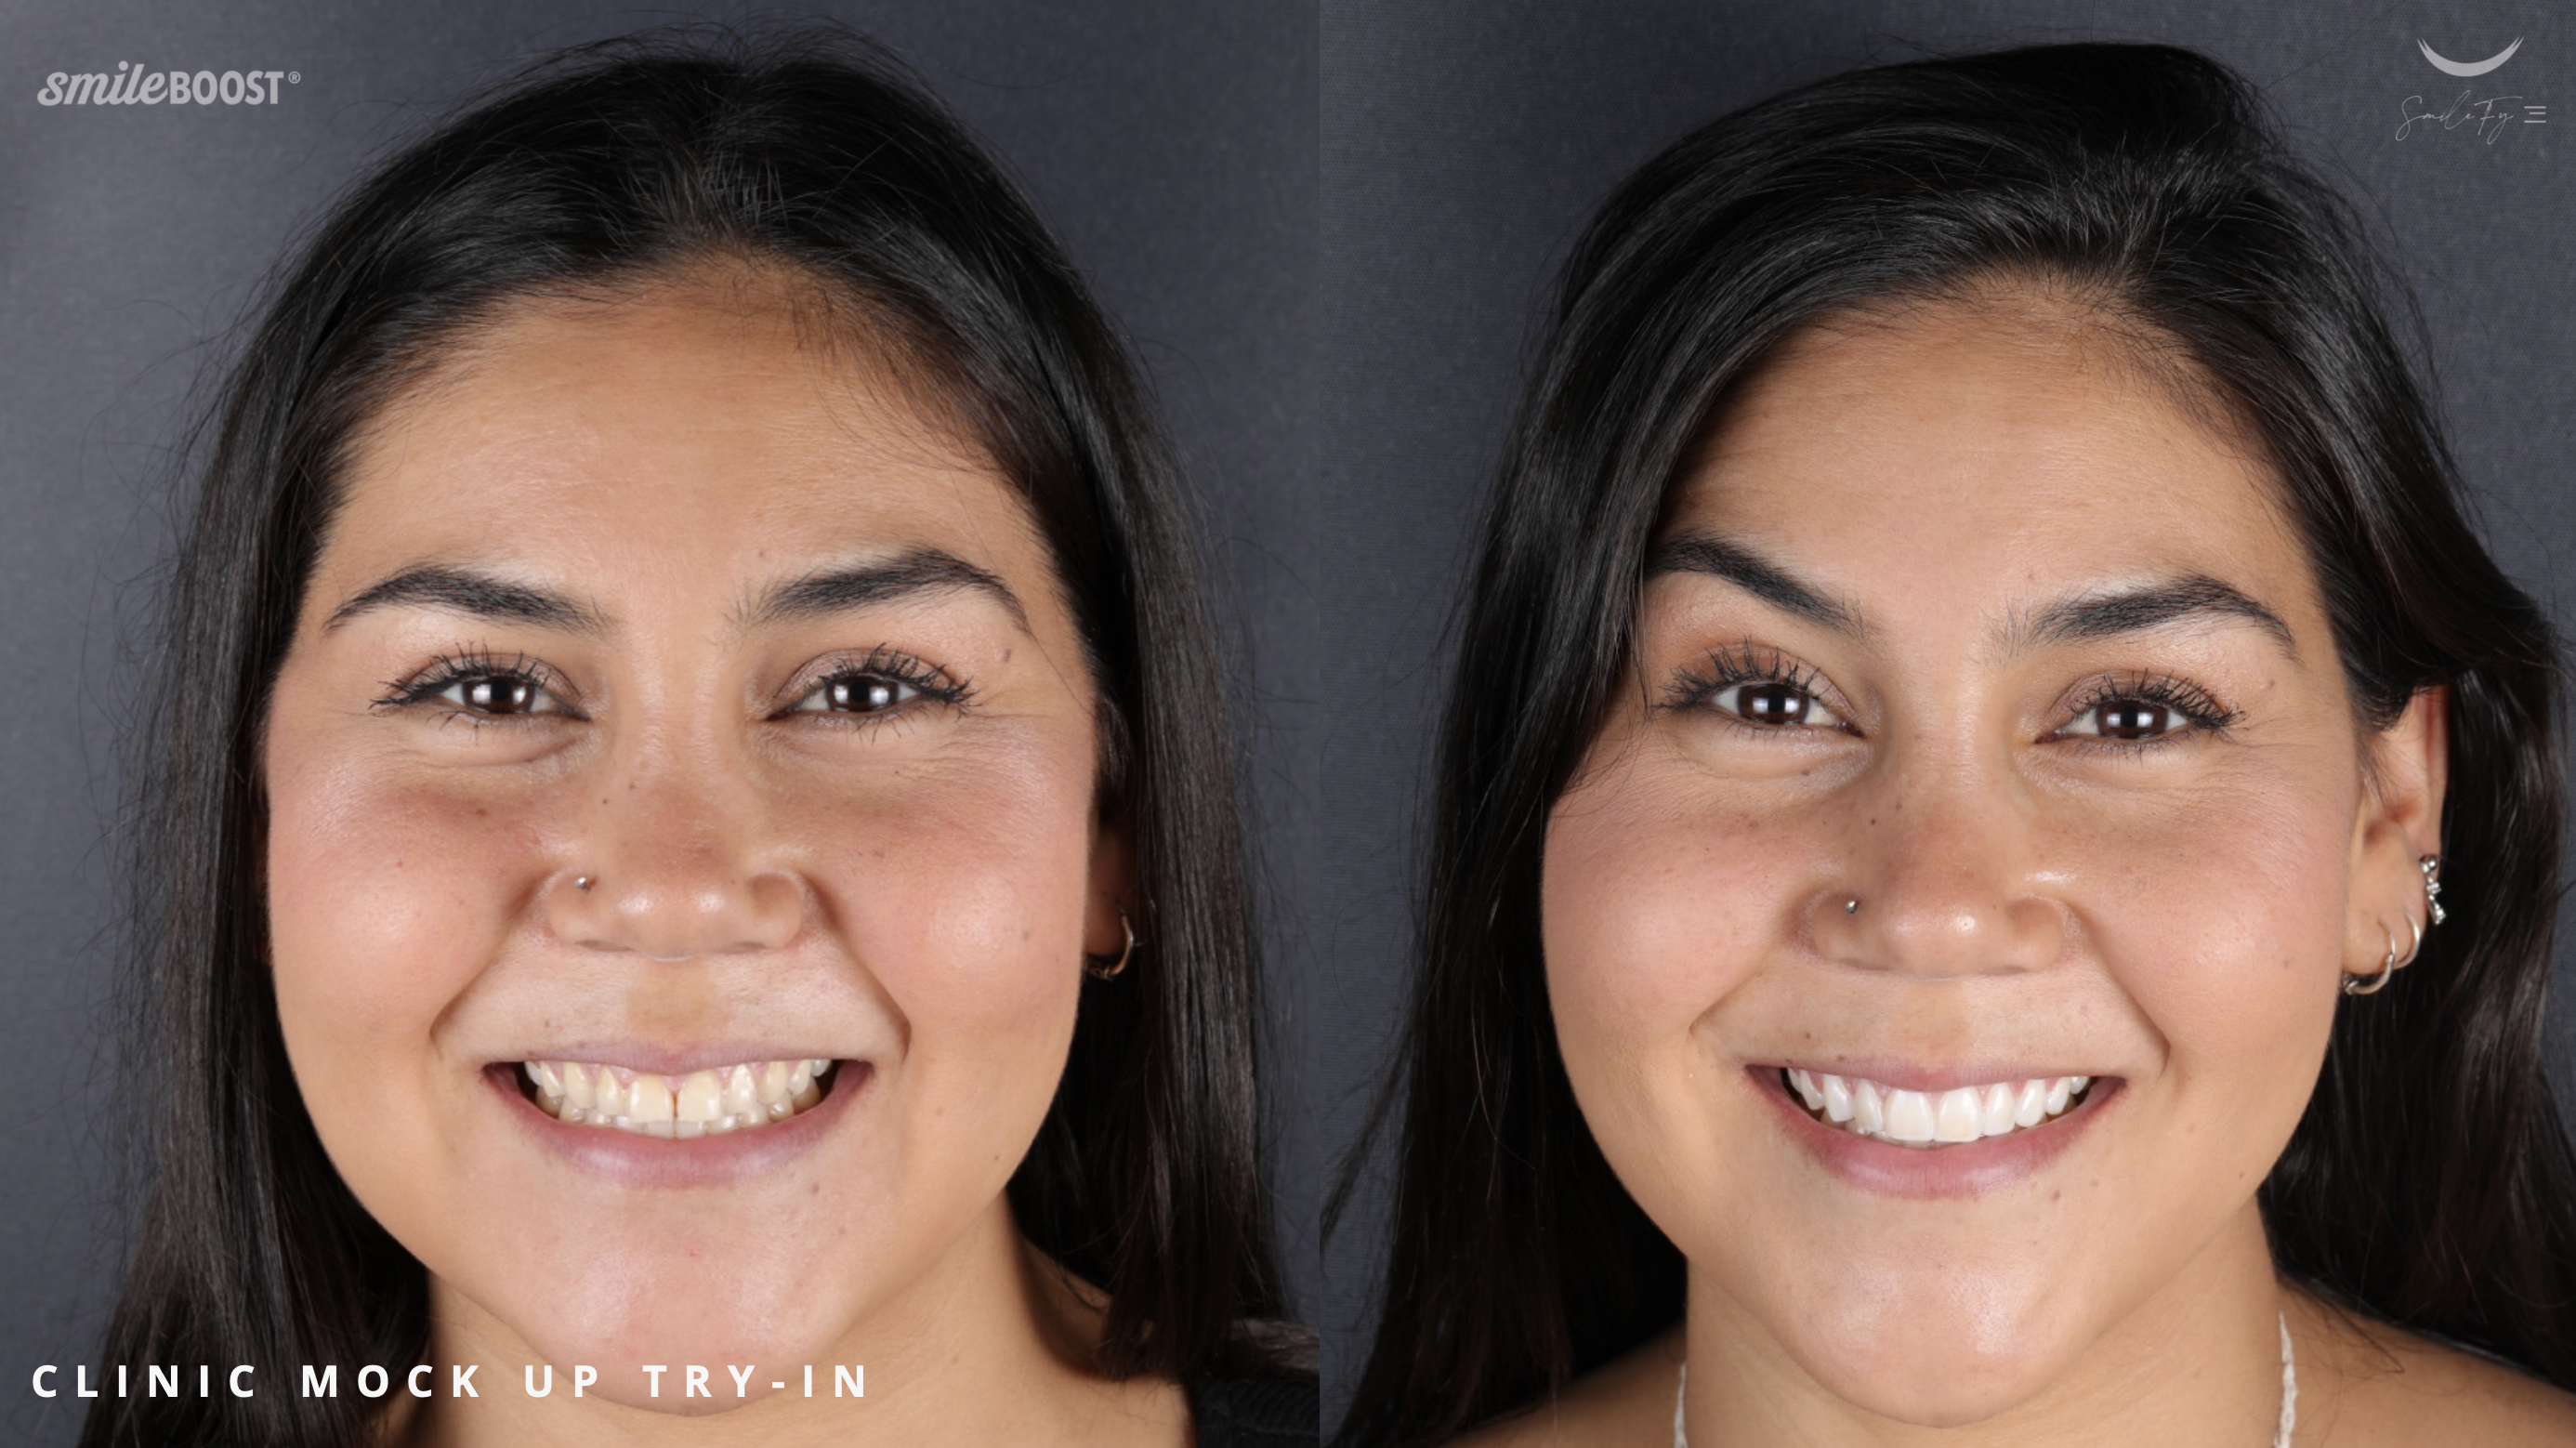
A smile trial was performed on the patient’s second visit to anticipate and manage her expectations and get her final approval.
Final functional adjustments of the dental mockup were performed in the mouth ( one of the many reasons a smile test drive adds immense value allowing the dentist to make the necessary adjustments to perfect the smile), and photographs were taken.
The Clinical Procedure ( The Open Method Prep Sequence)
During the same visit:
- The OPEN METHOD CLINICAL PREP SEQUENCE was performed;
- The patient was re-scanned;
- The provisionals were temporarily installed;
- And all essential files were then sent to the laboratory to manufacture the porcelain veneers.
The Third Appointment
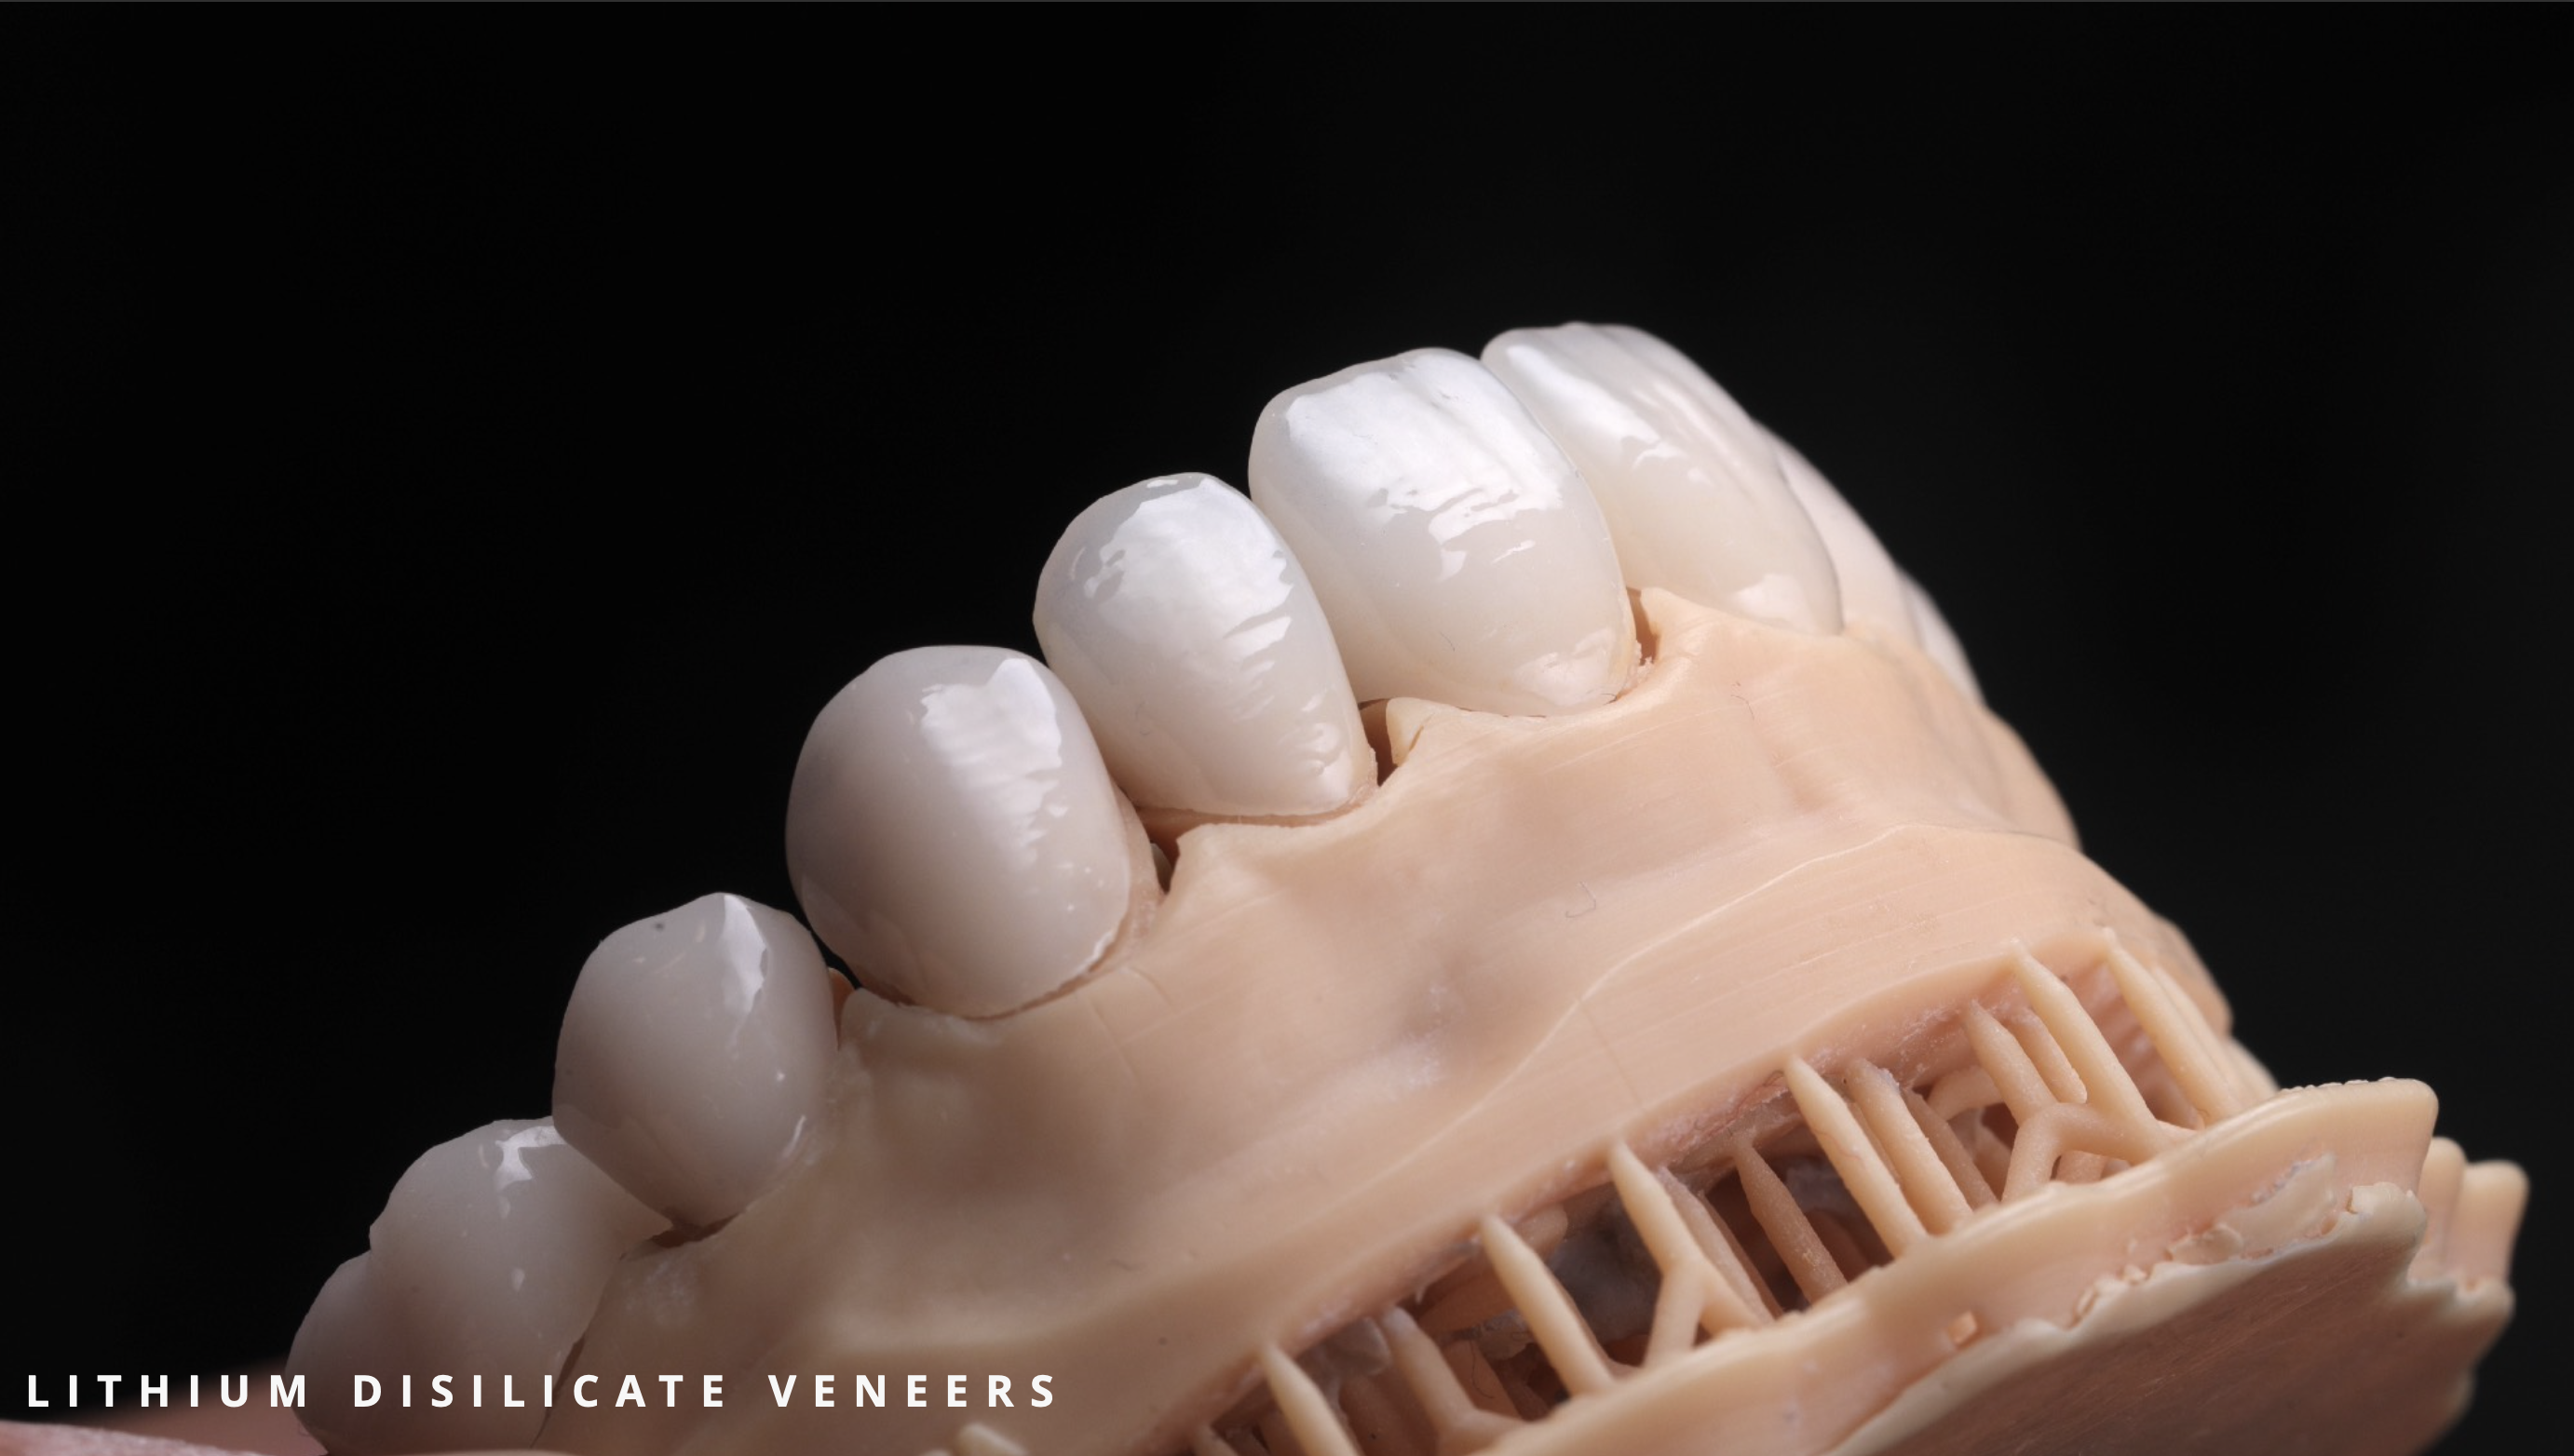
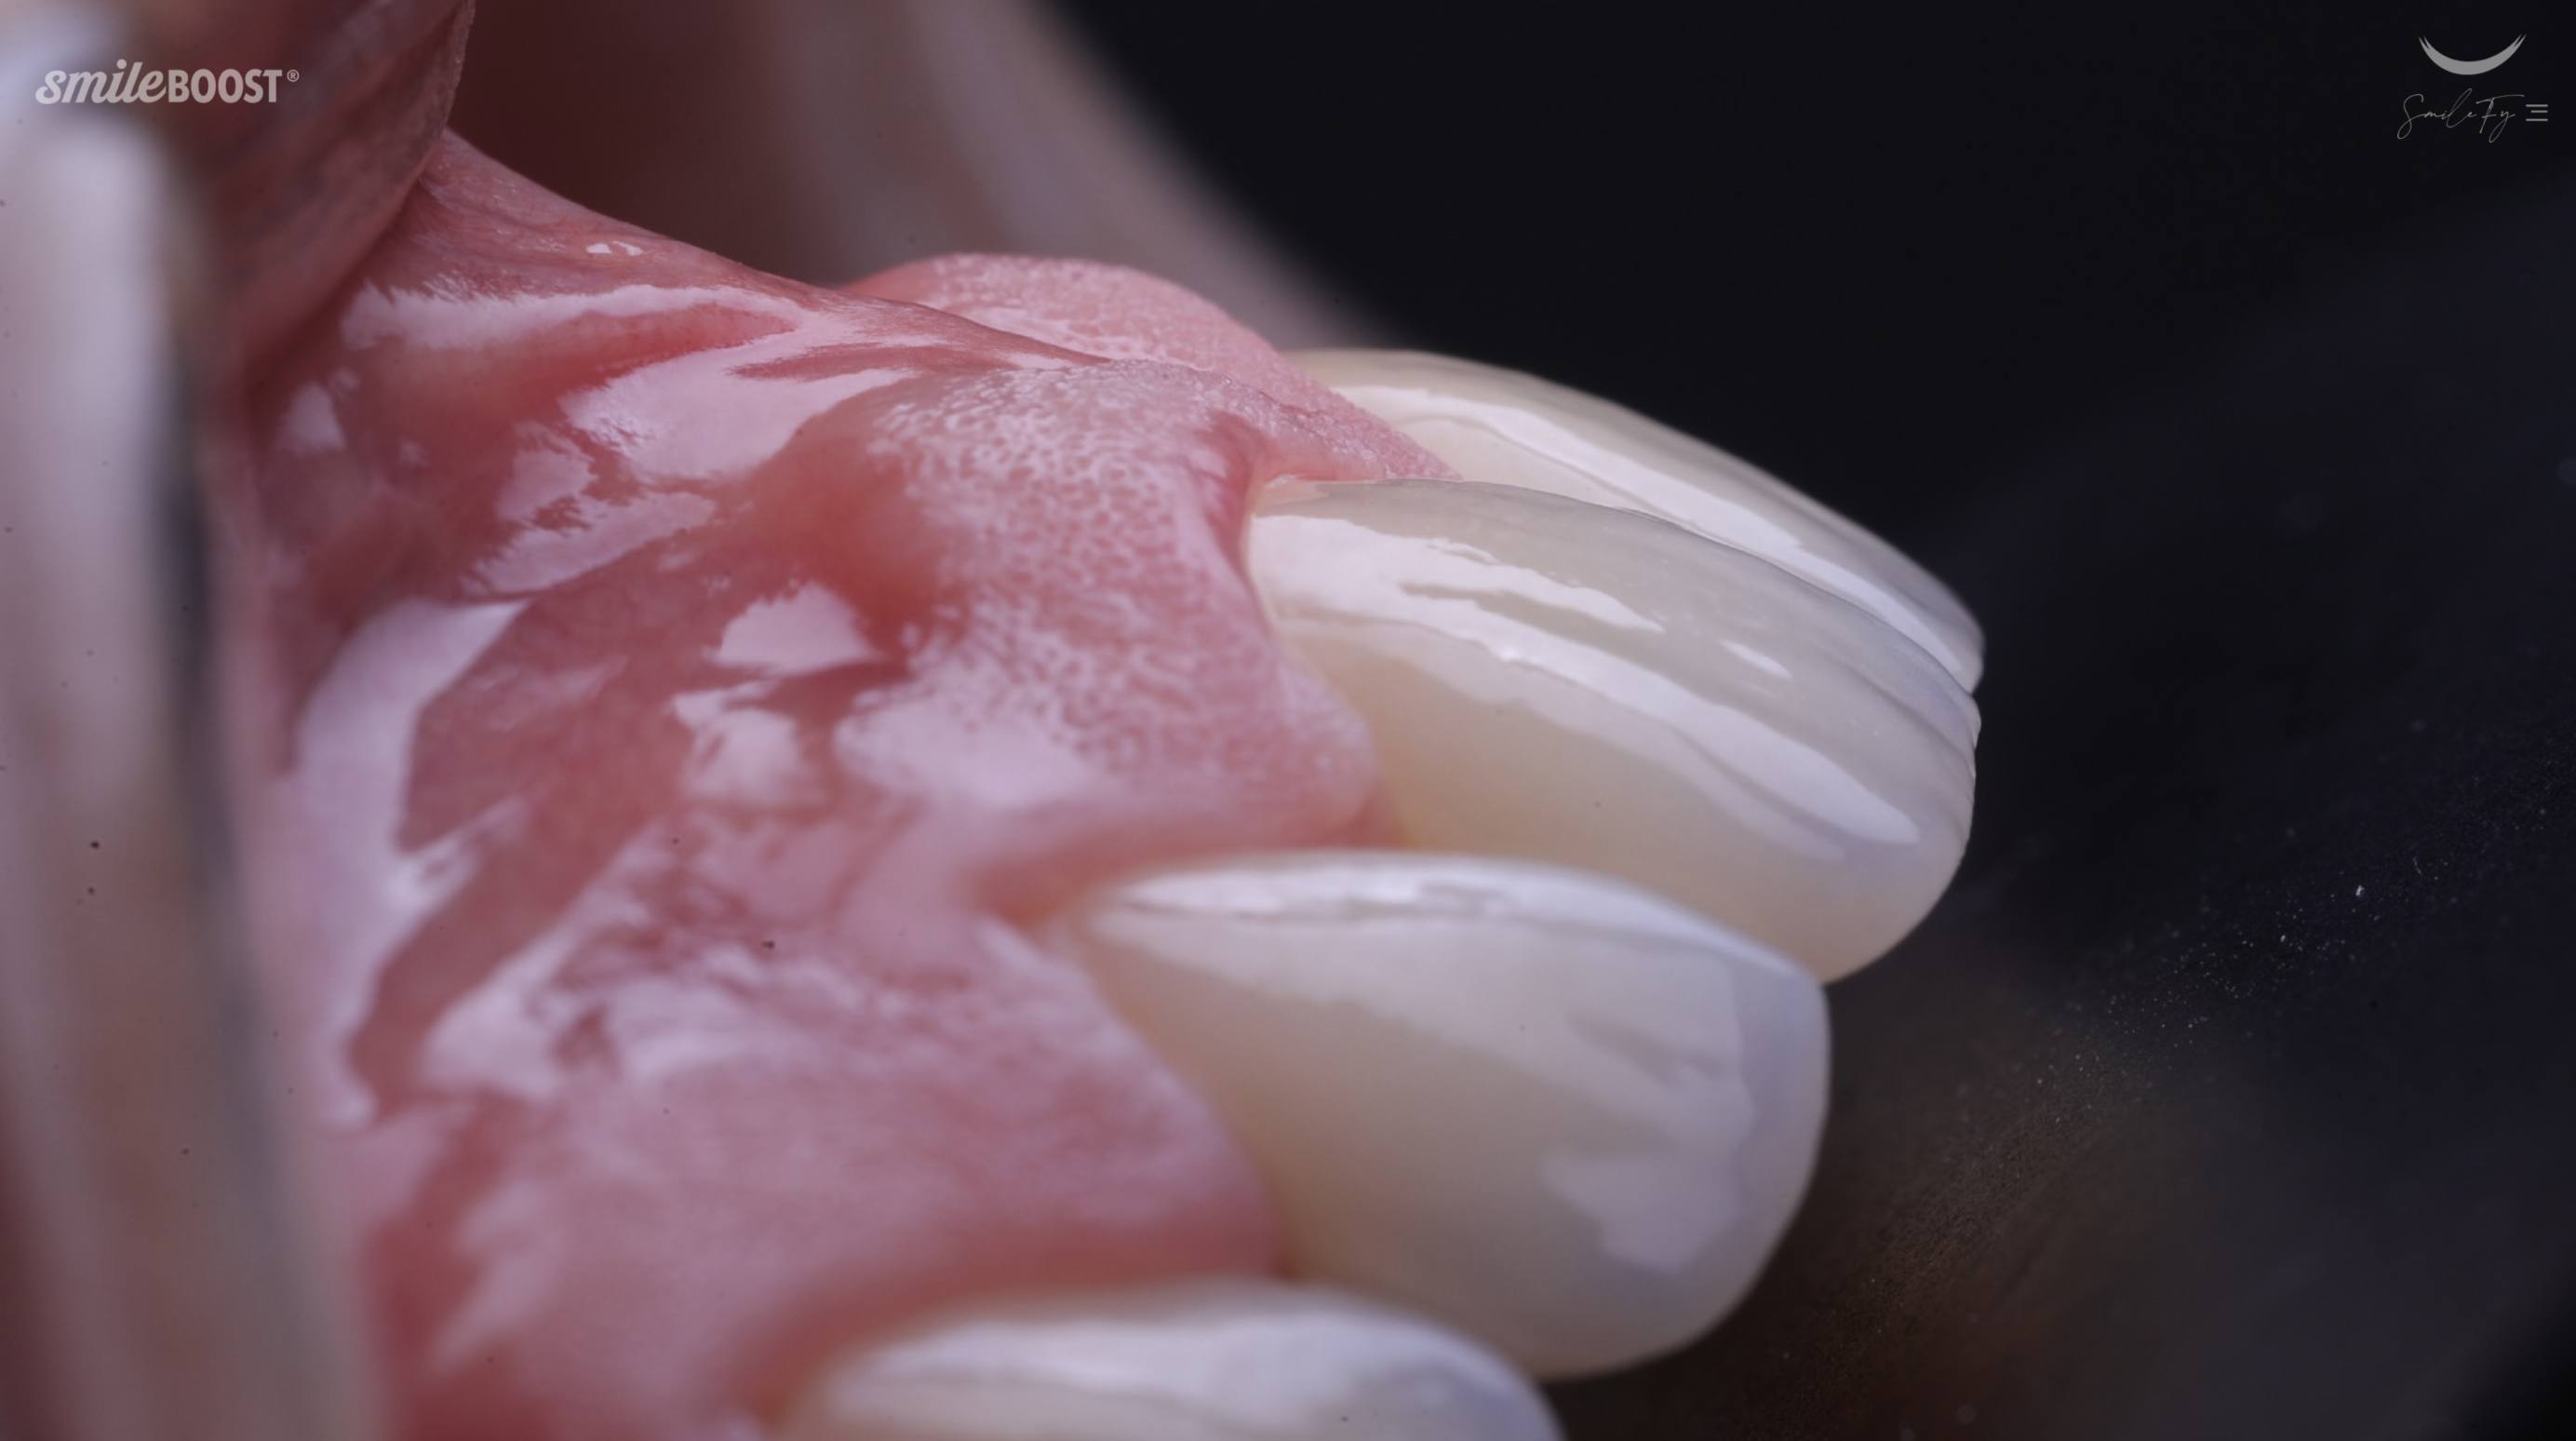
For the third appointment, the provisionals and after absolute isolation, teeth and veneers were conditioned, followed by a bonding protocol with Variolink Esthetic Neutral, Clear Fill SE Bond, and Occlusal adjustment were made to ensure quality control.

The Results
The importance of digitally planning cosmetic dental cases results not only in functional, balanced, and esthetic final restorations but also results in an experience the patient lives by involving them from the beginning to the final result.
Optimal results in esthetic dental treatments involving ceramic veneers can be obtained through detailed considerations with respect to the patient’s orofacial characteristics, Digital Smile Design planning, conservative open method teeth preparations, and gingival margins respect.
The Patients Satisfaction
The patient was immediately impressed with the significant changes, the appearance of her smile, and the smoothness of the treatment from the first visit up to the fourth visit in the quality control appointment.
This entire procedure was done during short visits to the dentist's office.
Dr. Andres Reyes and Dr. Allan Queiroz leverage dental workflow with in-house 3D dental planning to expedite the turnaround time for such cases and to share the full methodology with you. In addition, a limited-seat VIP Veneers course will teach you the entire process, from digitalizing to bonding porcelain veneers through the VIP OPEN METHOD CLINICAL PREP SEQUENCE.