Using 3D Wax-ups in Gingivectomy Cases: Clinical Analysis and 3D Aesthetic Guide
Author: Dr. Diogo Alves
3D digital wax-ups have evolved, facilitating the dentist’s journey to becoming a Smile Designer
The facially guided 3D wax-up and mockup trials should always be included as part of the treatment plan process to ensure the success of the treatment as it combines the practitioner’s clinical analysis while checking facial proportions and aesthetics.
Moreover, it respects the patient’s wishes and improves communication with those involved in the treatment.
In this multidisciplinary treatment plan, SmileFy 3D design was used to create 3D wax-ups for the different stages of the case.
In this case, we will review the gingival guide and studies in this report.
The Case
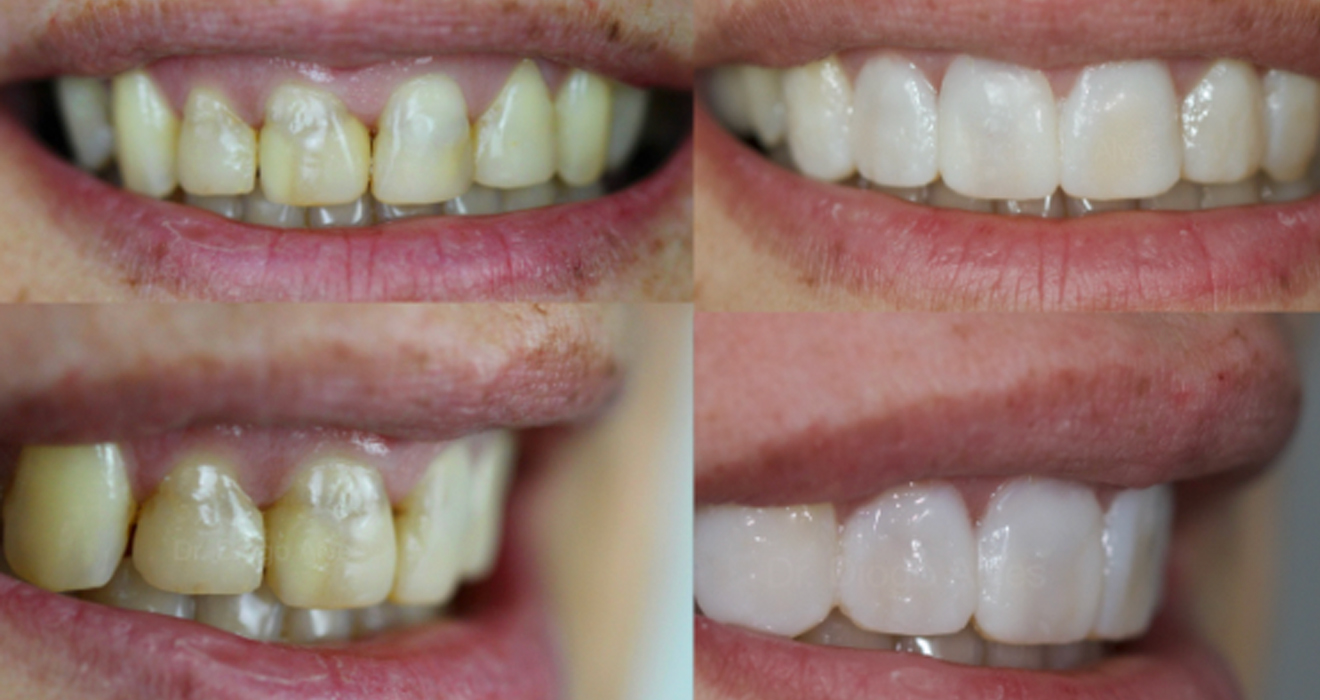
A 40-year-old female patient came in asking for aesthetic improvement in her smile.
An aesthetic analysis showed the necessity to reshape the teeth’ form, correct uneven gingival margins, and whiten the teeth by changing old composite restorations and replacing them with crowns and veneers.
The patient requested to keep some of her gingival exposure to maintain the identity of her natural smile.
After clinical examination and perio-analysis, the 3D digital wax-up was initiated.
1- Patient Digitalization
Frontal Facial Smiling Picture + upper and lower intraoral scans were added into the Smilefy app to generate a digital patient.

2 – 3D Calibration and Digital Wax-up Creation
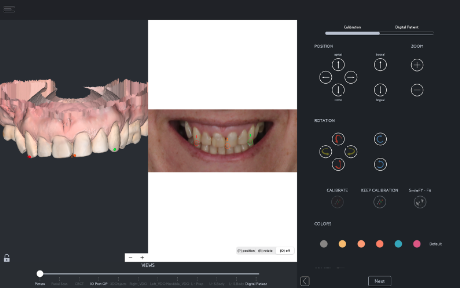
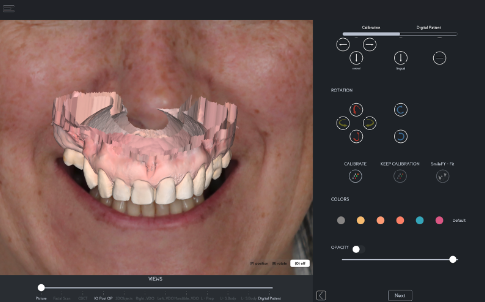
To create the digital wax-up in SmileFy 3D Smile Design, the intraoral scan and patient frontal picture must be calibrated as shown in the screens below. [Figures 2,3]
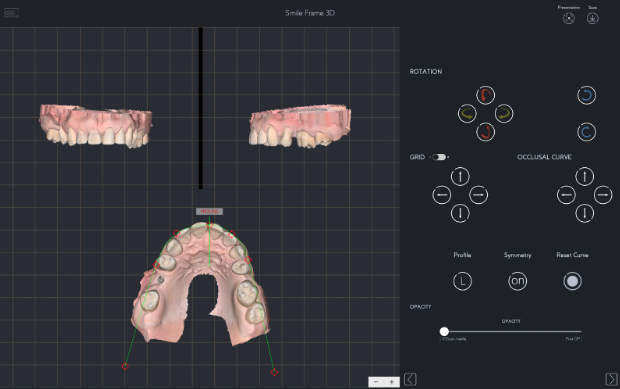
As for the gingivectomy portion of the treatment in the full rehabilitation case, the arch form was set according to the patient’s existing anterior teeth positions to guide the new position of the future 3D teeth. [Figure 4]
The 3D teeth were then selected for the 3D wax-up and automatically placed into the 3D smile frame following the proportions predefined in the previous screen [Figure 5]
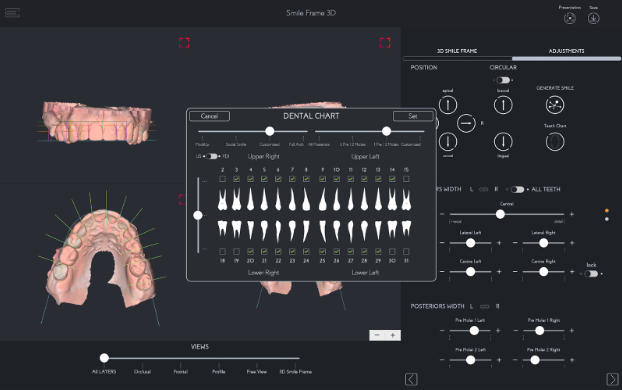
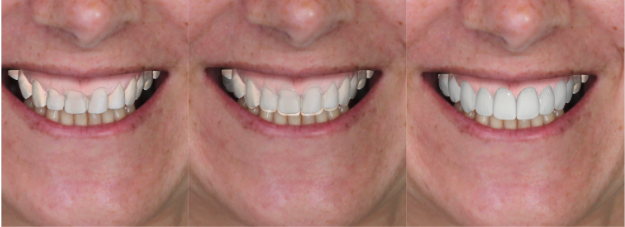
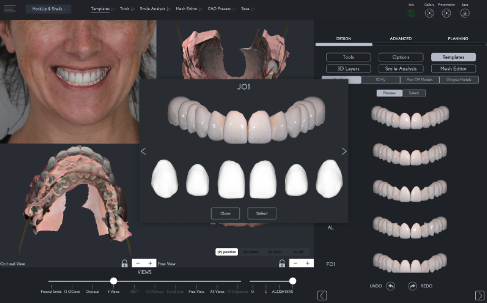
Different 3D Teeth libraries are available in the software that allows the smile designer to try on multiple wax-up versions digitally. The teeth have multiple forms and have natural tooth morphology.[Figure 6]
The dental midline was analyzed according to the facial analysis by tracing an imaginary line in the glabella, nose, philtrum, and chin with a goal to determine facial asymmetry and unique features that helps deliver a more balanced esthetic smile. [Figure 7]
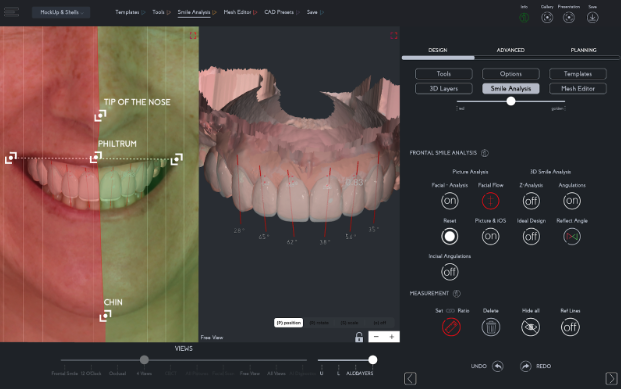
When it comes to determining the ideal smile zenith curve, it’s recommended that the central incisors are positioned 0.5 to 1.0mm lower than the canines, while the lateral incisors should be 0.5 to 1mm lower than the central incisors. To ensure proper balance and harmony, the length of the teeth in the 3D wax-up was adjusted over the gum line and measured using SmileFy software.
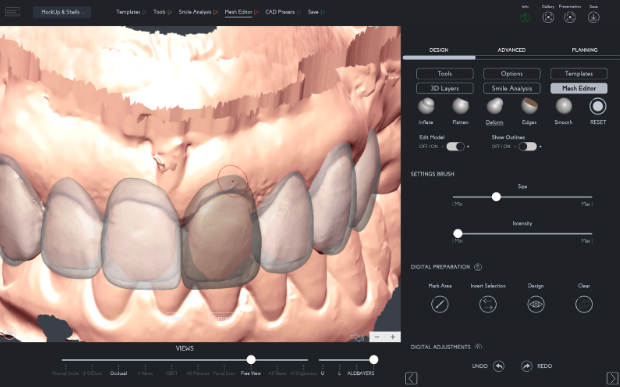
Before exporting the 3D wax-up, final adjustments were made in the mesh editor of the application to define proper teeth contour over margins, embrasures, and papilla, and to determine the thickness of the design. [Figure 8]
3 – .STL export and 3D Printing
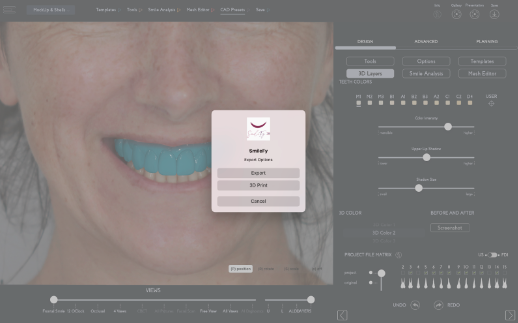
With a click of a button, the 3D digital wax-up was then exported as a print-ready file (.stl file) and 3D printed in-office.[Figure 9,10]
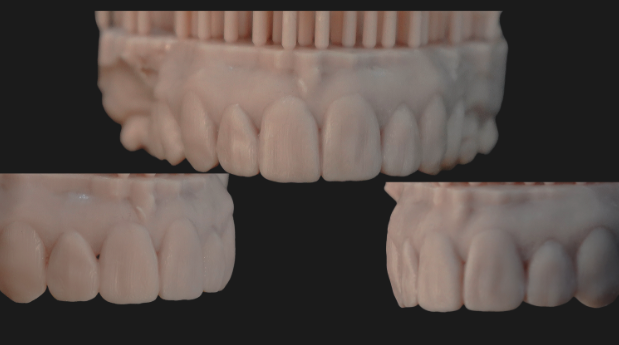
4 – Mock-up try-in and patient evaluation
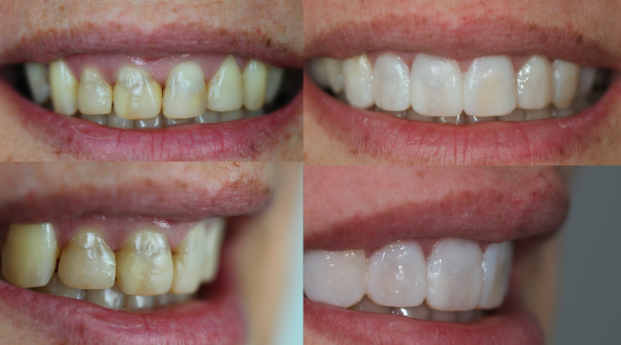

Conclusion
The 3D wax-up is an essential tool for cosmetic and restorative treatments. Here are the four primary purposes it serves:
- Helps the patient understand the expected final outcome
- Streamlines the in-office workflow, making everything faster and more efficient
- Provides a guide for esthetic and functional procedures
- Gives more significant control over the treatment plan directly into your hands
Creating 3D wax-ups that are guided by facial features offers numerous benefits beyond just aesthetic validation. It enables practitioners to develop treatment plans that are more predictable and facilitates more assertive communication with patients, significantly when gum reshaping is involved.

